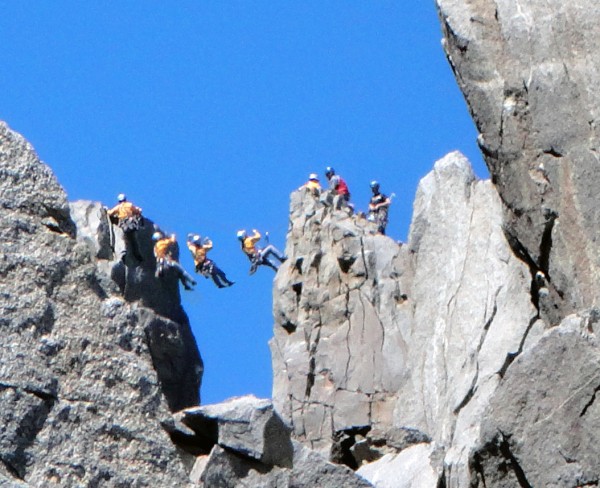
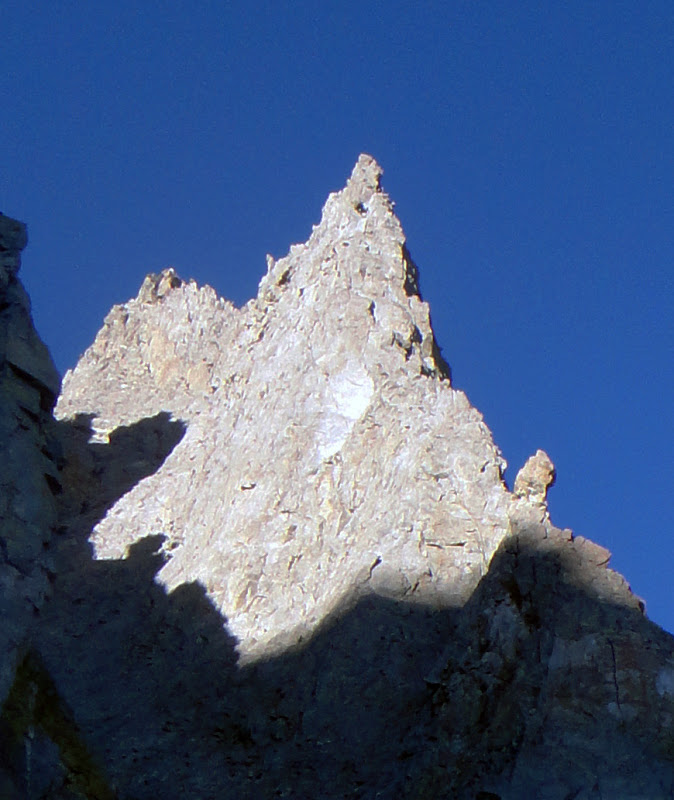
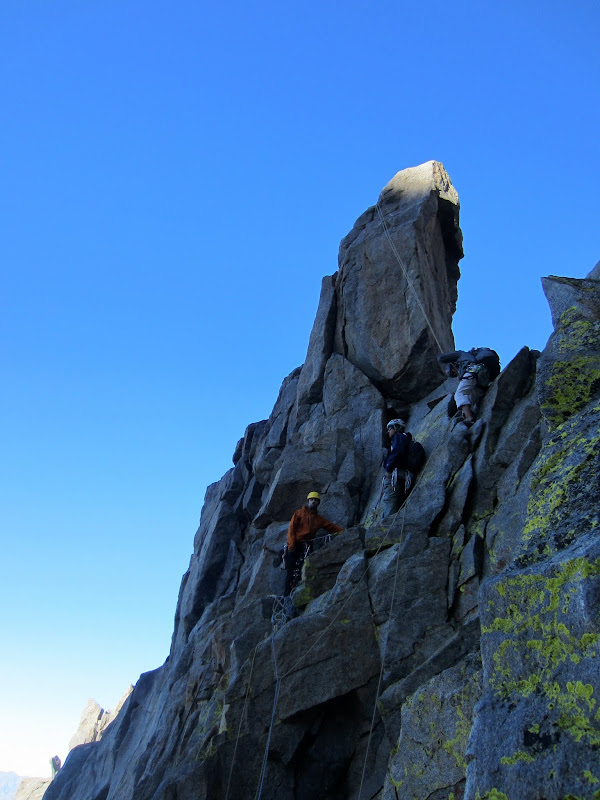
 Tyrolean on SRA seen from VBA through the notch between Ibrium Tower & First Tower on Moon Goddess Arete. Sweet! (This is a photo montage of one climber crossing the gap). Credit: PellucidWombat |
||
Jared and I hoped to take 3 days R-T to do a traverse to Gayley or Mt Sill, starting with the Sun Ribbon Arete on Temple Crag. This was to be my first real multi-day carryover of a technical climb, and I chose to do this as a prep-climb for my ambitious Teton plans with Steph Abegg, slated for September.
A lot of things slowed us up on day 1 (packs too heavy, not first on the route, group cluster at and beyond the Tyrolean, etc) so we had to bivy at the notch beneath pitch 9 with the team of 3 that was pretty much climbing in parallel with us. This delay cost us the traverse due to not having enough water to reach the next snowfield, plus we were just too tired as this was more of a butt-kicker than expected, but it was still a great experience climbing one of the longer, more classic routes in the Sierra with heavy packs!
Visit on googleusercontent.com
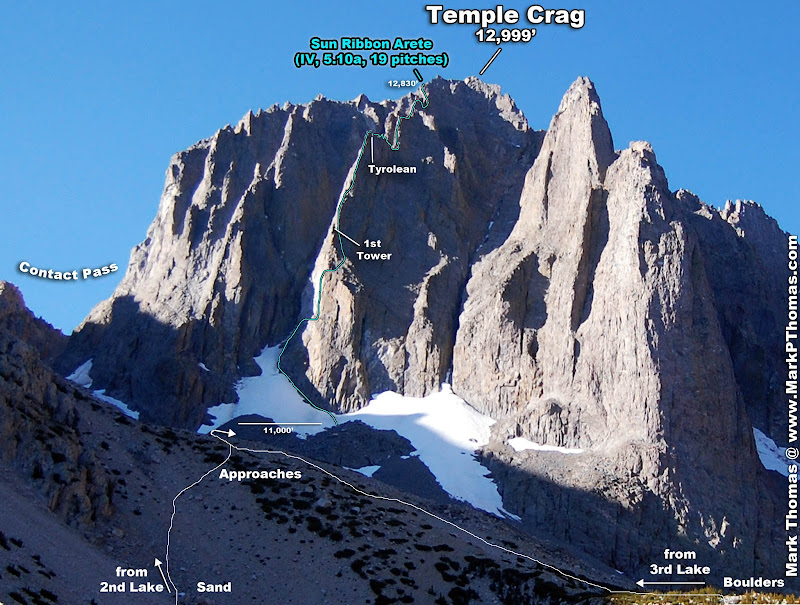
Sun Ribbon Arete - Temple Crag from 2nd Lake (September 5, 2011)
Apart from the cl. 3-4 pitch 2, I led all pitches, and I climbed with about a 35-40 lb pack (depending on the day) and 12 lb rack (from carrying doubles to #3). This was a good learning experience as first, neither of us fully appreciated how much harder and exhausting it would be to climb with heavy packs on (Jared had intended to swing many 5.7 leads, but changed his mind after following P1), and second, weight added up faster than expected. A post-climb analysis of what we brought and used, and a weight breakdown, made it easier to keep packs lighter on future carry-overs, and it was enlightening to see where it really mattered to trim weight (food) and where you were just stuck if you didn't move fast enough or place caches (e.g. water). Another important detail we overlooked was that the rack weighs a lot, so it really matters that the leader carries a lighter pack if both climbers are to climb with the same weight. We had our packs the same weight, assuming that was more convenient with swinging leads to avoid constantly switching packs, but as we ended up not swinging leads, that left a double-whammy on me leading!
A summary of my less-than ideal pack weights on this trip are as follows:
Pack on Approach - 61.2 lbs
Day 1 - 40.4 lbs, 52 lbs w/ rack
Day 2 - 34.4 lbs, 46.4 lbs w/ rack
July 28, 2012
Jared and I raced up to the start of the route the night before, bivying in the sandy bivy sites beneath the permanent snowfields. This allowed us to rest our legs before the grueling climb, enjoy some nice alpenglow on the peaks, and hopefully start ahead of the crowds more easily. We got 2 out of 3.

Visit on googleusercontent.com
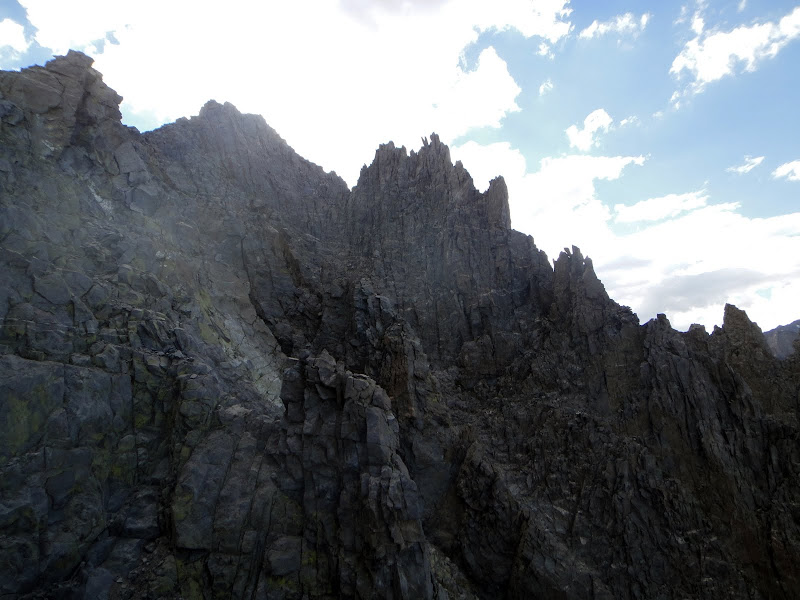
The Celestial Aretes and Dark Star under alpenglow.
Unfortunately, we had gotten a bit relaxed with our position right beneath the route, and erred on sleeping a little more and having a more complete breakfast before starting. As we were half packing, half eating, we heard voices. Crap! Some climbers were already ascending behind the permanent snowfield to access the route. Oh well, I guess we might as well take our time to let them get ahead!

Visit on googleusercontent.com
Climbers bypassing the snowfield in the moat and loose cl. 4 scrambling.
This was a bad decision, as two more parties came up behind them by the time we decided to leave camp to properly take our place in line at the base of the route. The party immediately ahead of was a party of 3. It was 10am by the time I began the first lead of the day. So much for an early start.

Visit on googleusercontent.com
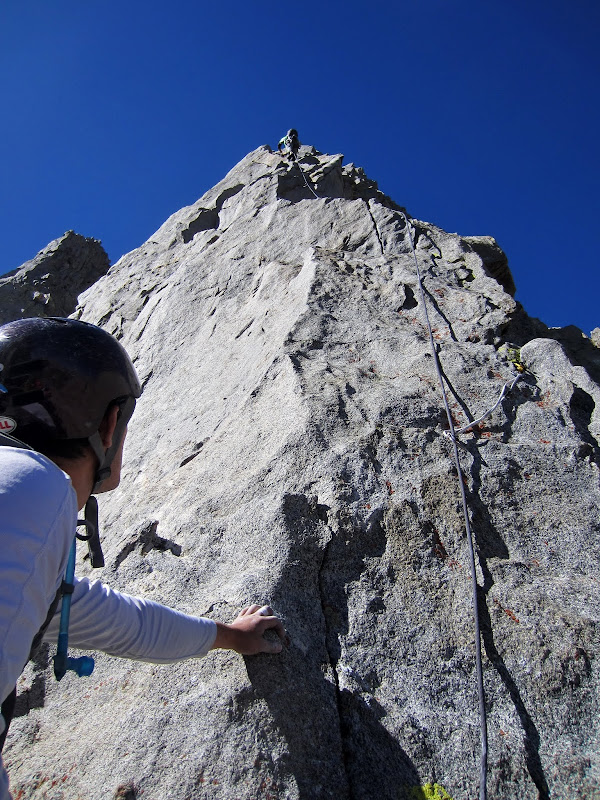
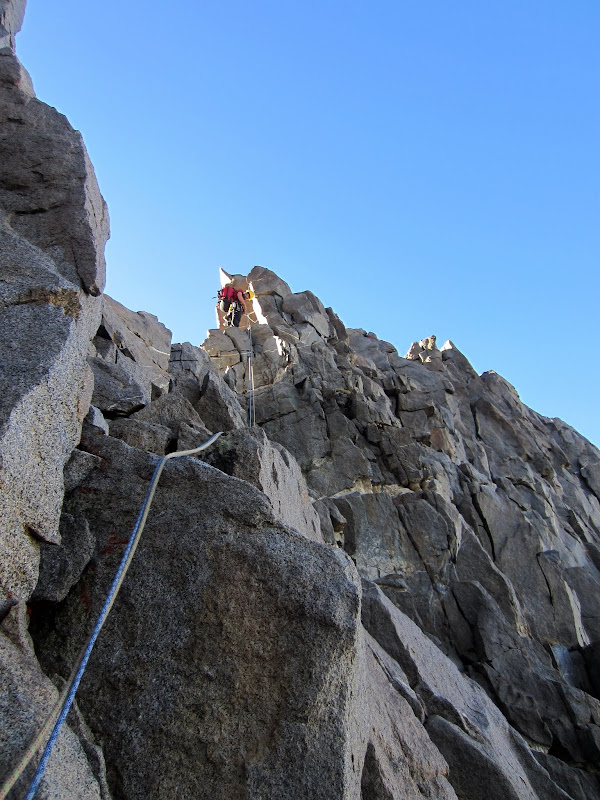
Leading P1 (by Jared Wood).
I was surprised how difficult the first 5.7 pitch was with a pack on, but I soon found my groove, albeit at a slower climbing pace with more broken up, deliberate moves, and more rests.
Visit on googleusercontent.com
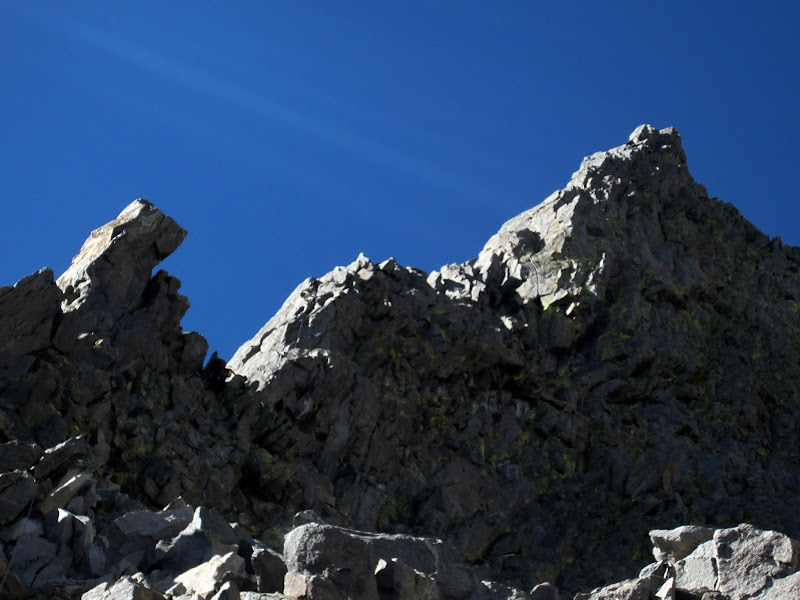
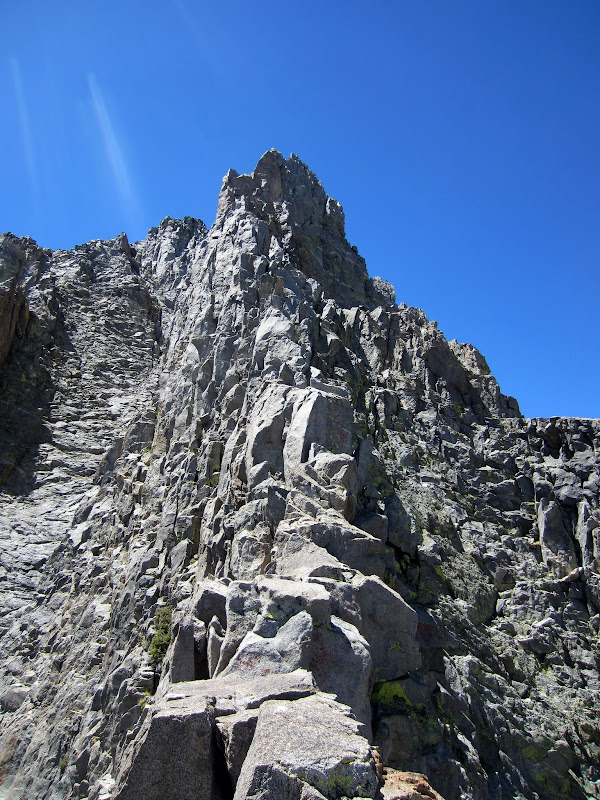
Sun Ribbon Arete seen from Moon Godess Arete. First tower is the lower one on the right. (September 3, 2011)

Visit on googleusercontent.com
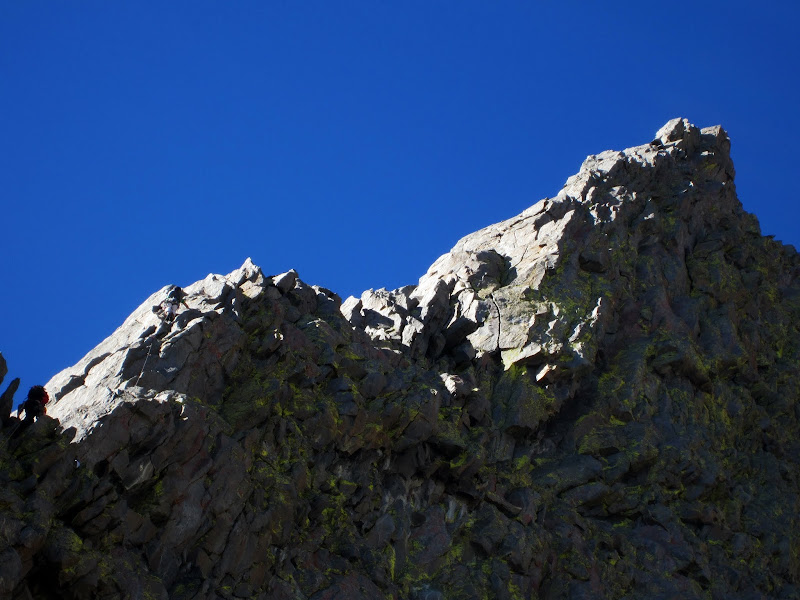
Sun Ribbon Arete seen from Moon Goddess Arete. First tower is located beneath the higher knob on Dark Star behind. (September 3, 2011)
I enjoyed my rest atop P1 as Jared came up, and Jared took off to lead the next couple of cl. 3-4 pitches as a simul-climb to the notch behind the First Tower.
Visit on googleusercontent.com
Jared nearing the end of the the cl. 3-4 pitch 2.
After following P1 and leading P2, Jared decided he would prefer to follow rather than swing leads. That was all right, although I underestimated how much more that would wear me out on this climb. All good for training, though :-)
Visit on googleusercontent.com
Pitches 3 to 6. The leader of the 3-person team is partway through pitch 3.
Suprisingly, despite our heavy packs, Jared and I caught up to the team of 3 climbers. As we were climbing with 70m doubles and could link longer pitches, the team ahead generously allowed us to pass once their leader started belaying their second.
Visit on googleusercontent.com
Waiting for the team of 3 to finish pitch 3. At the notch by the first gendarme.

Visit on googleusercontent.com
Leader of 3 climbers in the team ahead of us on the fun straight in cracks of P5.
One thing that surprised me was how much pro on this route goes behind thin or hollow sounding flakes. The climbing never got too hard, and there weren't too many loose blocks to avoid trundling, but this constant insecurity in pro left me wary for the entire route. I felt like in those ways, this climb was consistently looser throughout than Venusian Blind Arete.

Visit on googleusercontent.com
P5 passing the party of 3 (by Jared Wood).

Visit on googleusercontent.com
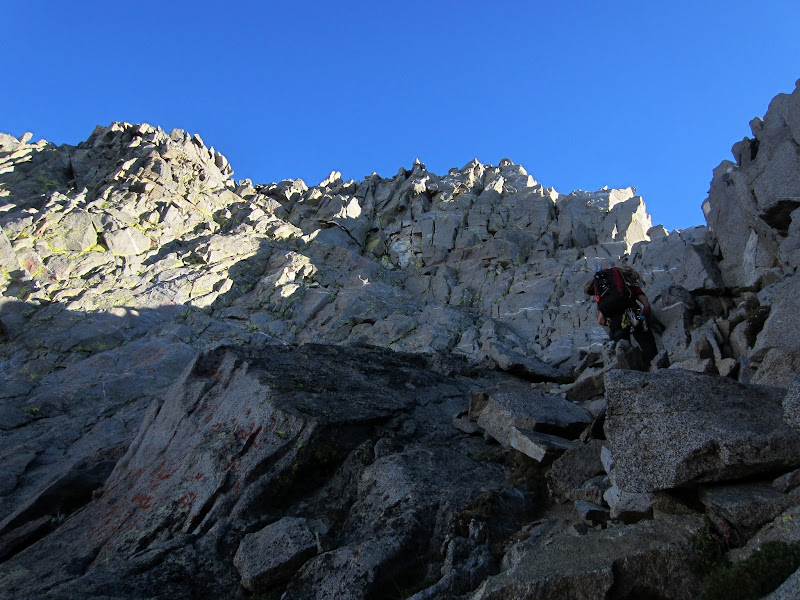
Final 5.7-5.8 corner of pitch 6.
I passed the party ahead smoothly, but then suffered an emergency wag-bag break on lead that cost us our time gain. By 2:40 pm we were atop P6 at the Tyrolean. We expected to pick up speed after this section, but despite the easier ratings in the topo, this was only the beginning of a long, slow section of the route.
Visit on googleusercontent.com
Sun Ribbon Arete with the Tyrolean notch on the right. Seen from the traverse around Ibrium Tower. (From Moon Goddess Arete, September 3, 2011)

Visit on googleusercontent.com
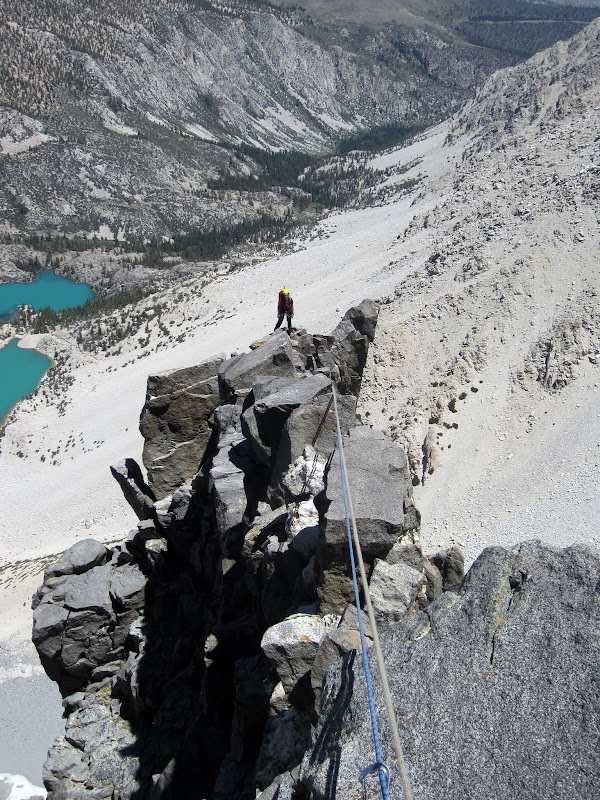
The Tyrolean.
I had hoped to do this climb a years earlier, following a more experienced friend as the final climb of the weekend that I climbed MGA and VBA, with the idea that the Tyrolean on this climb would be a good warm-up for a bigger Tyrolean on Lost Arrow Spire (LAS) that I had planned later that Fall. Unfortunately, the SRA plan fell through. Since doing LAS, reaching this Tyrolean was a bit anti-climactic, but in the alpine setting, and lassoing it as a means of moving forward, it was still really cool!
Unfortunately, I suck at throwing, and this exercise of rope trickery brought back bad memories of my two times throwing a rope over the Thunderbolt summit block. Fortunately Jared is a better thrower than me, so after I gave up, he quickly got the deed done.

Visit on googleusercontent.com
The horn is successfully slung! This toss looks good. I think between me and Jared this was attempt 12.
I wondered what this lasso would be like. The horn is much easier to snag than the Thunderbolt summit block, and it is very secure. The crux of the Tyrolean is the exit, but it isn't that bad if you think before you act. I went across first, then towed the packs, then Jared followed to clean.
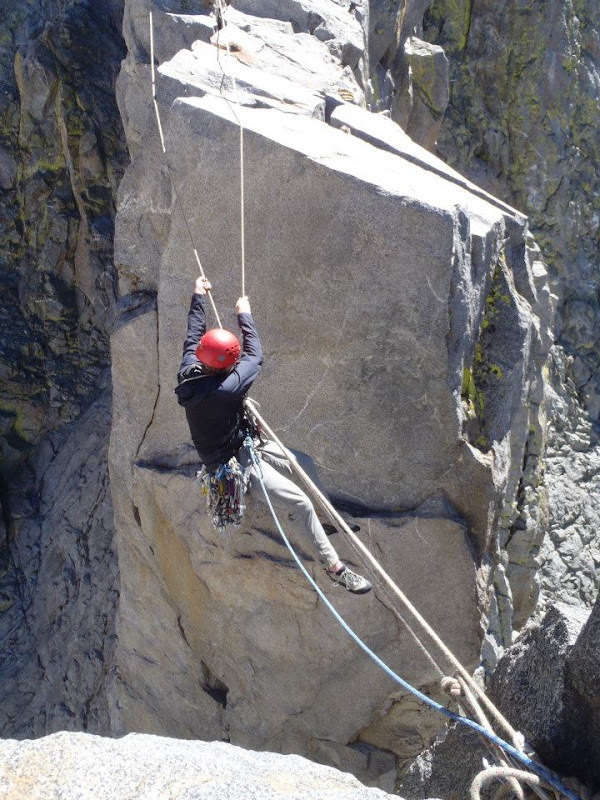
Visit on googleusercontent.com
Doing the Tyrolean (by Jared Wood).
Visit on googleusercontent.com
Jared on the Tyrolean.
[Click to View Linked Image]
The Tyrolean on Sun Ribbon Arete, seen through the Notch on Moon Goddess Arete. (From Venusian Blind Arete, September 4, 2011)
By the time Jared crossed, the team of 3 had caught up to us and asked if they could zip across on our line to save time. As they were nice enough to let us pass lower down, we decided to be nice here. In retrospect, not only did this cost us a lot of time, but it kept our parties too close together to avoid the cluster that was to follow getting over the next two towers.
Visit on googleusercontent.com
Looking back on pitch 7.
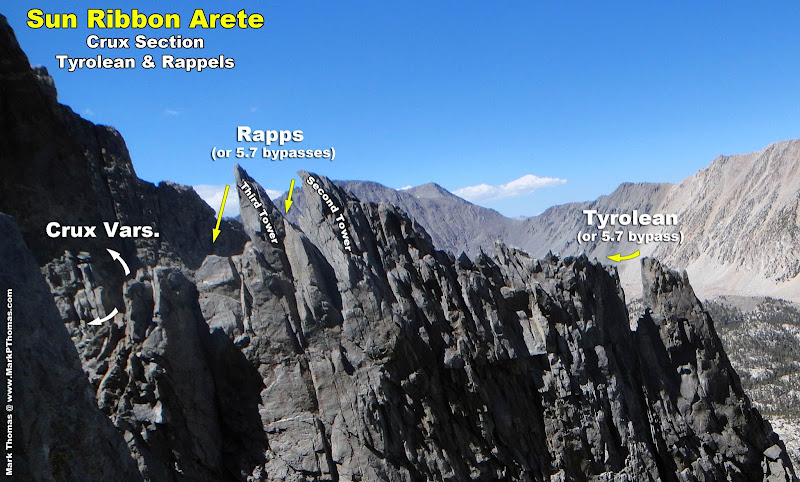
I made short work of the cl. 4 ridgeline up to the Second Tower. In an attempt to keep our speed up, I belayed Jared in a short bit to get slack, Jared fixed himself, and I rappelled the first tower before resuming the simul-climb. Both the SuperTopo and Bindner topos that we brought indicated that the next tower was to be bypassed by 5.7 climbing, and that the slings atop it should be ignored. My beta even indicated that it was 5.6R to reach them.

Visit on googleusercontent.com
Second rappel. SuperTopo says to ignore these slings, but I think they are actually a good way to go.
It turns out that while you shouldn't place pro due to drag, it is easy to climb to them (you can even place pro to protect thin moves, then back clean). The rappel anchor is good and drops you right into the notch, which was much more convenient than the 5.7 climbing, which was very difficult to pick out.

Visit on googleusercontent.com
Right variation of pitch 9. 5.10a face protected by pitons leading to a loose 5.9 crack.
Unfortunately, we ended up in a cluster of 5 climbers doing both the right-side 5.7 bypass and the direct rappel!
Visit on googleusercontent.com
Looking back at the cluster by the double gendarme rappels. At this point we were practically a team of 5. Not the best for moving fast!
It was getting late in the day and we still had a lot of ridge left. We were now at the base of the crux pitch, at a large, comfy notch. It turns out that the other party of 3 had brought enough gear for a comfy bivy as well, so we all decided "screw it! Let's just have dinner and sleep here!".
July 29 2012
We had a nice dinner and comfortable sleep in the notch. This was my first test of my quilt bag, and I was so warm I never even closed it all the way up. Very comfy mountain camping! I could enjoy more of this :-)

Visit on googleusercontent.com
Upper section of Sun Ribbon Arete seen from the traverse around Ibrium Tower on Moon Goddess Arete. The right notch is where one must set up a Tyrolean! (From Moon Goddess Arete, September 3, 2011)
From the big notch, one can choose to climb a 5.10a face variation on the right of the crest (illustrated well in SuperTopo, not shown in Bindner's topo), climb the 5.9 crack and 5.10a face variation on the left (shown completely wrong in SuperTopo, but accurately in Bindner), or bypass the ridge entirely and continue up a series of 5.7 ramps parallel to the ridge until you can reach the next notch (or enter the gully to finish).
Visit on googleusercontent.com
Looking at the double gendarmes at the start of the Left Variation to pitch 9.

Visit on googleusercontent.com
Pitch 9 Left Variation and the 5.7 bypass.
The team of 3 really needed to get back to LA that night, so they started up first. Jared and I expected to be slower, as the leader in the team of 3 got to lead with a bullet pack. As my pack was heavy, I planned to lead without it. I would haul my pack and Jared's at the same time to make the climbing easier for him. This was my first time experimenting with a hauling system for alpine climbing (using only Klemheists and a BD Guide in Guide Mode), and things worked out great. I hauled the packs on one line while belaying Jared on the other. Jared followed closely enough to unclip the bag rope from pro and tend the bags, and it turned out that I could haul the bags a bit faster than he could climb. We really didn't lose that much time doing this system as we caught up to the team of 3 in a few more pitches anyways. The only real problem that we had hauling was that I burned through the skin on the underside of my fingers, which made climbing somewhat less pleasant for the rest of the day. If you plan to do alpine hauling, especially with thin ropes like the doubles we used, I would recommend wearing gloves!

Visit on googleusercontent.com
Phil leading the 5.10a Left Variation of pitch 9.

Visit on googleusercontent.com
Alex following the Pitch 9 Left Variation, after the 5.9 crack and beginning the 5.10a face traverse.
The 5.10a face traverse was very tough and heady for me, since I suck at face climbing. Unfortunately I had to hang midway through rather than risking a real fall onto very small gear. After the crux I tried climbing straight up a 5.6ish groove towards where Phil is in the above photo, but it was a rounded out groove without pro. I was pumped enough from the 5.10a section that I started losing my grip, so I quickly downclimbed back to a rest near pro. While less direct, it turns out that it is much better to traverse right all the way to the ridge crest and scramble up cl. 4 blocks on the backside. It is easy to avoid placing gear here and you can then flip the rope to trail in line above the crux (better for hauling) and you can flip the rope back over for the follower after they pass the crux.
Visit on googleusercontent.com
Christian following the 5.9 hand crack on the Pitch 9 Left Variation. This crack was steep and sustained jamming. Very sweet jamming!
Visit on googleusercontent.com
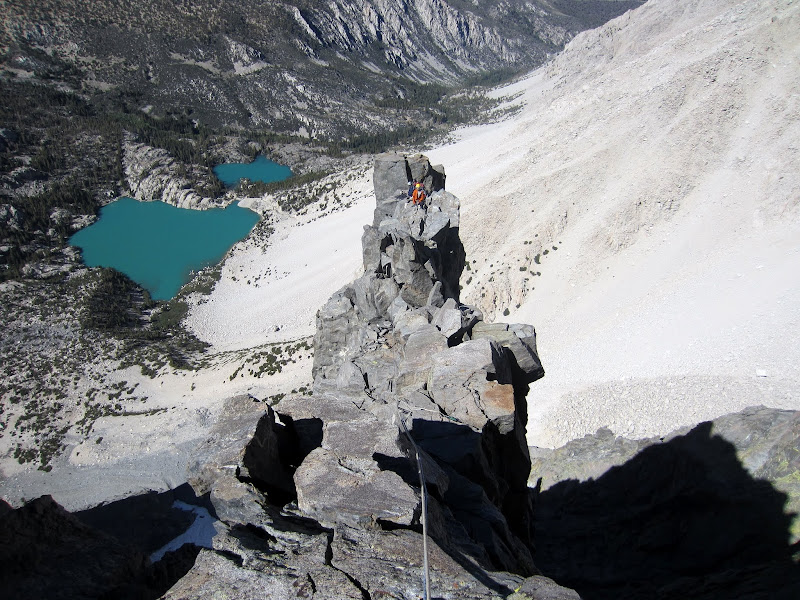
The double gendarmes and notch that we slept in.

Visit on googleusercontent.com
Gendarme with the 5.7 pitch on Moon Goddess Arete.

Visit on googleusercontent.com
Looking down pitch 10, about to link with pitch 11. Below are the Tyrolean and Rappels section.
Visit on googleusercontent.com
Looking ahead on pitch 11.
Visit on googleusercontent.com
Upper section of Sun Ribbon Arete seen from Moon Goddess Arete (September 3, 2011)
Visit on googleusercontent.com
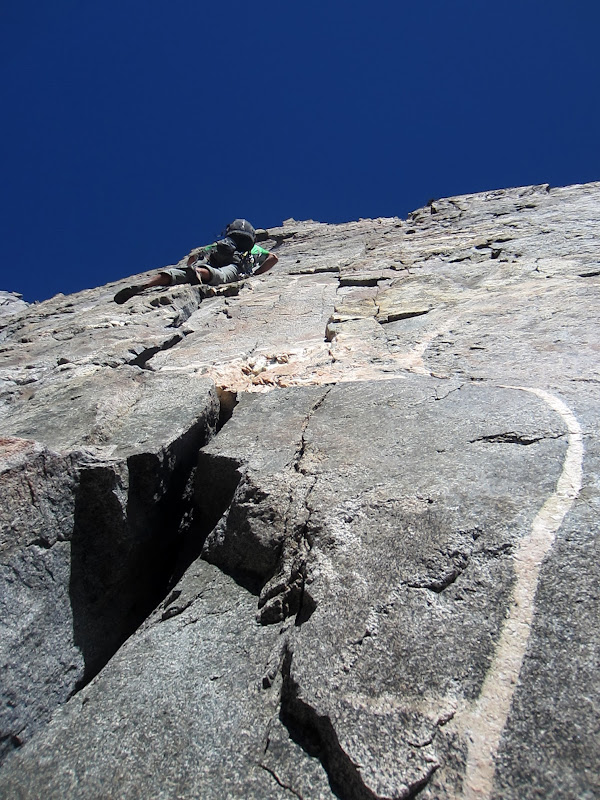
Jared following pitch 12.

Visit on googleusercontent.com
Reaching the rappel tower on pitch 13. Cross to the south side to climb this.
Visit on googleusercontent.com
Looking at the last half of pitch 15 across from the rappel.
We caught up to the team of 3 at this point. They still needed to be back in LA that night, and after 15 pitches of ridge climbing, they had lost their enthusiasm for it, so at this rappel the traversed left into the cl. 4 gully to finish quickly. This is a very easy bail to do.
Jared and I still had time and energy, so we continued along the ridge after the rappel.
Visit on googleusercontent.com
Upper two-thirds of pitch 15. Bindner rates this 5.4, SuperTopo has no rating. Compared to the other pitches, I'd say this felt like a mid-5.7 (it was at least harder than some of the 5.7s earlier).

Visit on googleusercontent.com
Pitch 15 seen from the notch. It starts with some hard, physical moves and loose rock, but gets better as you get higher.

Visit on googleusercontent.com
Looking back at the pitch 15 downclimb and traverse. Even with doubles and minimal pro, rope drag shut me down here.
After the rappel, SuperTopo indicates climbing to the right of the ridge crest and climb some sort of 5.8 crack. Bindner indicated that you could switchback up to a small notch on the ridge via 5.4 climbing. As Bindner's route was easier and more direct, we didn't see any point in following the SuperTopo way here!
Visit on googleusercontent.com
Pitch 15 5.4 to the notch.

Visit on googleusercontent.com
Pitch 16 from the notch. Traverse on the north side of the ridge, occasionally climbing back left towards the crest.
Visit on googleusercontent.com
Looking down Sun Ribbon Arete from pitch 17. The flat top at the end is the approach side of the Tyrolean.

Visit on googleusercontent.com
Pitch 17 to the next rappel. The end still looks like a ways away, and the ridge is about to get harder again.

Visit on googleusercontent.com
Traversing around to rappel into the gully on pitch 18.
[Click to View Linked Image]
Nearing the top of the next gendarme before the rappel on P18 (by Jared Wood).

Visit on googleusercontent.com
Pitch 18 and on.
At pitch 18 it was really difficult to see how we could stay on the ridge. We were getting very worn down and climbing slowly, so it seemed that it would take way to long finish the route staying true on the last few pitches. Also, a short ways ahead I saw a large block that looked disturbingly precarious, with no way to avoid climbing over it.

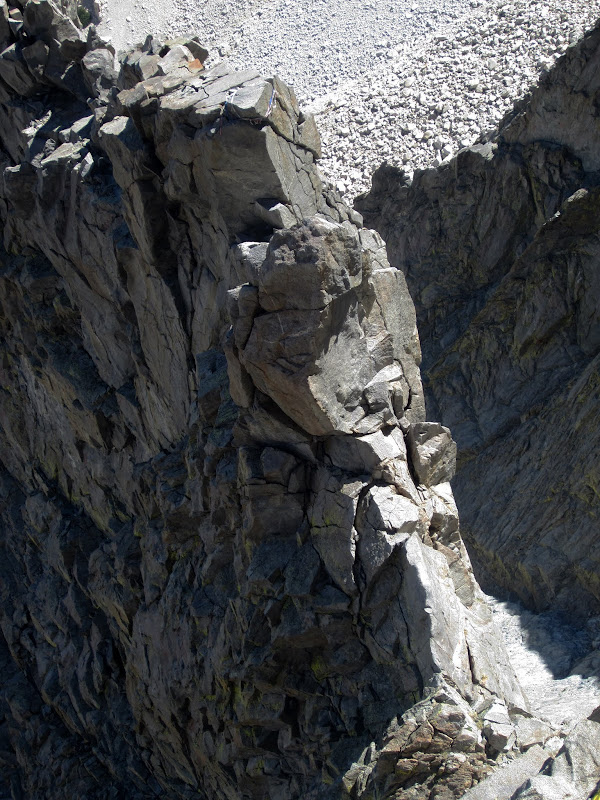
Visit on googleusercontent.com
Death block perched on death gendarme. We had had enough of the ridge by now, and the gully was very close, so we rappelled into the gully here and took the class 4 scramble finish.
The end was so close and the gully was not very far down, so we decided to call it good and rappel off.
Visit on googleusercontent.com
Rappel #2 to get into the gully. This station is better for getting into the gully. In retrospect the downclimb-traverse isn't too bad, or at least it would be better to skip the first rappel station and downclimb-traverse to this station.
Visit on googleusercontent.com
Class 4 gully scramble to the top, follows the slanting ledges.
By the time we reached the Temple Crag summit plateau, we were pretty much exhausted. We had another day left of time and provisions to climb, but it was doubtful that we would get much farther than the summit before sunset, leaving a lot of climbing the next day to reach Gayley and descend. So we decided to leave the packs at the top of the route, visit the summit, and head out that night. The Temple-Gayley traverse will have to wait for another time.

Visit on googleusercontent.com
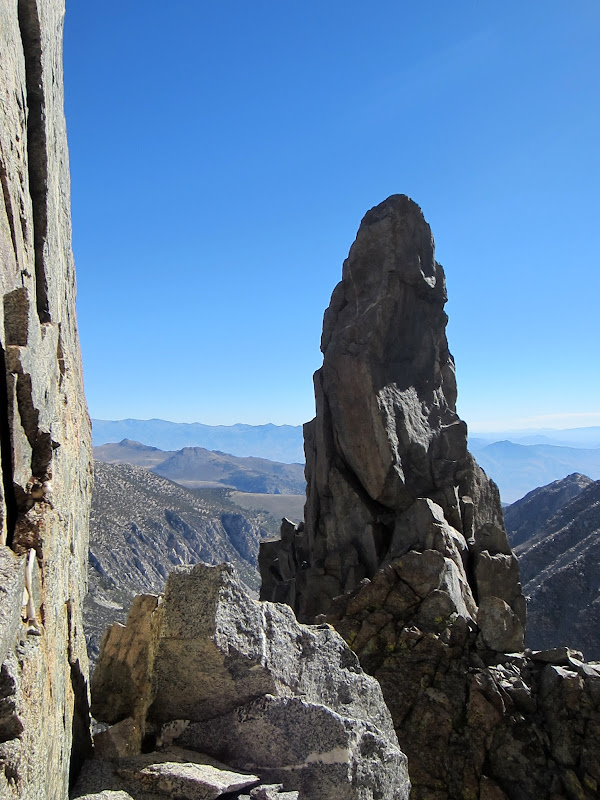
Traverse from Temple to Sill via Gayley. Next time . . .
I found the SuperTopo info to be spot on for the rack for the route, and the topo was useful for the lower section. It does not show the alternate crux accurately and missed an easier and more direct variation on the upper pitches. For these, I would recommend supplementing that info with Bruce Bindner's excellent route topo.
Personal Website
Picasa