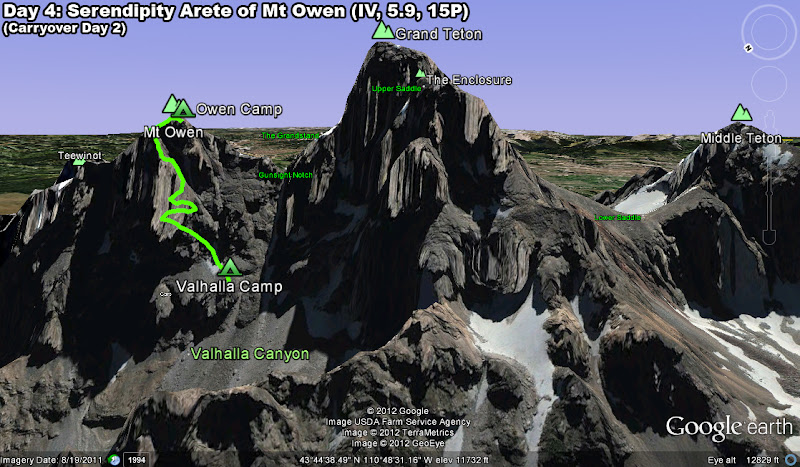
September 2, 2012
(Carryover Day 2)
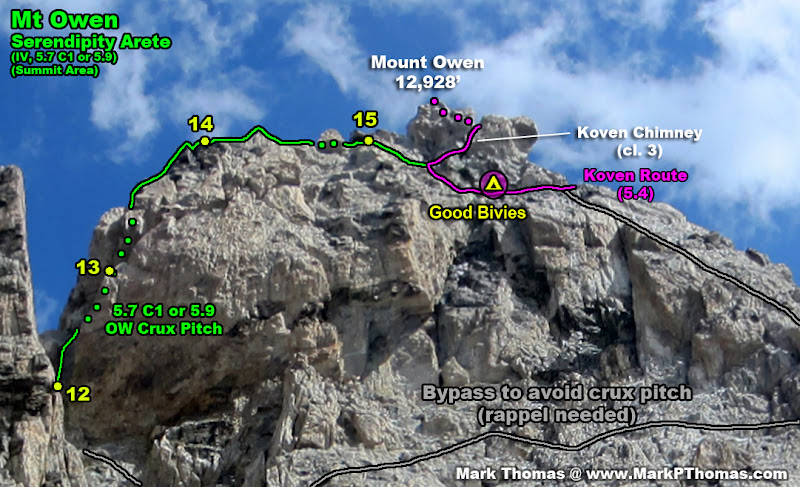
"People tend to love or hate this well-known, remote and seldom climbed route on Mt. Owen . . . This long climb demands good routefinding, speed, and endurance to complete the descent before nightfall."
 Gams, Teton Rock Climbs
Visit on googleusercontent.com
Day 4 Climbing
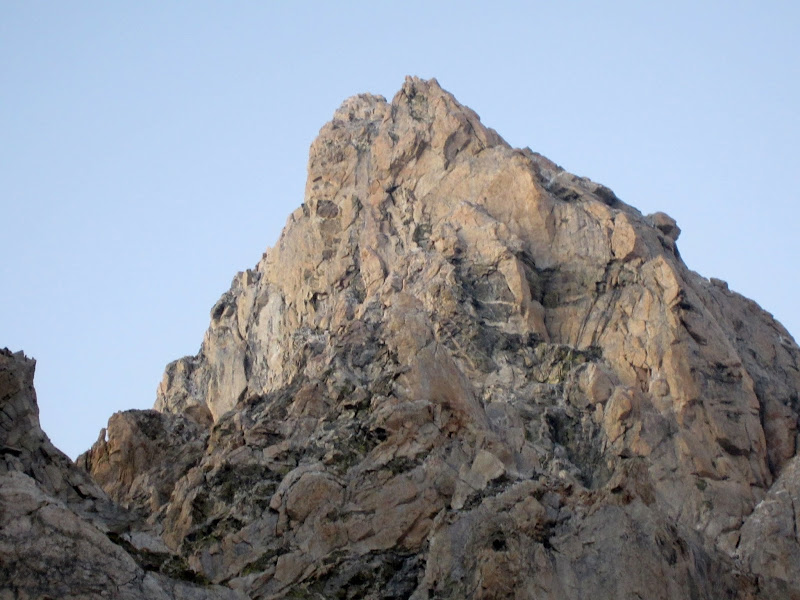
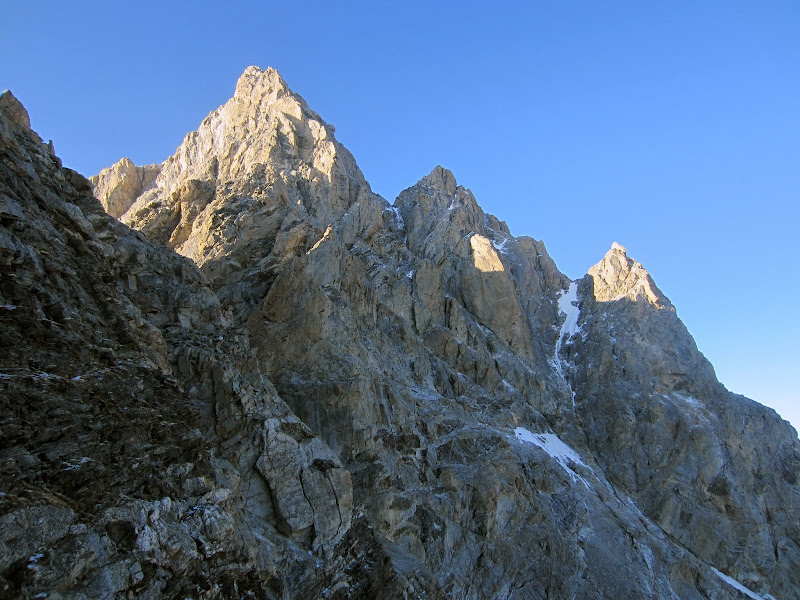
Our aim for this day was to climb the long classic Serendipity Arete on Mt Owen as a very indirect means of reaching the Grandstand Camp, from which we planned to attempt our priority climb of the North Ridge of the Grand Teton.
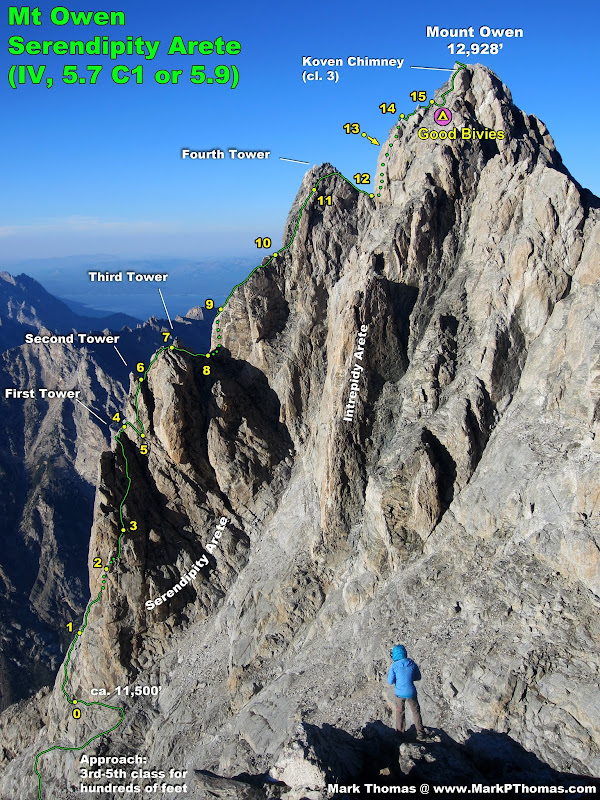
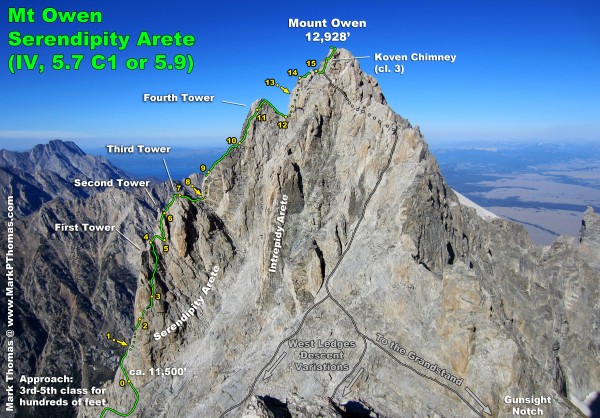 Serendipity Arete and various descent Options seen from the Grandstand Credit: PellucidWombat |
||
Visit on ggpht.com
Serendipity Arete seen from the Grandstand
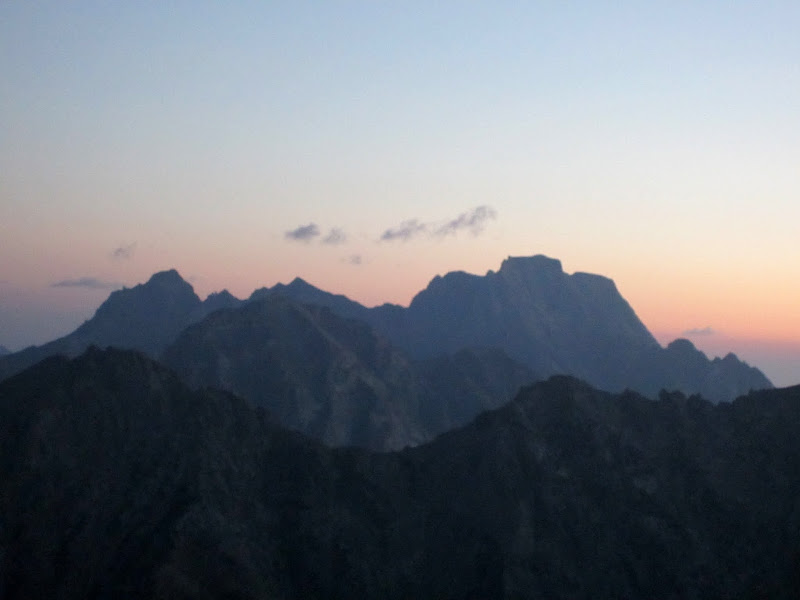
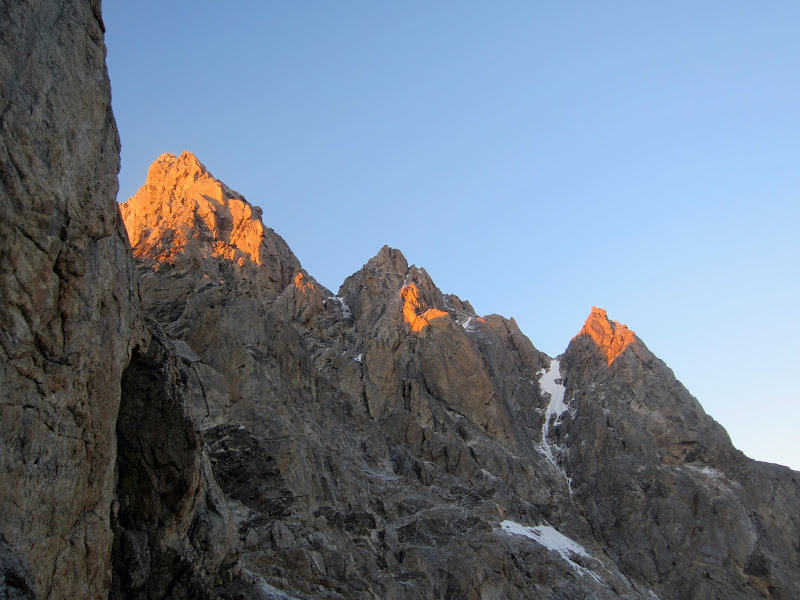
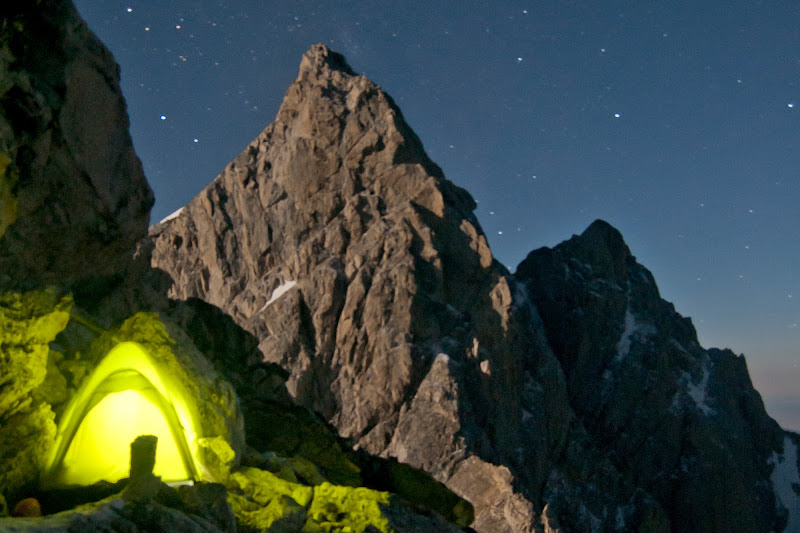
I woke at 4 am to get in some night photography as Steph and I ate and packed up camp (photos are at the end of the prior trip report). At 6:30 the sun began to rise, giving us enough illumination to begin our climb.

Visit on ggpht.com
Sunrise over Cascade Canyon. Mt. Moran is on the horizon.
Visit on ggpht.com
Mt. Moran at sunrise.
Visit on ggpht.com
North Ridge of the Grand Teton seen from Valhalla Camp.
In my research of the route, I learned that the approach to Serendipity Arete is long and rather serious, with difficult routefinding and hundreds of feet of class 3-4 scrambling that could easily turn to 5th class. Fortunately one of the key pieces of beta that I gleaned was that one should aim for starting the belayed pitches about one pitch below the gigantic corner and roof on the first tower. It was good we had this as a reference, as the annotated aerial photo in the Ortenburger & Jackson guide showed a completely incorrect line!

Visit on googleusercontent.com
The approach started out well enough. It seemed that all of the hail that had fallen the day and night before had melted . . . we hoped. The rock and grass was still a tad wet, but it seemed like we would have reasonable conditions. We headed partway up the next gully to the north of our camp, taking a line we had scouted the day before, and traversed out north onto ledges early on.
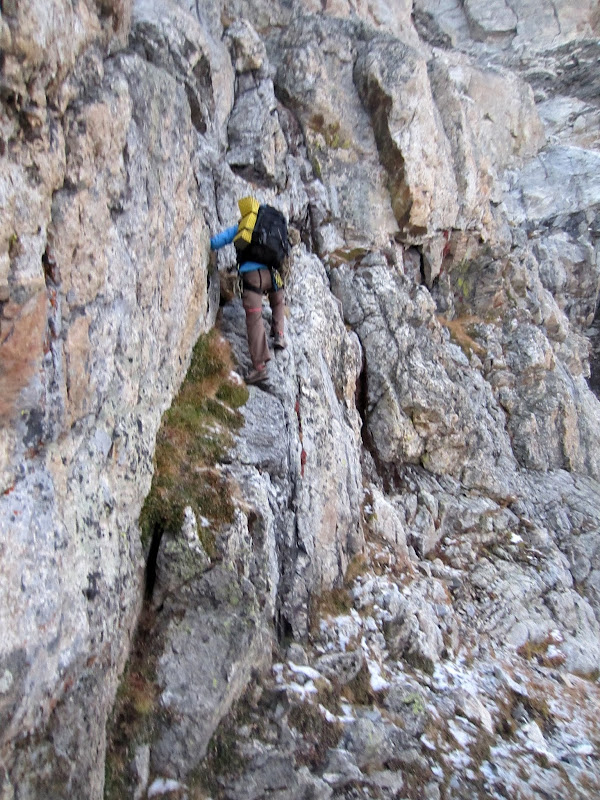
Visit on ggpht.com
Steph starting up the approach.
These ledges worked out well enough, but when the first main ledge pinched off into a class 3-4 chimney, I took off on the corner to the right. Based on what we had seen from camp the day before, and looking at the line drawn in the guidebook photo, we figured we stayed mostly to the right of the large corner until we came up to the first roped pitch. This idea dominated our routefinding strategy for the morning and led to us being off route for most of the time approaching the route.
Visit on ggpht.com
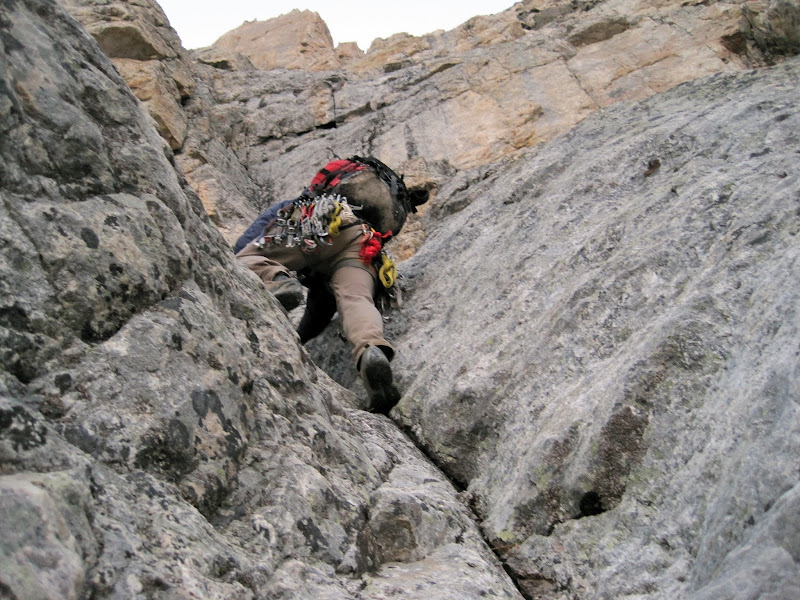
Climbing off route up a slightly wet 5th class groove. (by Steph Abegg)
The groove I started up looked fine enough, but then the crack turned into a seam, the rock above became more moist and less featured, and Jedi mind powers came into play to maintain adhesion of my approach shoe rubber to the slab. Steph wasn't feeling her wet slab soloing mojo this morning, so I dropped a coil of rope to belay her up past the crux. Was this really the way we should be going?
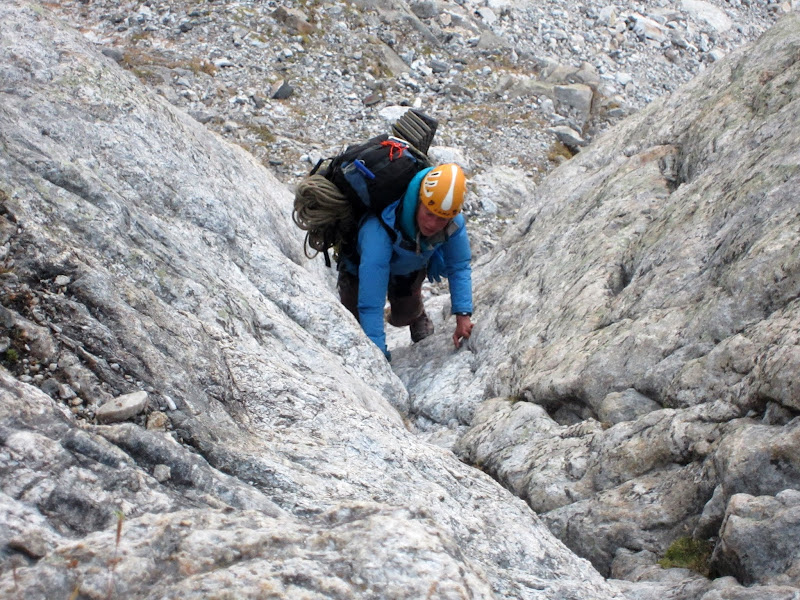
Visit on ggpht.com
Steph climbing off route up a slightly wet 5th class groove. Fortunately we got back on better terrain above . . . and then got off route on 5th class again :-P
The easiest line above the corner was to continue traversing north, so we did so, finding a nice class 2 ledge, and saw that apparently the lower ledge opened up after the class 4 chimney and nicely merged with our ledge. Doh! We continued traversing far left, looking for the first reasonable line to cut up towards the next set of ledges. Eventually we found a break and I investigated. Then I roped up to simul climbg (clue), then decided I needed a full on belay (another clue). I climbed through terrain that felt more like 5.6-5.7 to me (yet more clues) until I was stymied by a corner that seemed to burly and insecure to climb with a pack (even more clues). Still, we had the idea in our minds that we needed to be switching back before heading too far north. Steph offered her suggestions on an alternate route, that upon inspection, turned out to be even worse. After 20 minutes or so of wasted time, I came down and we tried the idea of just following the ledge north until a definitively non-5th class way to reach the next ledge above us presented itself.
Visit on ggpht.com
Sunrise on the Grand Teton and Enclosure.
Visit on ggpht.com
North Face and North Ridge of the Grand Teton at sunrise.
Visit on ggpht.com
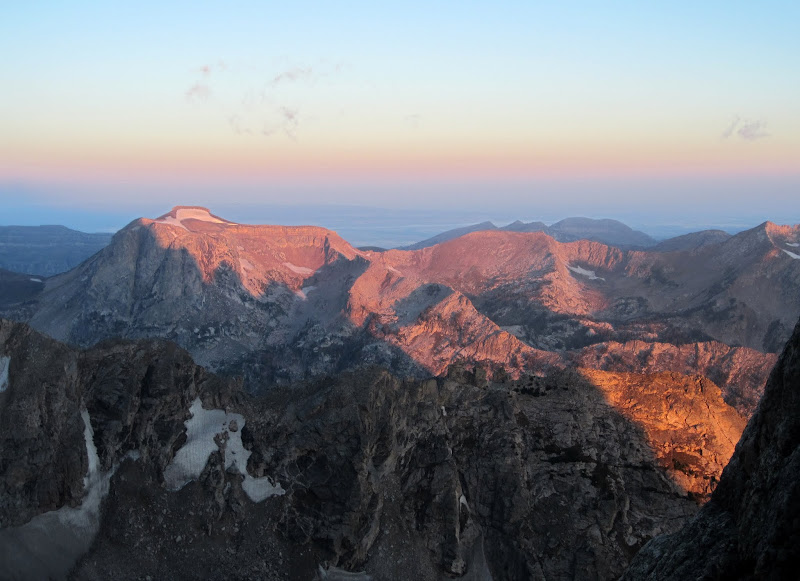
Table Mountain at sunrise.
This alpine stuff is a lot harder when you can't see the terrain due to perspective, and there is virtually no information (or incorrect information) for choosing your line! After wasting so much time on the 5th class groove, and the harder 5th class dead end, we decided to play it safe and just routefind as we went, rather than trying to make our route fit our preconceived notions. This ended up working much better. We traversed much farther north than expected, but found an easy way up to the next ledge. Then we traversed much farther south than expected before finding the next break to the next ledge. Oh well. Although we were traversing much more than we were ascending, at least we were moving much more continuously.

Visit on ggpht.com
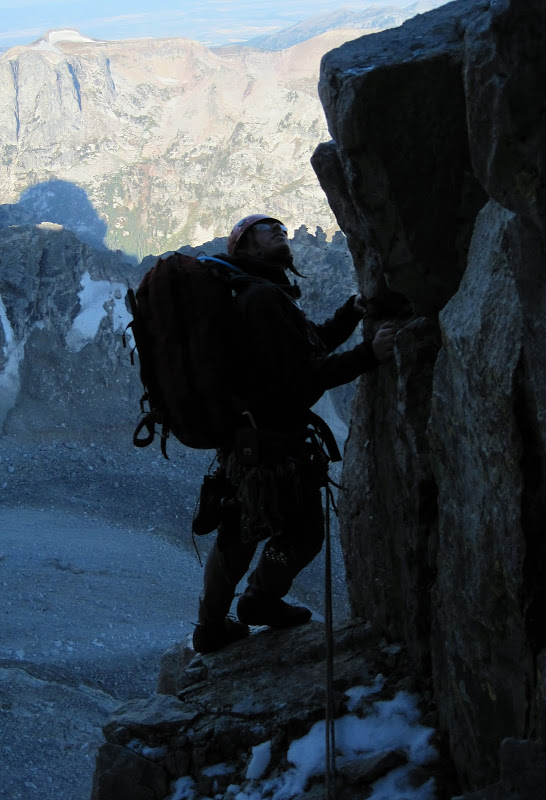
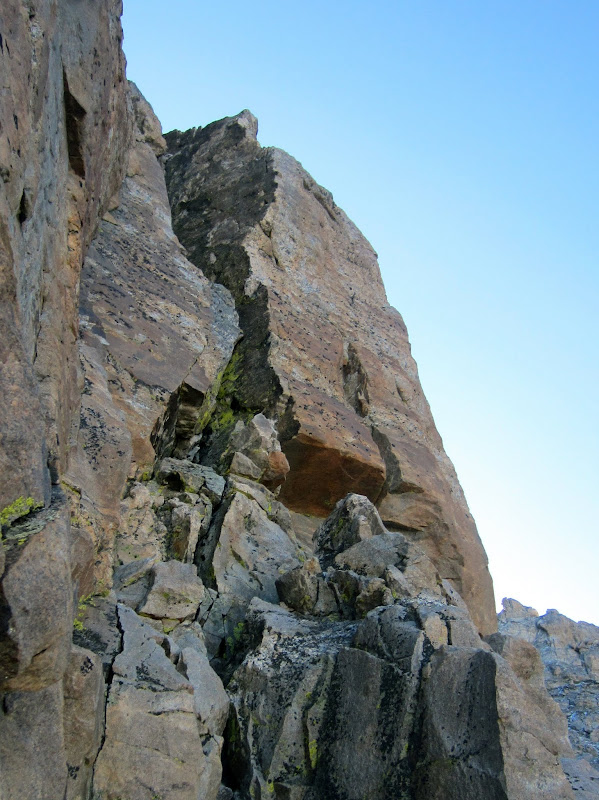
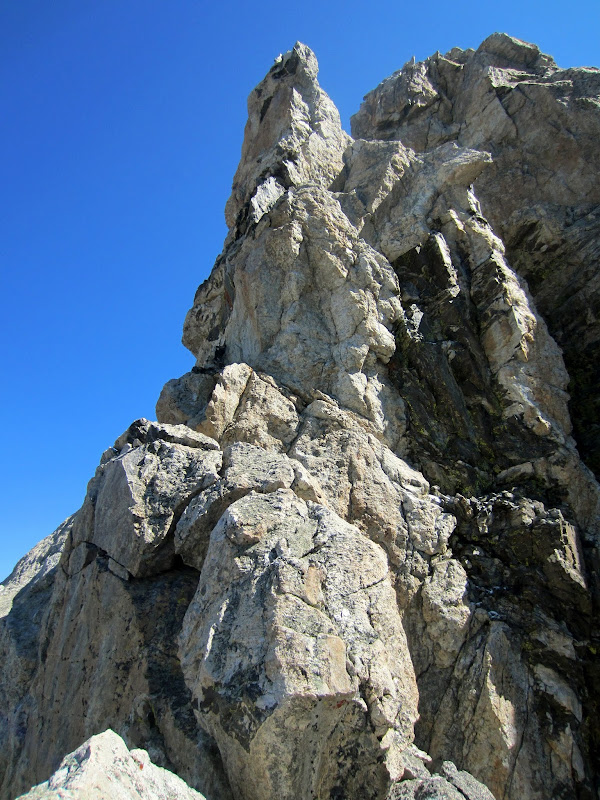
Still approaching the route, trying to keep the climbing easier. The route starts near the huge roof and corner above.
Because of the wet rock and uncertain expectations of terrain, we simul climbed the approach. In reality this isn't necessary as long as you stay on route, whatever that is. My annotations in the accompanying photos should be somewhat accurate - at least the final switchback is correct for where we went.
Visit on ggpht.com
Even still working out the approach.

Visit on googleusercontent.com
Visit on ggpht.com
Grand Teton and Enclosure area as we gain height.
The final switchback took me nearly back into the large gully before I could turn the corner and climb some 4th class chimneys up to the next ledge.

Visit on googleusercontent.com
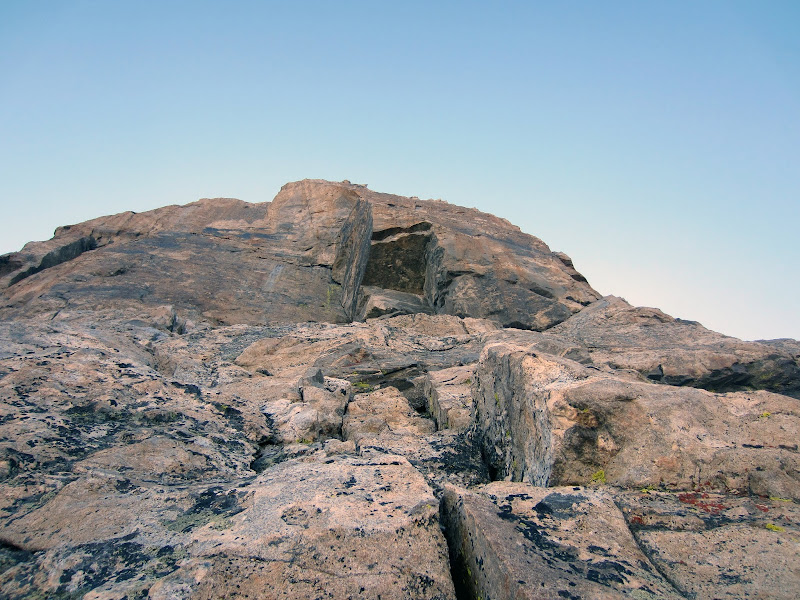
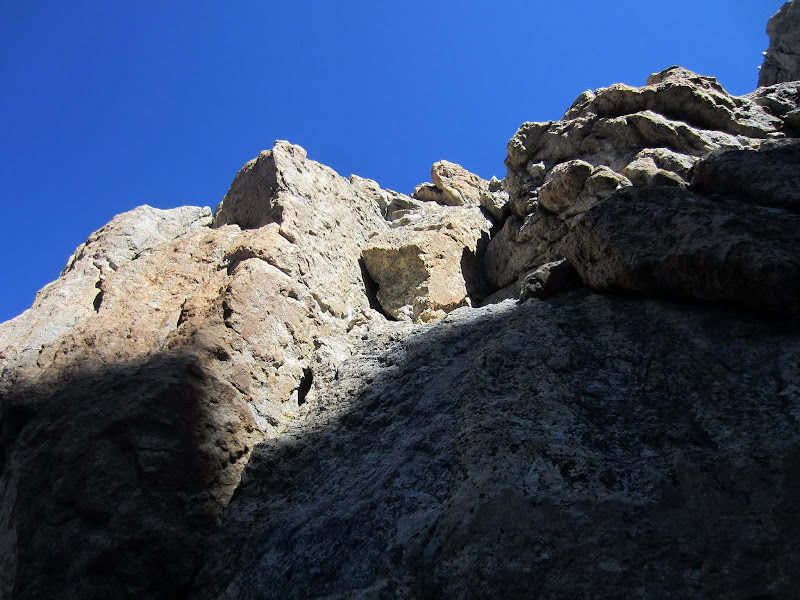
The Ortenburger guide shows going this way in the aerial photo. That is off route. Keep traversing left and eventually you end up climbing corners above the three little roofs above.
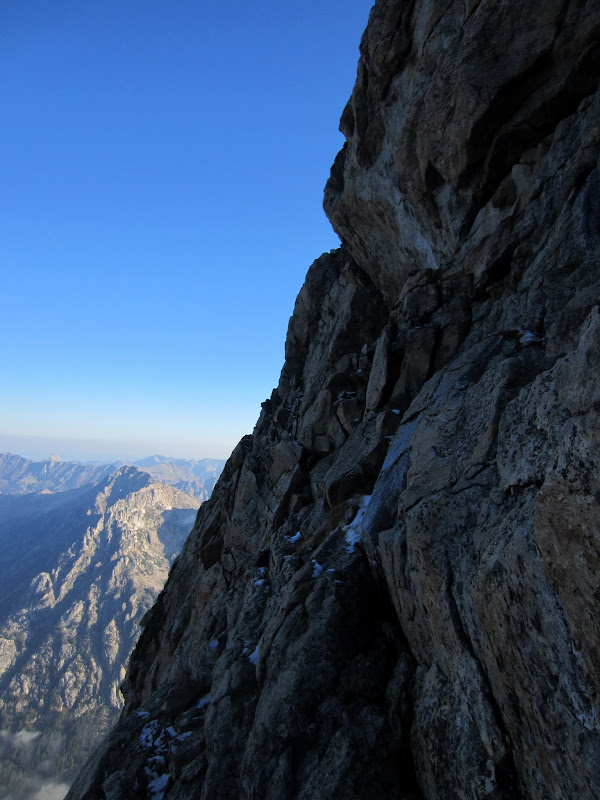
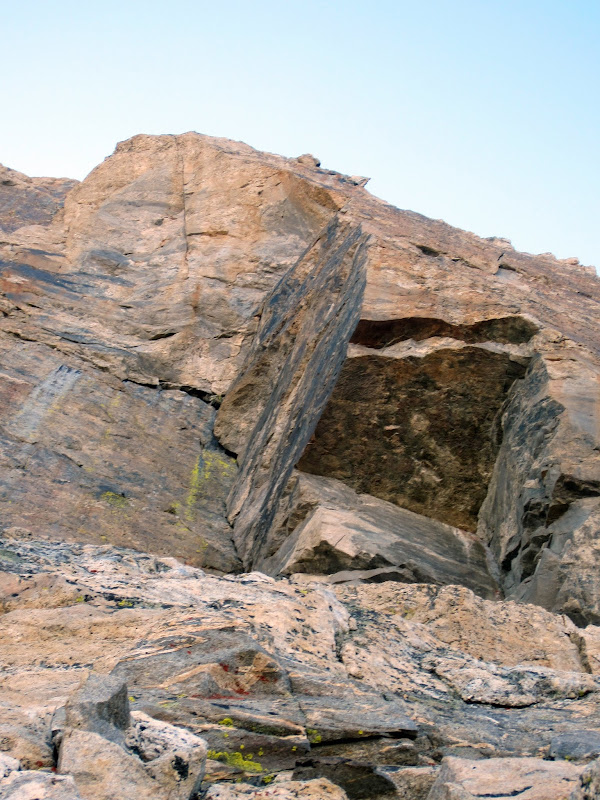
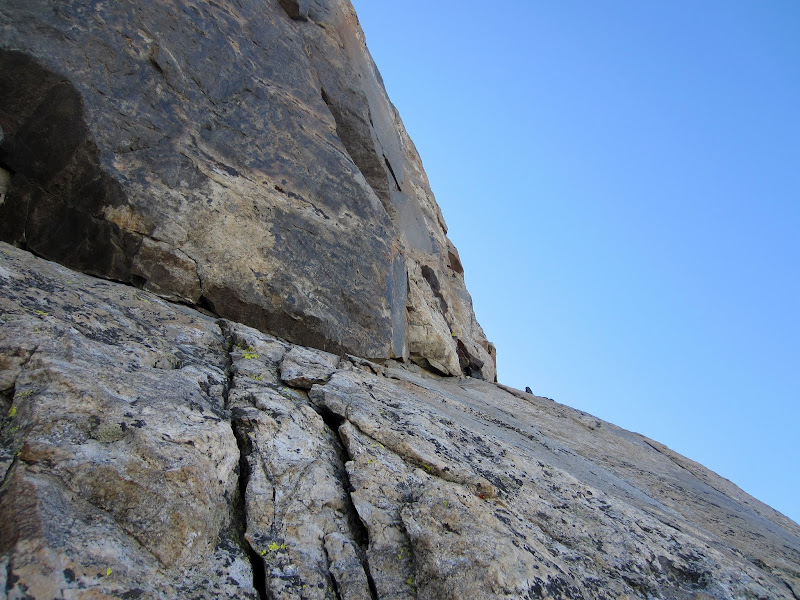
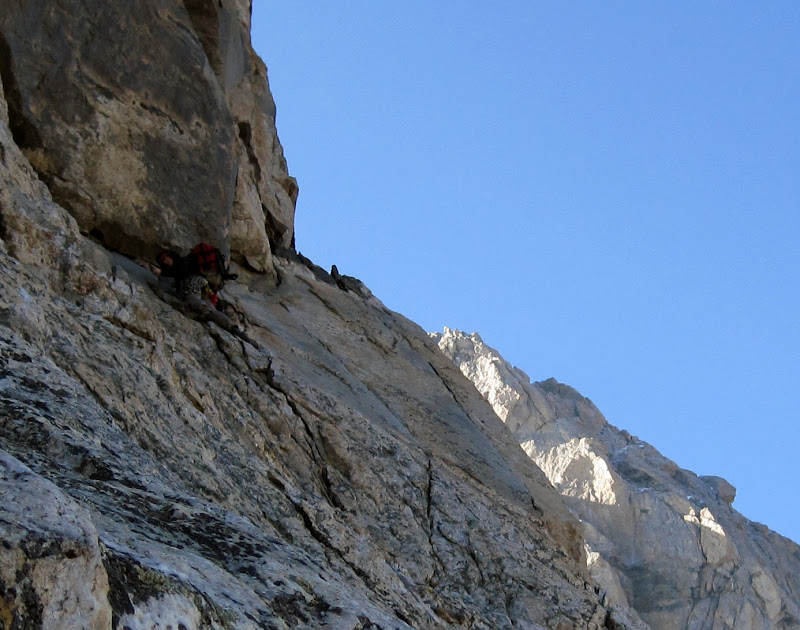
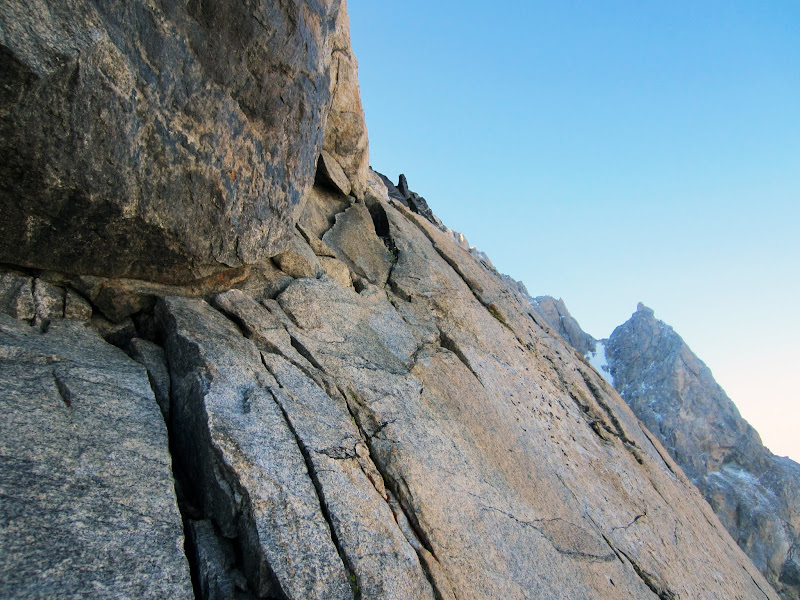
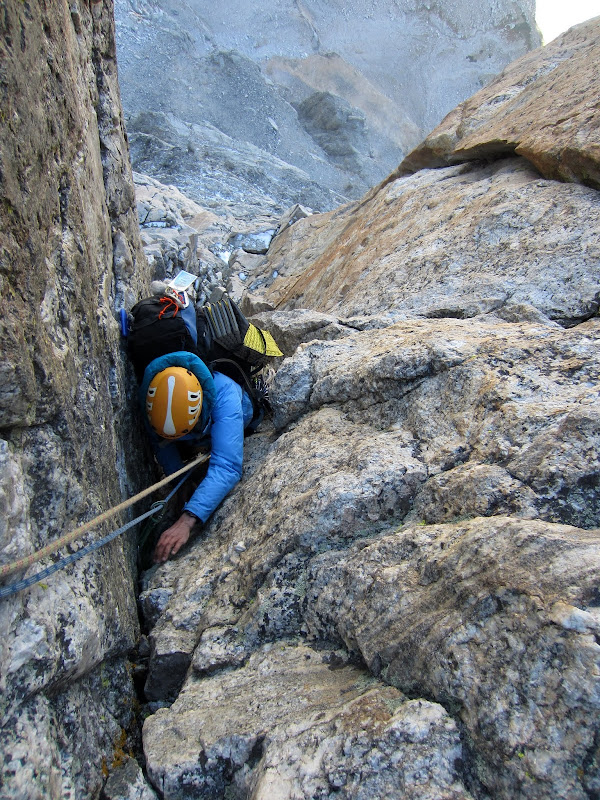
The final ledge had a fair amount of hail-turned snow left on it. As the exposure increased, I saw verglass on some of the rock slabs and promptly began placing some gear to protect me and Steph for traversing this iffy terrain. While the information on MountainProject was helpful in suggesting to aim for ending up below the large roof and corner, more directly beneath a long, thin, black roof, we felt that another good landmark to refine routefinding is to aim for the 'triangular' roof just beneath the thin, black roof, as the first pitch belay starts in a corner at the north end of this roof.
Visit on ggpht.com
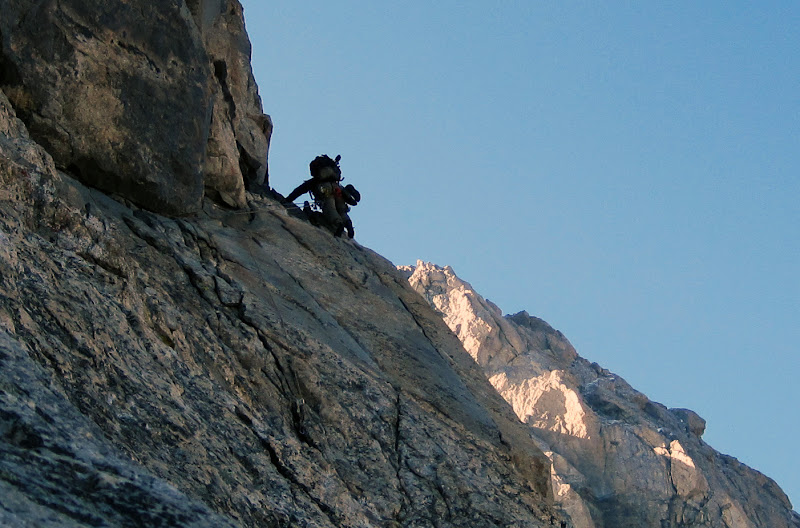
Final exposed traverse to the proper start, which turned out be be in the corner beneath the sloping roof. It was good we roped up here as there was fresh snow and verglass on the slabs.

Visit on ggpht.com
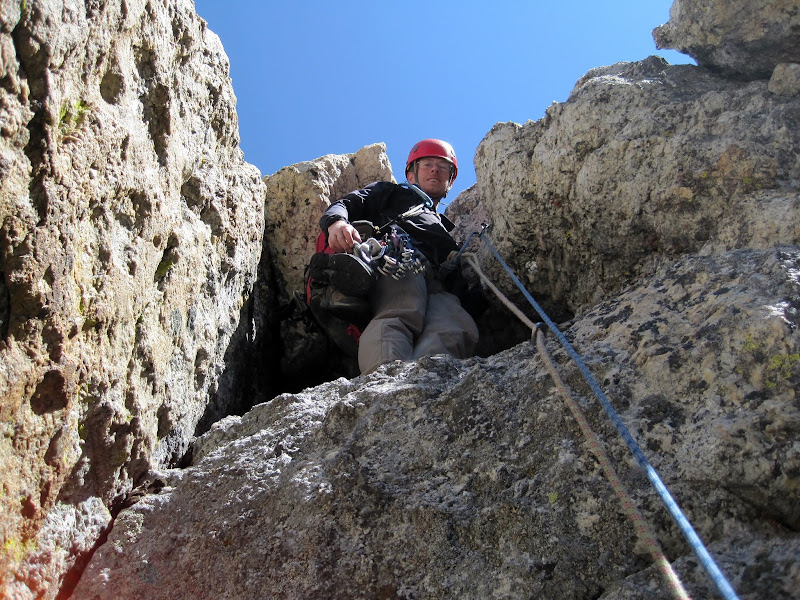
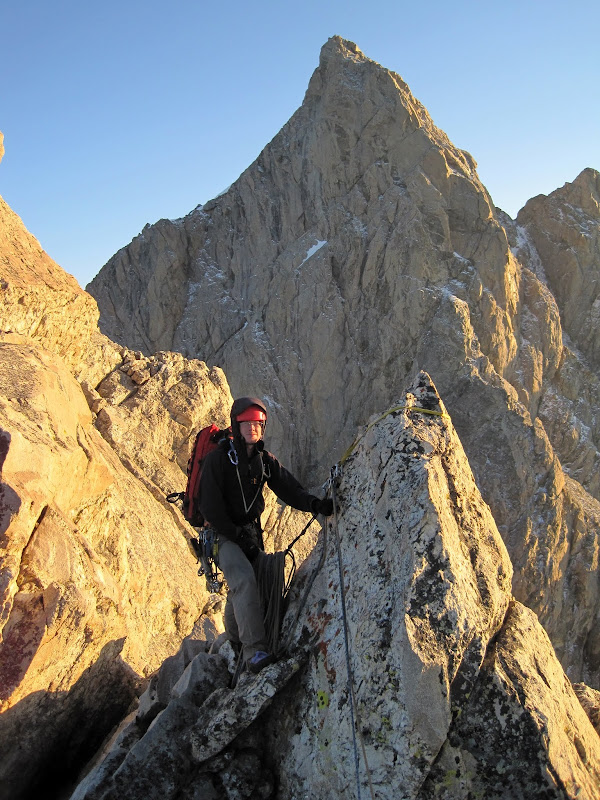
At the belay to start the first pitch. We're at the start of the route proper at last! (by Steph Abegg)
I started to climb around a corner and saw that it became more sustained 5th class, and decided that I was at the official belay for the first pitch. I made an anchor and belayed Steph in.
Visit on ggpht.com
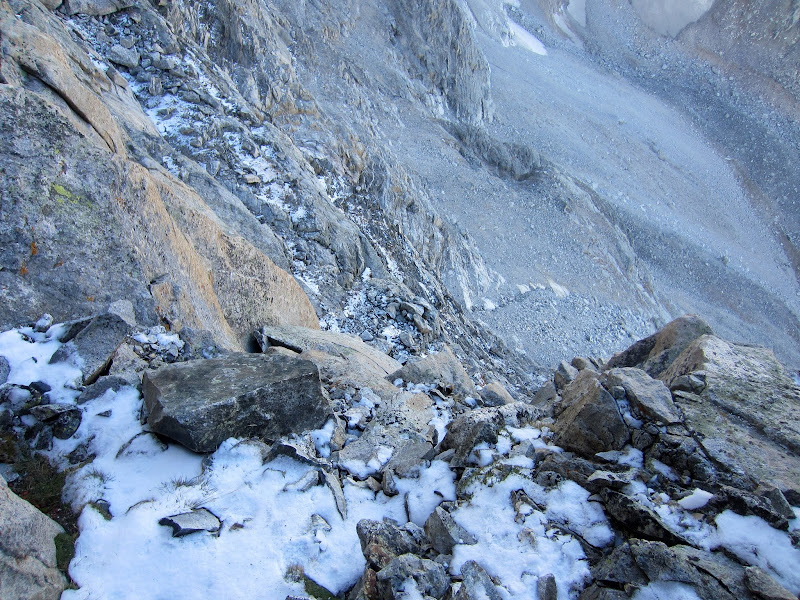
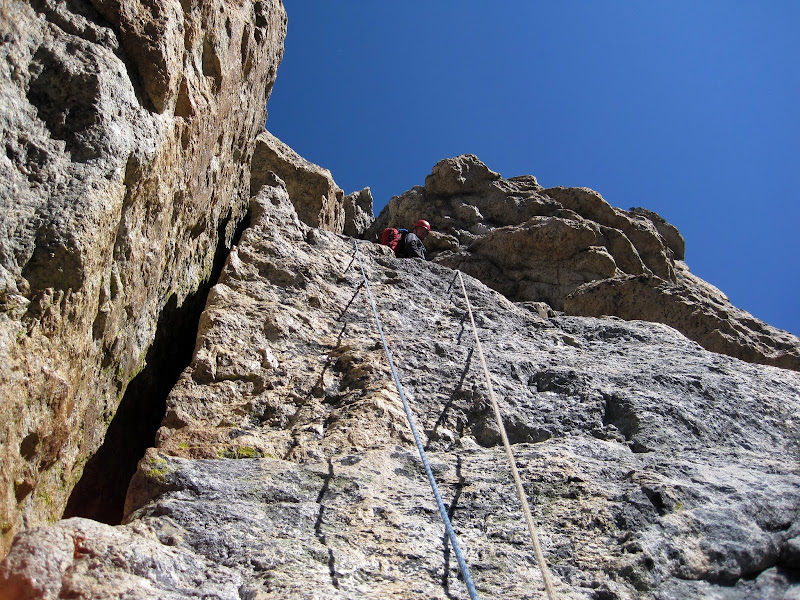
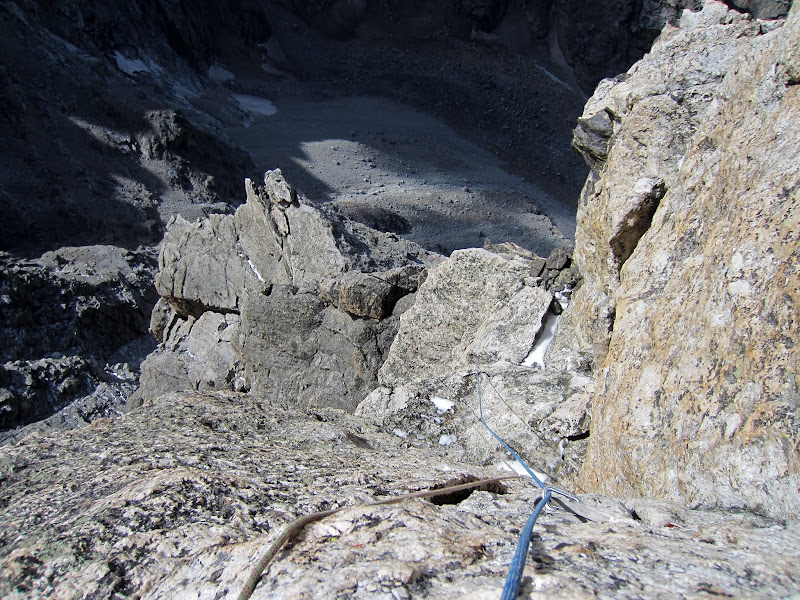
Looking down from the start of P1. It was pretty cold, and you can't even feel the wind in this photo, which was blowing unrelenting from the west at about 10-20 mph.
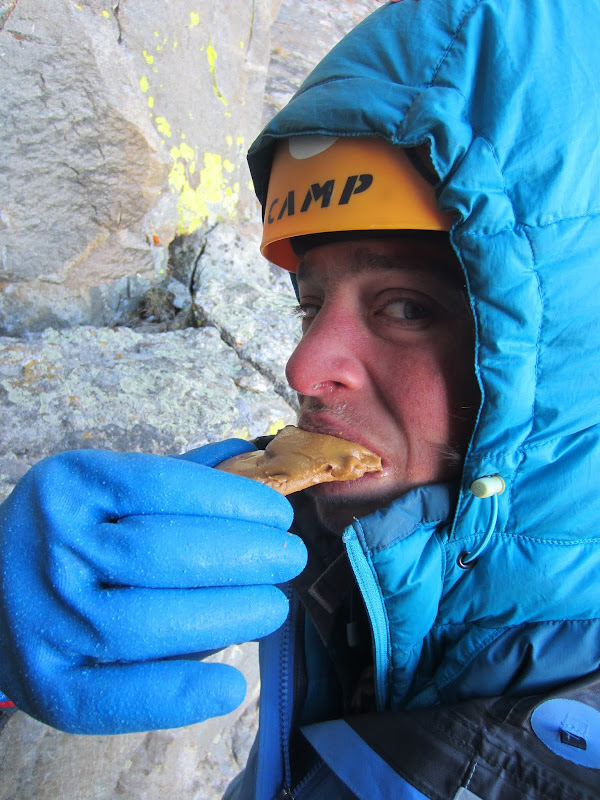
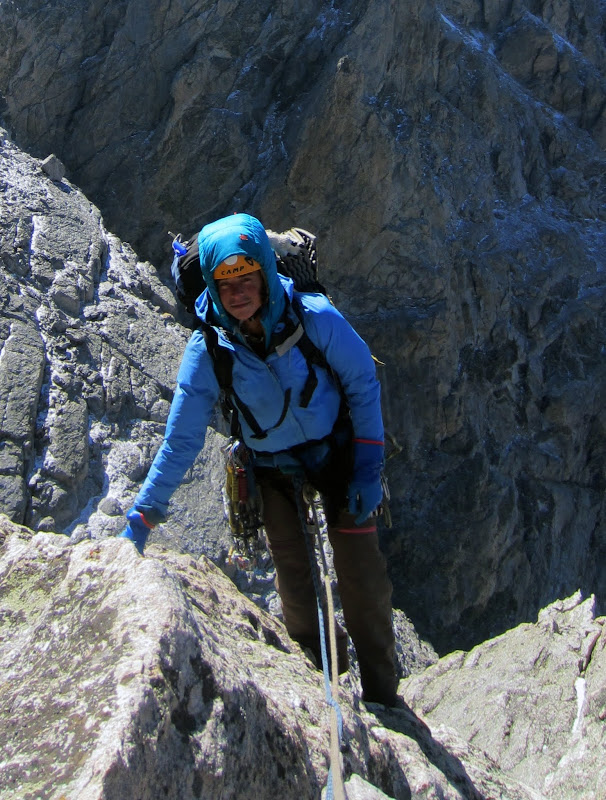
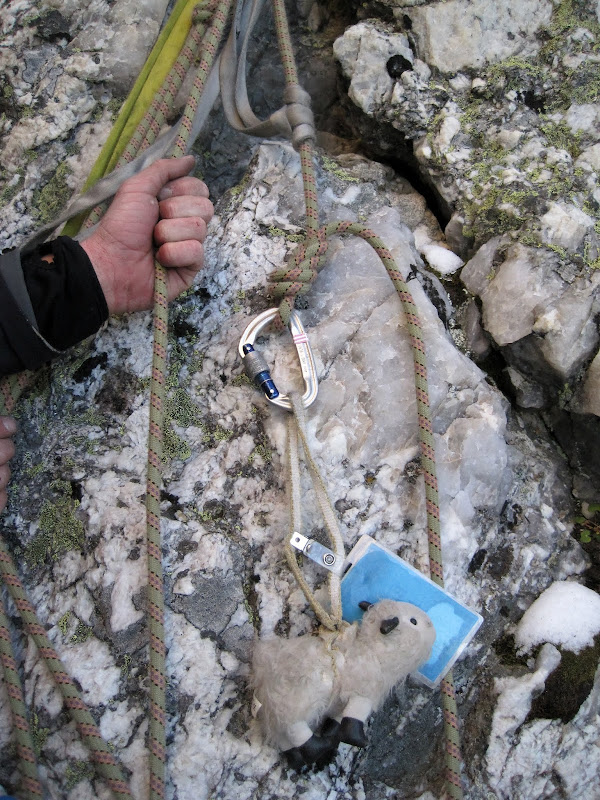
We each at a second breakfast as we had worked up an appetite on the approach. I also took some time to rewarm my hands, as there was a constant wind blowing, that coupled with the occasional grabbing of snow, ice, and more often very cold rock, left my hands numb and in need of some painful re-thawing. Steph was doing fairly well, though, as a friend of hers had recently given her a secret weapon - the blue gardening gloves of power, which gave her enhanced grip while maintaining warmth in her fingers without too much loss of dexterity. I was jealous as I only had thin, slippery liners that I often had to remove for the tougher climbing. I need some better gloves to climb in . . .
Visit on ggpht.com
Miss blue eating second breakfast: PB & PB (Peanut Butter & Power Bar), an orange glob of dense calorie goodness.

Visit on ggpht.com
Close Up of the first 5 pitches
Unfortunately we realized that as this route is on the west side of the Teton crest, it was fully exposed to the predominant winds that were unlikely to diminish. Also, although the sun was rising and the landscape all around us was brightening, we would be shaded by Mt. Owen for a good while longer and we had too much terrain to climb to allow the luxury of letting the sun come to us. I would just have to tough it out and climb as much as I could in my glove liners, and then take them off for the harder climbing and race through it to the next rest stance to rewarm my hands. At least I had warm socks to wear in my climbing shoes.
Visit on ggpht.com
Starting out on P1 (about 5.4). (by Steph Abegg)
The first pitch is pretty easy and quite reasonable to simul-climb if you weren't frozen stiff and climbing with overnight packs like we were. About a full rope length worth of easy 5th class crack climbing on good rock brought me to a nice sloping (i.e. snow covered) belay ledge beneath the large roof.
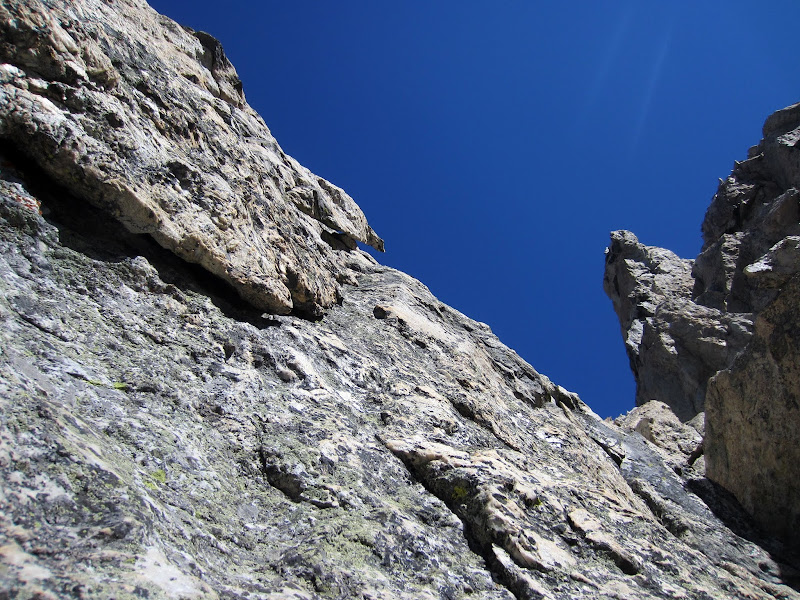
Visit on ggpht.com
P1 cracks and ledges.
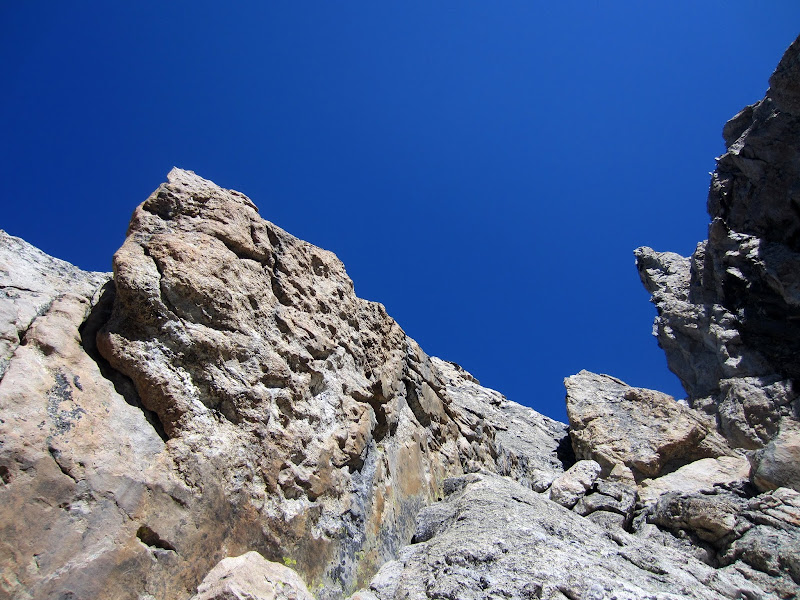
Visit on ggpht.com
The big roof and corner. That corner looks like an interesting lieback-OW problem.
Visit on ggpht.com
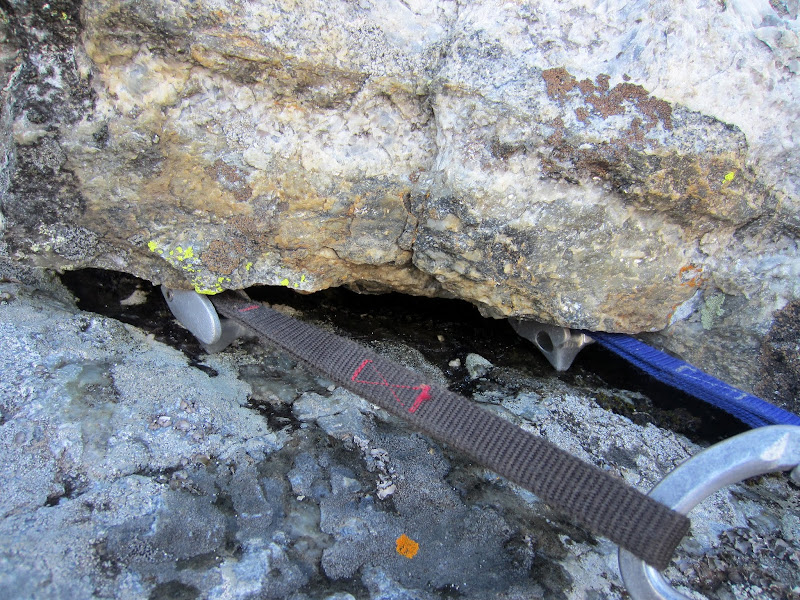
Tricams in an icy crack at the P2 belay.
The next pitch turns the large roof to keep the route at a reasonable and consistent 5.7 rating. This second pitch was pretty fun, as it was all very solid rock, with easy hand jamming to start, and then a nice hand traverse,. The traverse had some tricky, polished rock for the feet, and the occasional old piton.

Visit on ggpht.com
Starting P2 (by Steph Abegg)
Visit on ggpht.com
P2 fun 5.6ish hand cracks and nearing the hand traverse (5.7).
Visit on ggpht.com
P2 placing pro to start the hand traverse (5.7). (by Steph Abegg)
Visit on ggpht.com
Reaching the P2 5.7 hand traverse. The rock was really slick on some parts, but the hands were bomber. There was also a nice piton along the way. Fun stuff!
Visit on ggpht.com
Leading the P2 5.7 hand traverse. (by Steph Abegg)
After the hand traverse I placed a piece high and found it better to downclimb a bit as I turned the corner. Some people belay here, but I decided to follow the descriptions that had me ascend the next corner first. I actually found this corner to be the crux of the climb after the 5.9 OW finishing pitch. You must climb a hand crack in the corner, and it is reminiscent of a classic Indian Creek splitter. The problem is that it was a little too tight for me to get my palm in, and the corner flared for the first 5 ft with slick, featureless walls, so basically I had no feet and was starting on what felt like a slight overhang. I threw a red cam in high, shoved my hand in as deep as it would go, crimped to hold it, and kicked my feet against the walls as I pulled up on the jams and dynamically bumped then up a few times until the crack widened enough to get a more solid, passive jam. I threw in another piece, moved a few more tiring moves up, and at last I could get my feet in the crack! From here it was easy jamming and some tricky stemming and awkward squeezing to finish the pitch.
Visit on ggpht.com
Turning the corner on P2. Place a piece high and do an exposed downclimb and step across into this chute. You can belay here or continue up the corner (jamcrack and chimney) to a nice, protected ledge.
Although this section was shown to be 5.7 in the topo, I really felt like it should be rated 5.8+ or even 5.9. While my pack did make things harder, Steph had the benefit of smaller hands and a top rope and also felt that it was much harder than 5.7. At the very least, we both felt that this section was significantly harder than any of the other 5.7 on the route. It was a great crack, nonetheless.
Visit on ggpht.com
Steph following up the last bit of P2.
The information on the next pitch was a bit ambiguous and the topo was wrong (I am making an improved topo for the climb). From our ledge I tunneled through a class 3 chimney to an even larger ledge that was beneath a 30' slab, bordered by an offwidth. There were no cracks except for the offwidth, and alas we didn't bring our Valley Giants. The face was featured enough to appear reasonable to face climb, staying mostly alongside the offwidth. This felt like thin, crimpy 5.4-5.5, although significantly harder and more serious than the friction pitch on the Upper Exum.
Visit on ggpht.com
P3, an unadvertised 5.4R or 5.5R slab. A lot harder than the friction pitch, and no pro for the entire 30' section - just a big ledge below to catch your fall. Steph ripped a feldspar crimper off when following this pitch.
Visit on ggpht.com
Starting the P3 runout face. Or have more fun and climb the OW, which is probably a lot harder.
Eventually I was near the top and still had no pro in. This is definitely 'R' terrain as a fall would be an ankle breaker on the ledge below. About a body length before the end I found a marginal #0 C3 placement in a flaring groove to protect the easy finish and traverse into a corner. This corner had a piton and the next section seemed trick, so I set up a belay in the glorious sunshine and belayed Steph up to the warmth.
Visit on ggpht.com
Steph reaching the P3 runout face - and sunshine at last! I did manage to get in a #0 C3 in an hourglass groove to protect the finishing moves. (by Steph Abegg)
Steph followed up quickly and learned (for the both of us) that the feldspar crimpers sticking out of the gneiss can and do in fact rip off. She tore off one of the last ones I used before I placed my only piece for the face! Hmm . . .
Visit on ggpht.com
Steph following the P3 runout face (5.4R-5.5R) - and sunshine at last! I did manage to get in a #0 C3 in an hourglass groove to protect the finishing moves. This was shortly after she ripped off a feldspar crimper that I had used before my only piece of pro. Yikes!
Visit on ggpht.com
Grand Teton from P3 of Serendipity Arete.
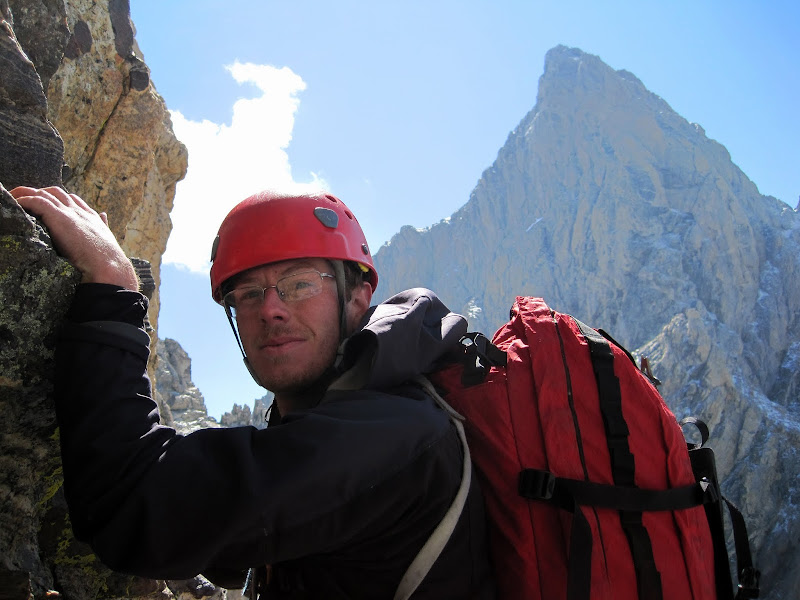
Visit on ggpht.com
Warming up at the P4 belay. (by Steph Abegg)
The next pitch begins right off the belay with some physical stemming. Your belayer is acting more as your spotter or crash pad in this case, a you climb through the crux before you can get in your first piece.
Visit on ggpht.com
Just past the 5.7 stem right above the belay on P4. (by Steph Abegg)
After this burly start, the terrain suddenly eased to class 3.
Visit on ggpht.com
Easy terrain on P4.
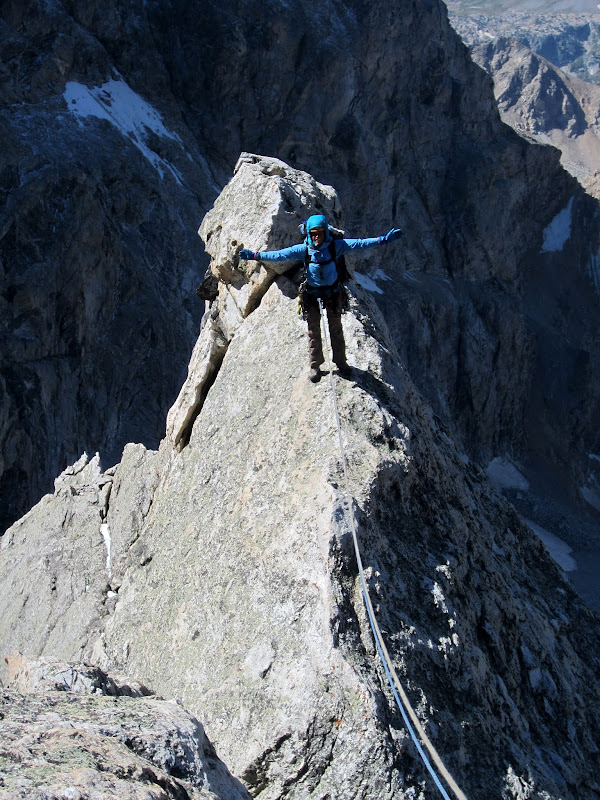
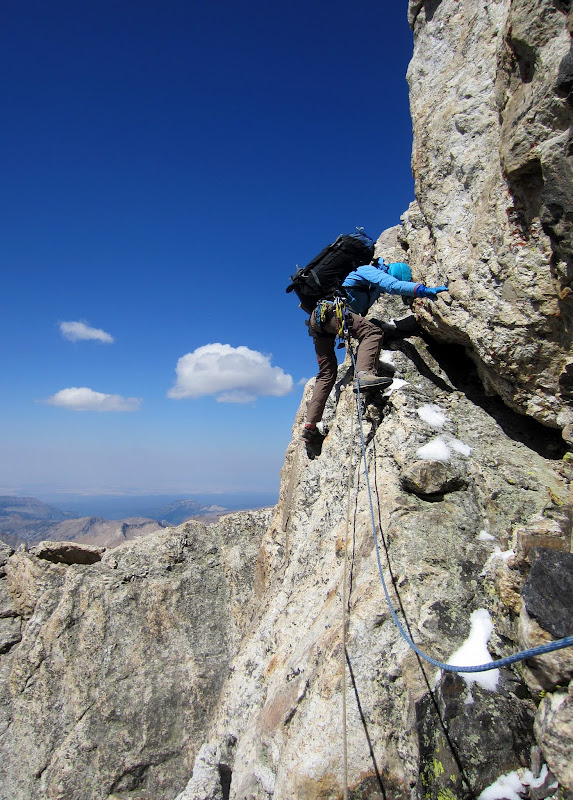
The class 3 terrain led to an ugly, cold, wide corner. However, there was a fun looking flake to the left, so I face climbed up to it where I underclined and liebacked up to the ridge crest, placed my last piece, then did a hand traverse back over to the wide corner and up the remaining ridge to a nice belay spot. I guess this part was the famed 'knife edge' ridge of the climb. Narrow, yes, but nothing like Matthes Crest or the Palisade Crest.
Visit on ggpht.com
P4 undercling leading to the knife edge. Not too necessary, but much more fun than staying in the dark corner on the right.
I belayed Steph up, and as she neared the last piece, I felt a slight twinge of concern that she faced a long and bad fall consequence from there and pointed out that she was removing the last piece, about 40 ft before the belay.
"Steph, take care when you remove that piece, as it is your last one! Also, I found good feet to hand traverse that ridge to keep thing more secure," I shouted out officiously over the roaring wind. Steph removed the last piece, looked at me, and climbed atop and then walked along the crest of the knife edge ridge! Oh well . . .
Visit on ggpht.com
Steph on the P4 undercling leading to the knife edge.
Visit on ggpht.com
Steph on the P4 'butter'knife edge. I did a hand traverse on this, or you can be more gutsy like Steph.
Visit on ggpht.com
Belaying beneath the Second Tower. Despite the sunshine, the continuous wind kept things frigid. (by Steph Abegg)
Visit on ggpht.com
Steph at the end of P4.
Visit on ggpht.com
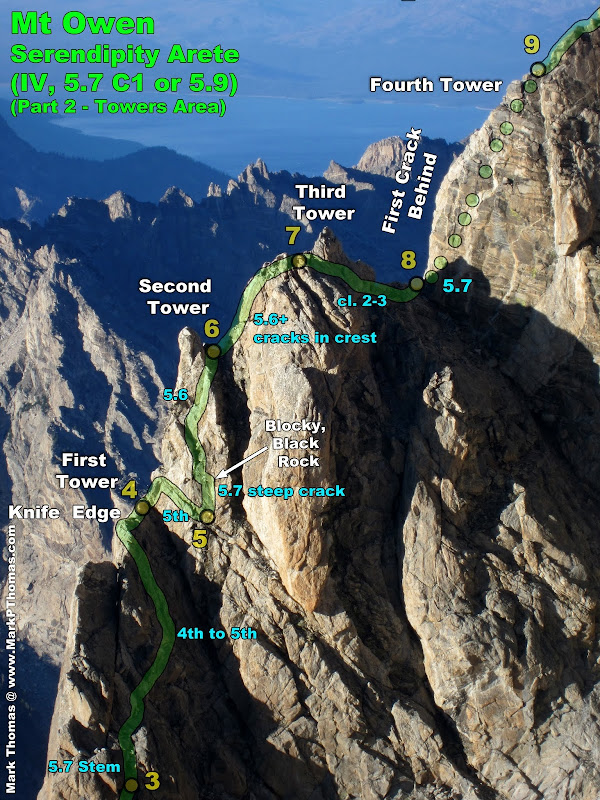
Close up view of the middle section of Serendipity Arete
The next pitch was a short one, but necessarily so as it is terrible for rope drag. Our aim was a corner of dark rock that streaked up the Second Tower. I scrambled up to the tower, climb up about 15 ft to a ledge, and did a downclimbing traverse into the corner.
Visit on ggpht.com
P5 & P6 on the second tower. P5 (cl. 4-5) ascends to the ramp and downclimbs to the black rock corner. P6 ascends the steep black corner (5.7) and steps left and ascends the left corner in lighter rock (5.6).
Visit on ggpht.com
Wind-induced rope drag on P4. (by Steph Abegg)
Visit on ggpht.com
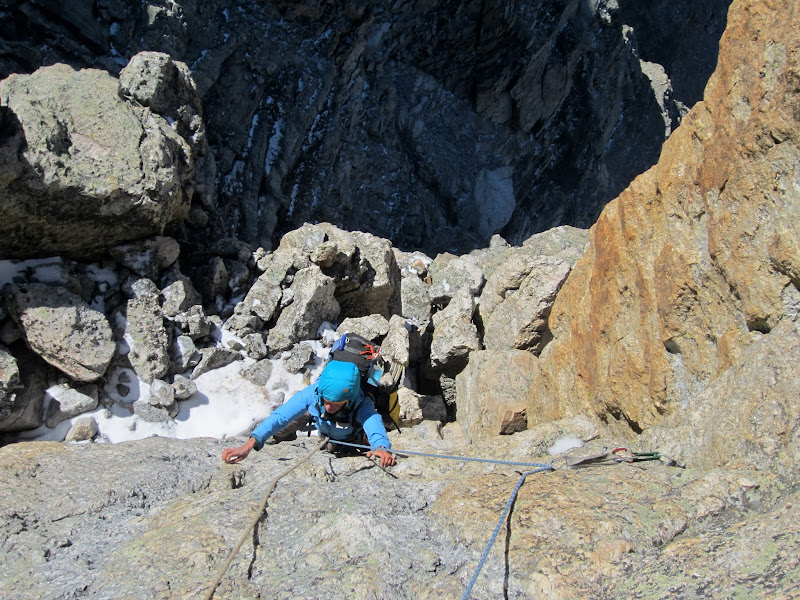
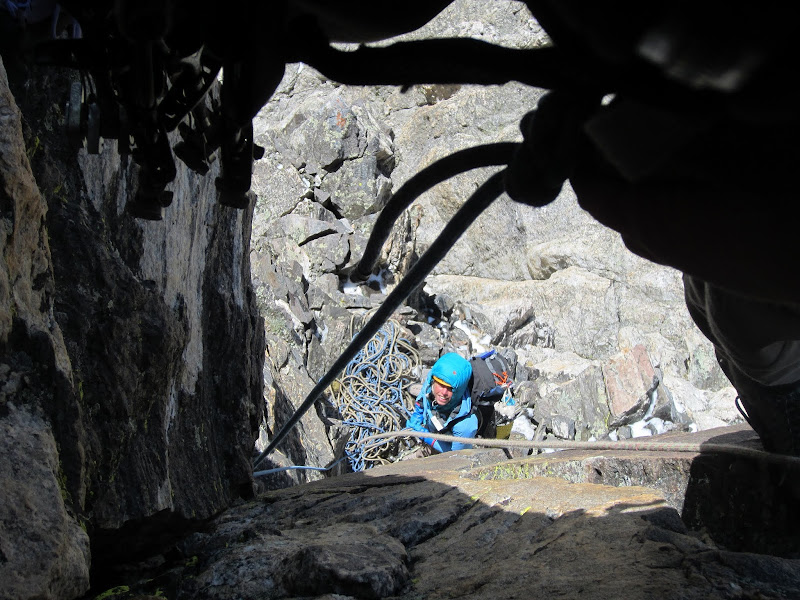
Leading P5 (cl. 4-5). (by Steph Abegg)
Visit on ggpht.com
Steph following the P5 downclimb (cl. 4-5).
Visit on ggpht.com
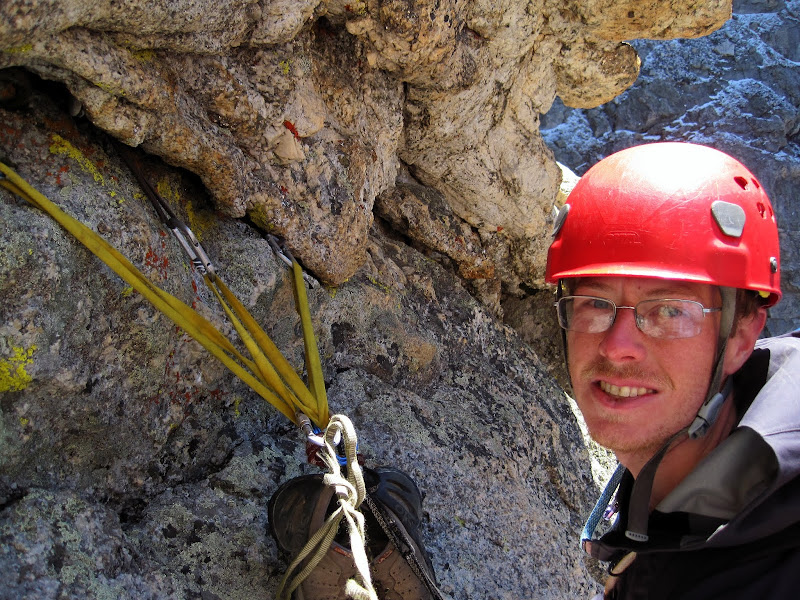
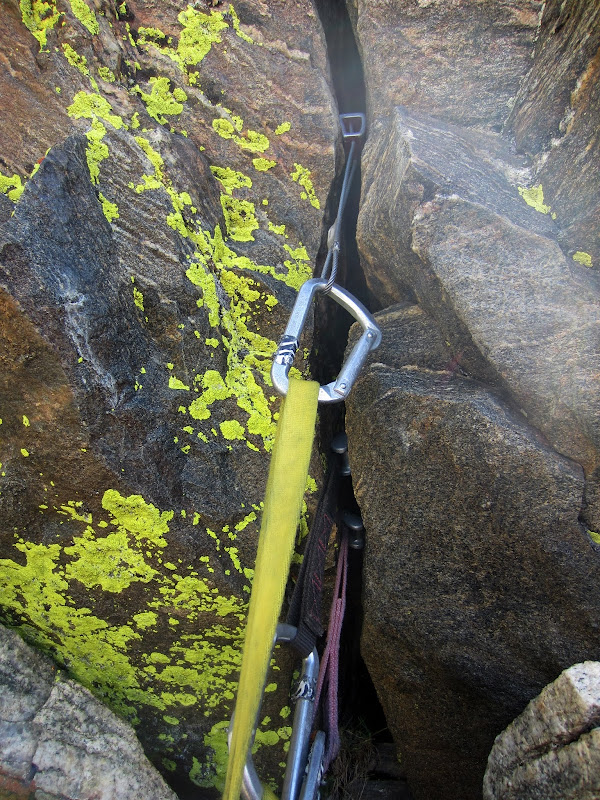
P6 nut & tricam anchor. Gotta save those cams!
Visit on ggpht.com
At the P6 belay. (by Steph Abegg)
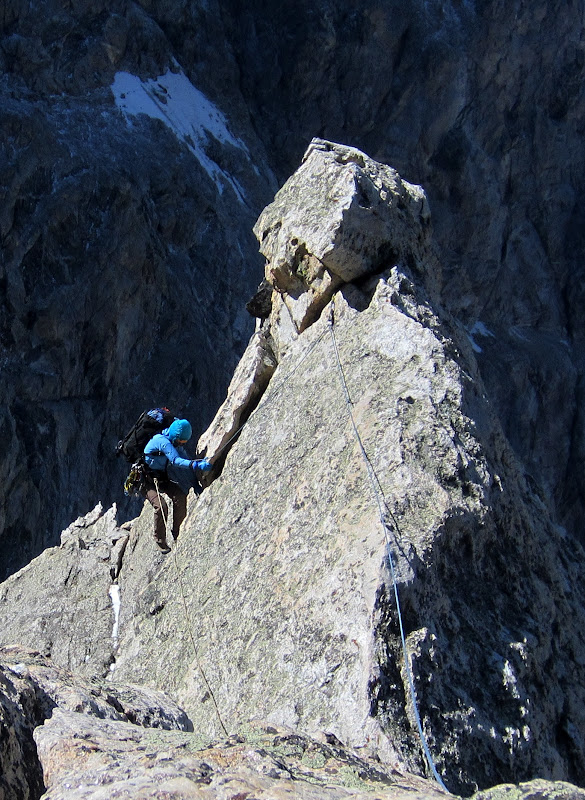
The next pitch is surprisingly steep for 5.7, but it has wonderful hand jams and some good feet if you look for them. The moves are hardest right off the belay before your first piece (naturally) and then things get more secure. I climbed about halfway up the corner, then stepped left to the next corner, which faded back to golden gneiss, where the angle declined and the cracks became more rounded and eroded to finish the Second Tower pitch.
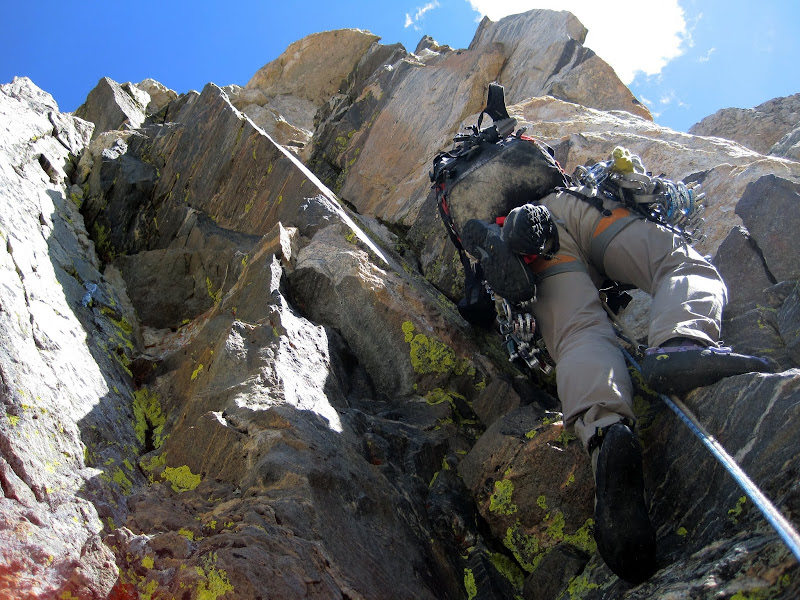
Visit on ggpht.com
Leading the steep P6 (5.7) on the Second Tower. (by Steph Abegg)
Visit on ggpht.com
Looking down the steep corner on P6.
Visit on ggpht.com
Looking down P6.
Did I mention that despite the clear sunny day, the wind was blowing continuously on us as if we were in a wind tunnel? This wind was very strange. Rather than it feeling like it was stripping away heat, the actual blowing air mass felt frigid. Also, the wind was either fully on or off. One minute it would be calm, with the sun gradually warming us, then like a switch being turned, the wind blast would return, roaring across our bodies for anywhere between the next minute to thirty minutes before there would be a short break. Still, discomfort goes hand in hand with alpine climbing, so we enjoyed the warmth when it came, and then bundled up and climbed faster when it departed.
Visit on ggpht.com
Steph in her rope blanket, ready to belay P7.
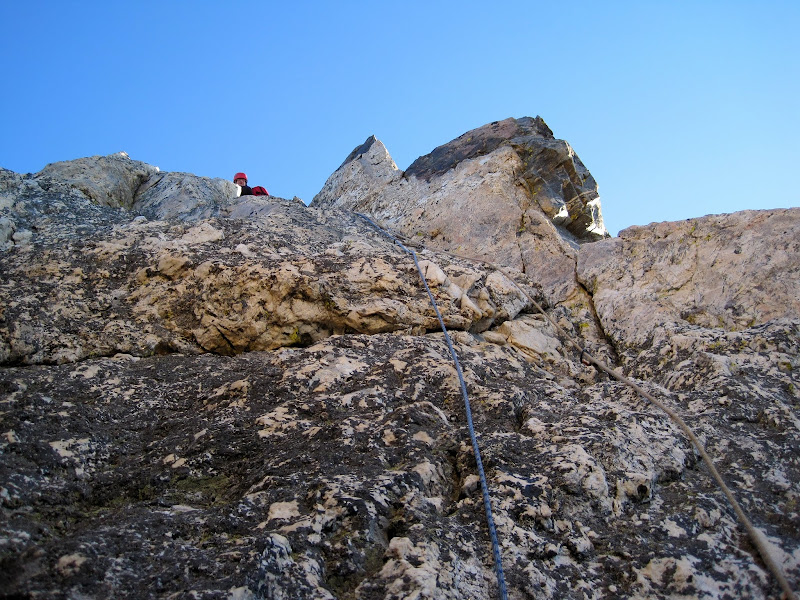
The next pitch was supposed to be 5.6 (according to Mountainproject, or unlisted in our other topos), and was supposed to take the crest directly. The easiest line veered off the crest (it seemed to me), and it seemed harder than 5.6 (to both me and Steph). It had some interesting face climbing moves with decking potential - classic alpine. It was short, though, and soon I was atop the Third Tower.
Visit on ggpht.com
Leading P7. Some call it 5.6, but the way I found was pretty hard! I'd call it 5.7, and don't fall or you'll deck. (by Steph Abegg)
Visit on ggpht.com
Looking down the Third Tower at the wind tugging on the ropes.
Visit on ggpht.com
More wind-induced rope drag, on P7. (by Steph Abegg)
Visit on ggpht.com
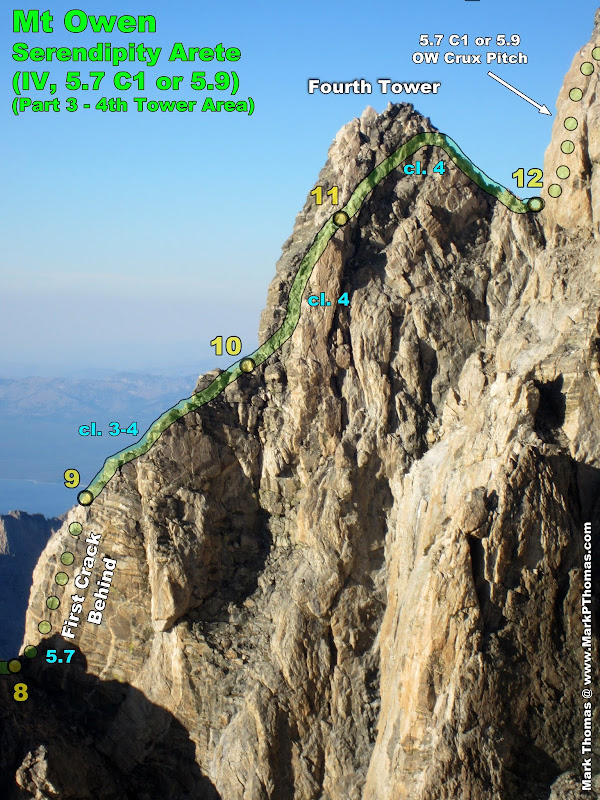
Close up view of the Fourth Tower area
Okay, if you're using any published topos of this route, keep in mind that it is not at all to scale. It seems silly to call this entire feature the 4th Tower, as it is larger than the 2nd, 3rd, and 4th combined. Also, sources ambiguously call the lower hump the 4th tower, but I'm going to insist on labeling the high point the 4th Tower. The scrambling over to it is much shorter than the next 5.7 pitch than depicted on the topos.
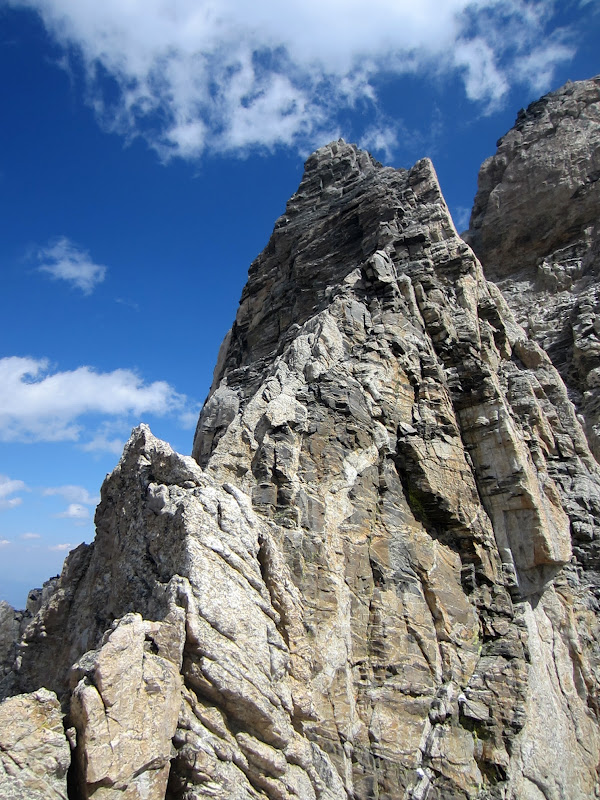
Visit on ggpht.com
Fourth Tower, beginning P8, which is really just a cl. 2-3 walk over to the tower and a bit around the left side of the crest.
Easy 2nd class walking brought be around the corner. One small yet critical detail I missed was that the 5.7 corner begins at the first crack, merely 15 ft beyond the crest as you traverse on to the north side of the tower. I think I went about 30 ft before I saw a good way to head up. Oops.
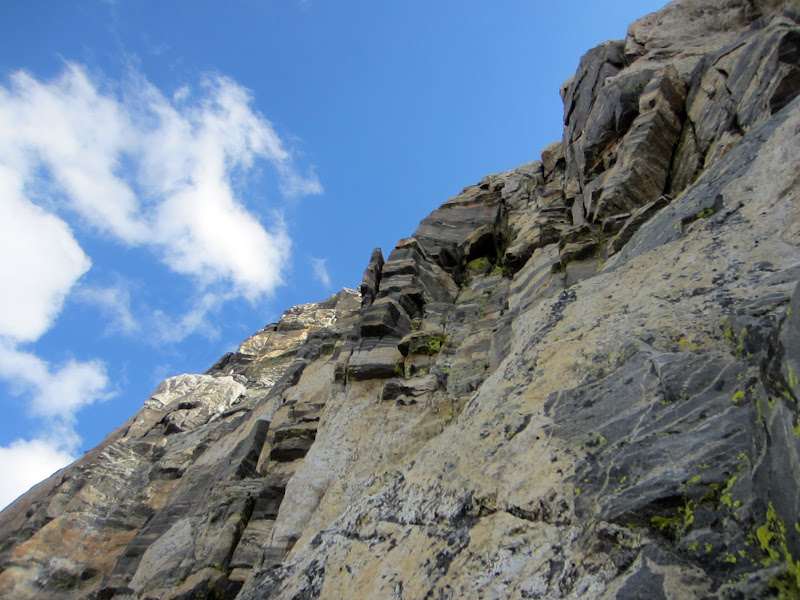
Visit on ggpht.com
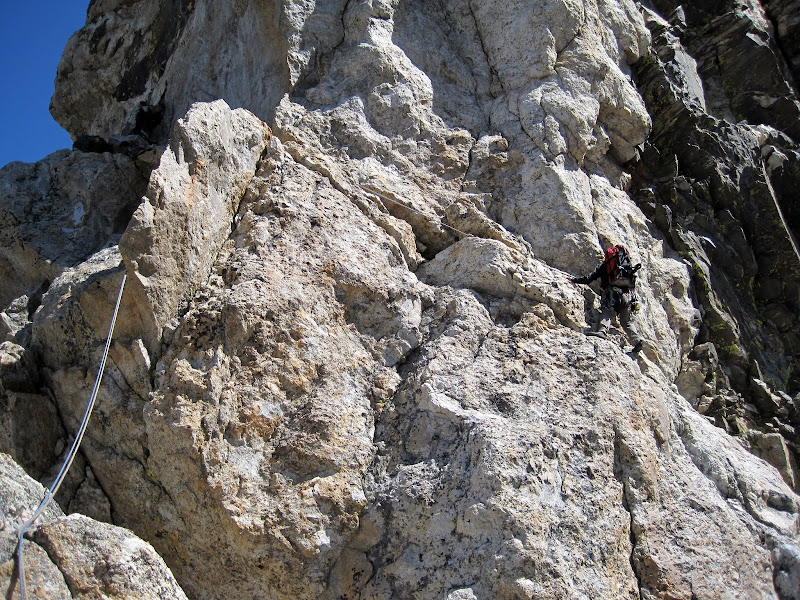
P8, Left side of the Fourth Tower, if you walk too far over. This was pretty steep! Also there were some loose blocks. I picked a way up and eventually made it back to the 5.7 line, which apparently starts only 15' left of the crest.
I climbed atop a projecting hump of rock and belayed Steph up. From here I climbed steep 5.7 terrain up and back right to intersect the correct line. This pitch has some loose and fractured rock, so take care.
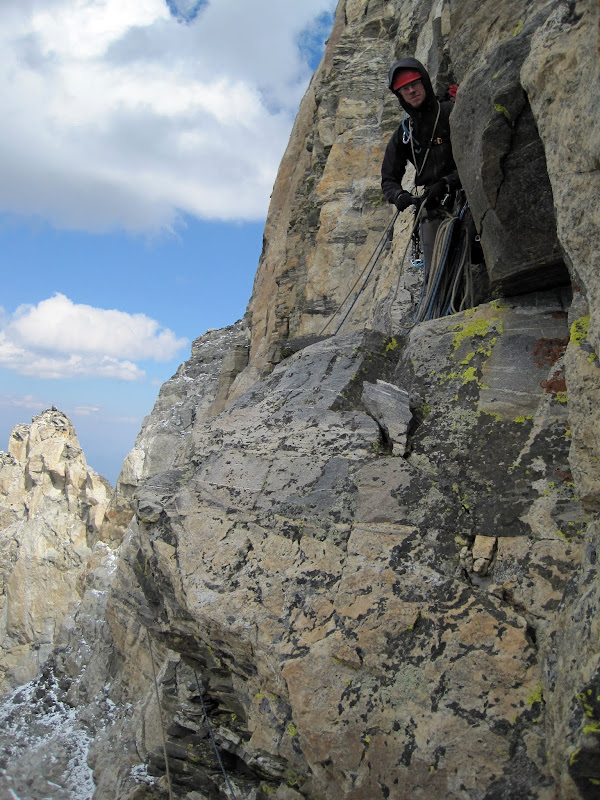
Visit on ggpht.com
P8 belaying behind the 4th Tower. This is off route as I traversed too far over, but I eventually got back on the line. (by Steph Abegg)
I stopped short of the flat ledge to squeeze into a small slot, out of the wind, and belayed Steph up. Steph was up for leading the next few hundred feet of class 3-4 up and over the 4th Tower, so we swung leads here and she continued on to lead the simul climb, belaying me in a couple of times for rope drag (so you might want to shorten your rope on this part for better simuling).
Visit on ggpht.com
P11, Steph leading cl.4-5 terrain over the Fourth Tower.

Visit on ggpht.com
Mt Moran
Visit on ggpht.com
P11, Grand Teton seen from atop the Fourth Tower.
Visit on ggpht.com
P12, Teewinot from atop the Fourth Tower.

Visit on ggpht.com
Steph in the tower notch beneath the Crux P13.
Visit on ggpht.com
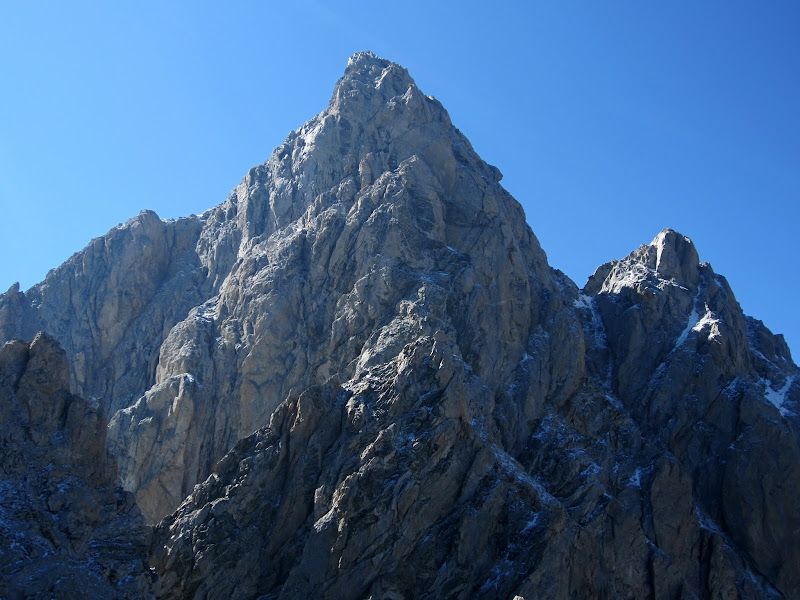
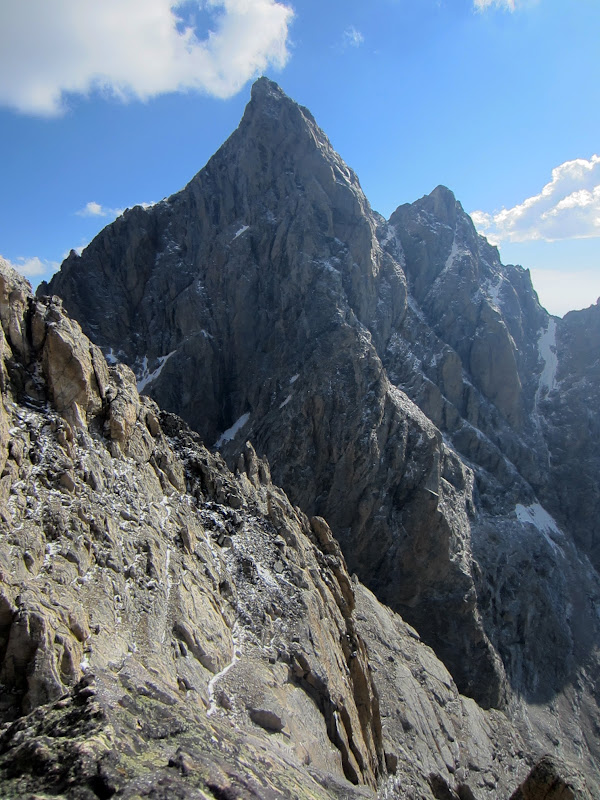
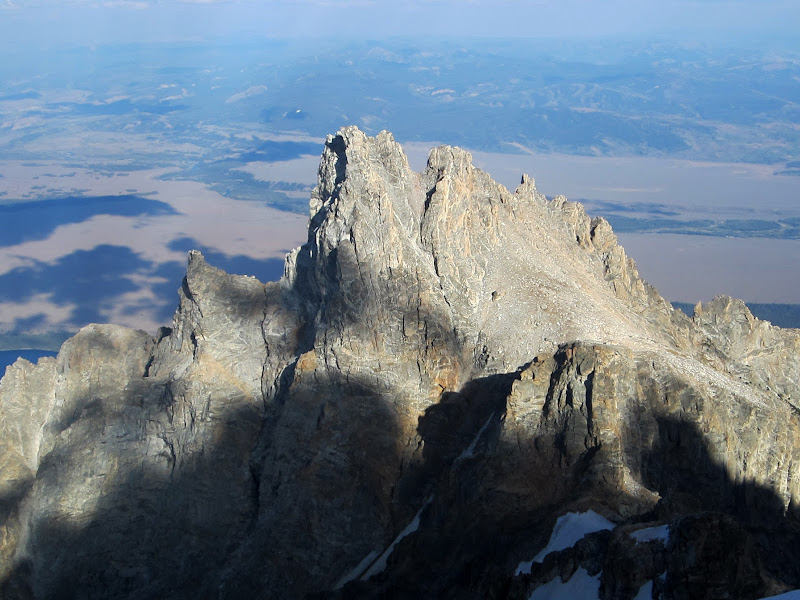
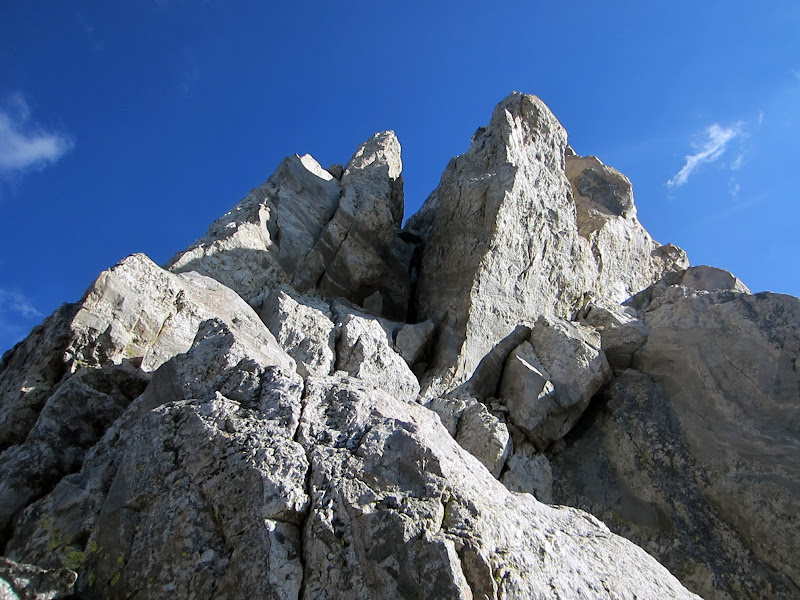
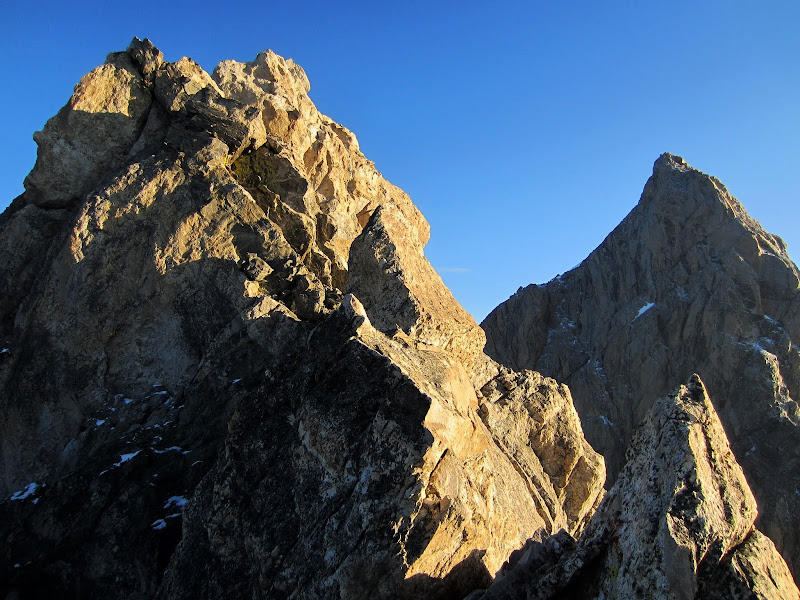
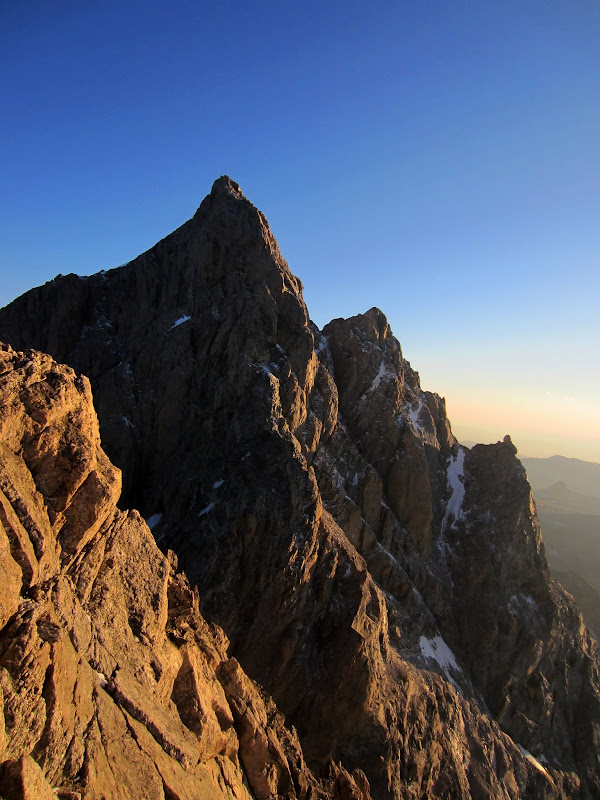
Close up of the summit area, seen from the Grandstand
Visit on ggpht.com
Summit area seen from the Third Tower

Visit on ggpht.com
Summit Area from atop the Fourth Tower
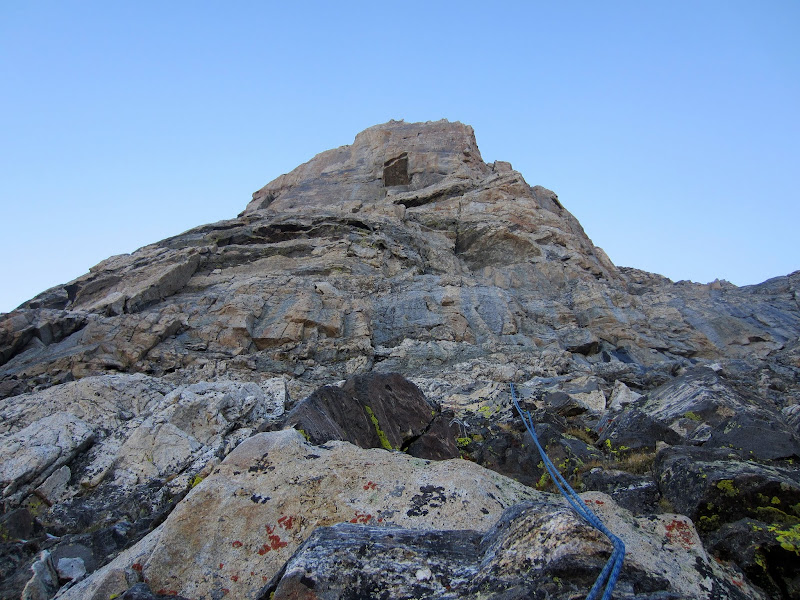
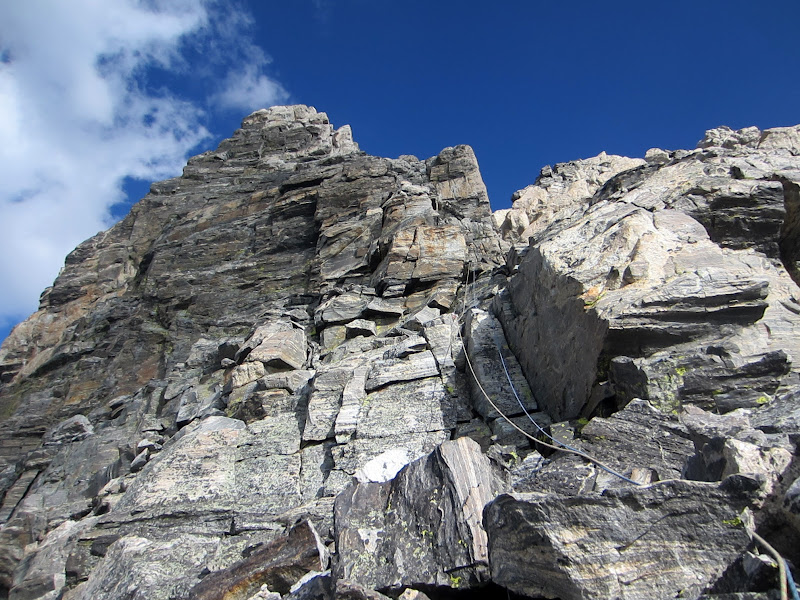
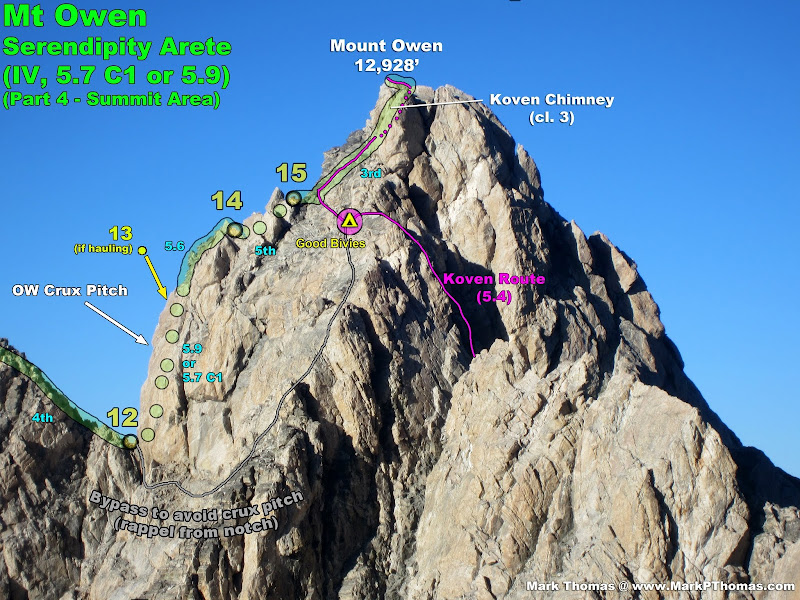
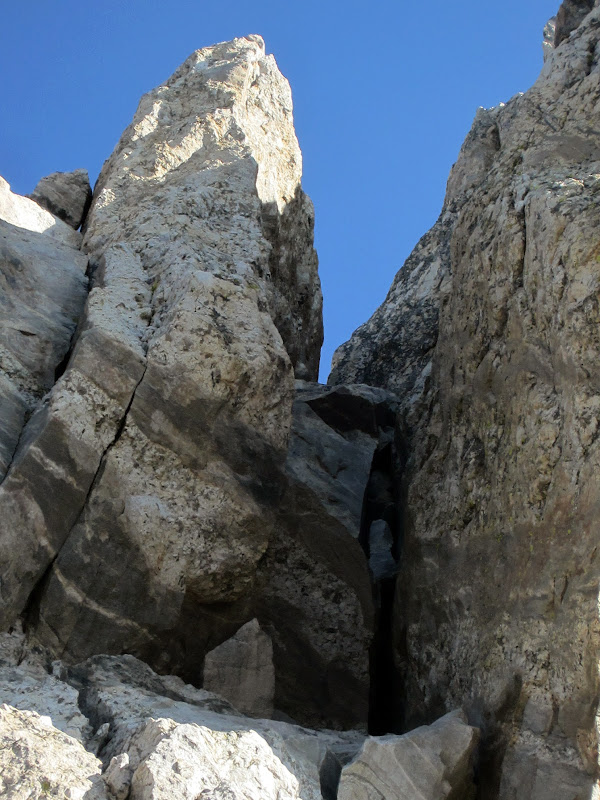
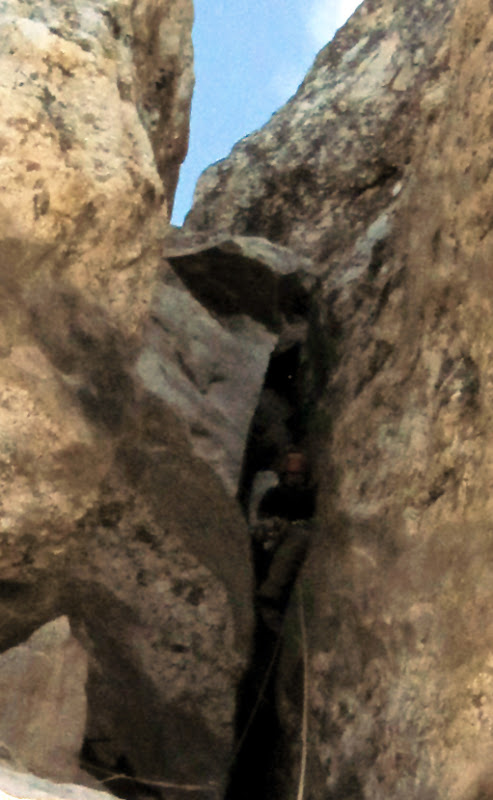
At last we were nearing the end of the climb. I followed up and over the 4th Tower and down into a large notch. Here our information indicated a bypass option, but I was feeling good and set upon finishing this climb properly. This final pitch was listed as 5.7 A1 or 5.9 chimney or stem. Somehow it seemed like none of this to me. It was no the last pitch, it would go at 5.7 C0 if you brought micronuts and were more gutsy & adept at aiding off of them than free climbing a short offwidth, and the crux itself presented no stemming or chimneying except as an afterthought. You'd better have your Wyde hat on for this one!
Visit on ggpht.com
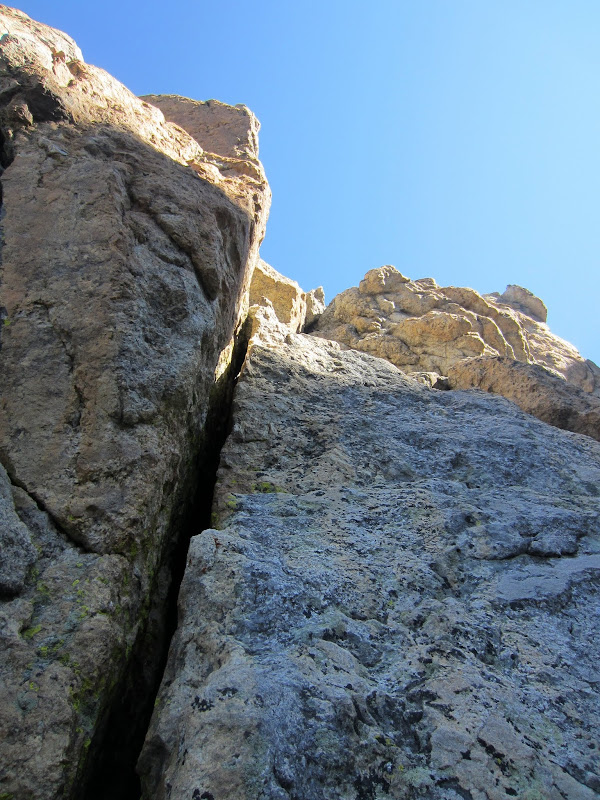
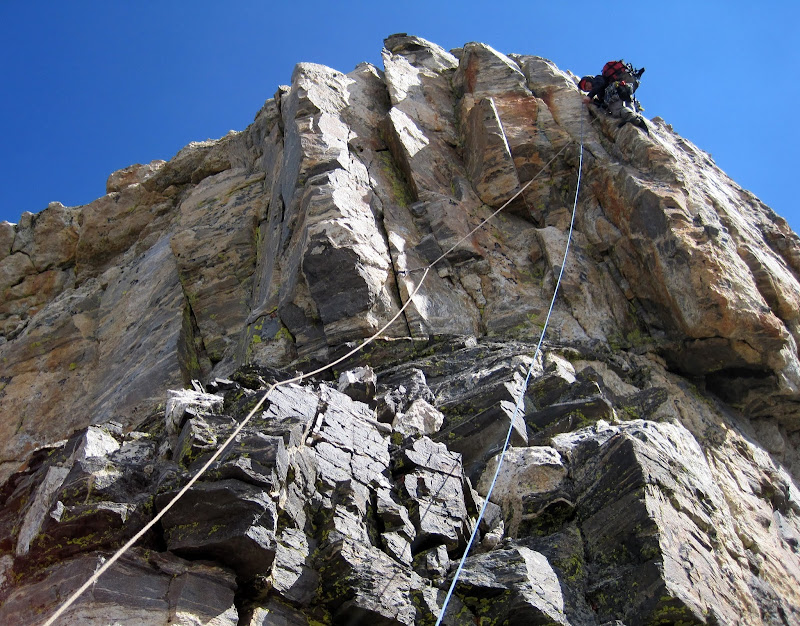
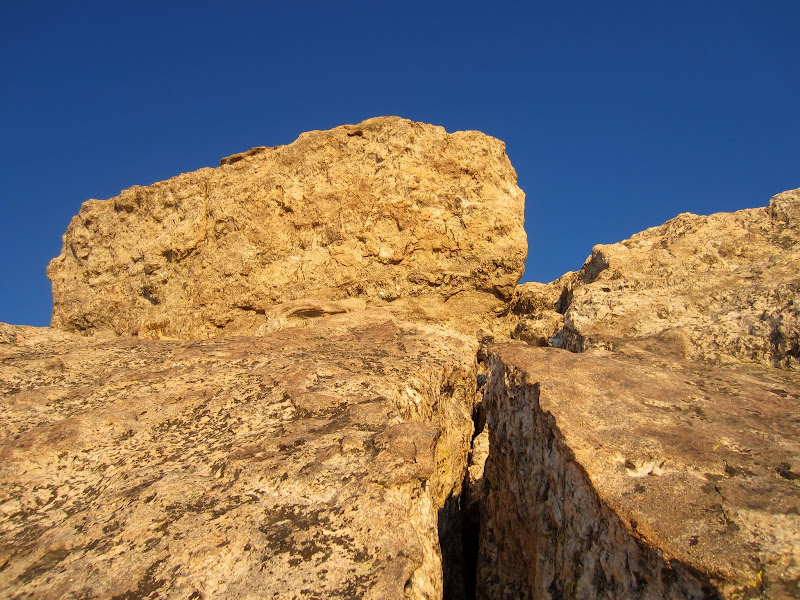
Looking up P13 to the crux 5.9 OW.
My plan was to climb to the base of the offwidth, clip my pack to the last piece of pro beneath it, and then free climb the offwidth to the next convenient belay anchor where I could then belay Steph up to my pack and, then haul my and Steph's packs up, then belay Steph up. So away I went, with the first part of the pitch traversing a lot back and forth on face climbing moves until I could sling a block at the base of the offwidth.
Visit on ggpht.com
P13 Crux 5.9 OW. I left my pack on a piece clipped at the base for hauling.
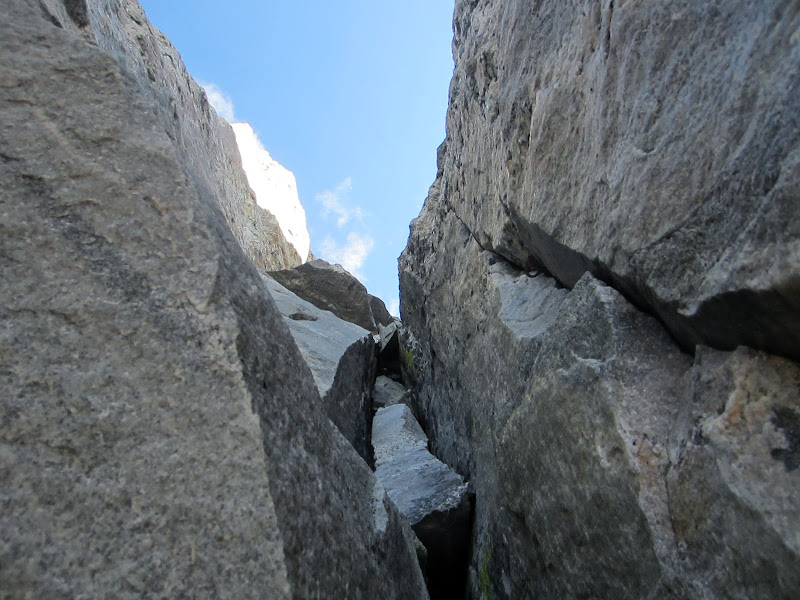
The location of the piton on this pitch kept me honest, as I couldn't reach it until I was midway through the OW crux, and it seemed to me scarier to attempt to yard on any nuts placed before the piton than it was to just climb the offwidth. Once again, you would fall onto a ledge if you mess this section up, but at least it is short!
Visit on ggpht.com
Climbing the P13 5.9 OW crux. You have to climb about half of it before you can reach that piton. Apparently this can be aided at 5.7 C1, but that looks to me like some tricky nutwork to reach the piton!
This felt to me like a 5.9 OW in Yosemite Valley. It was featureless, and the beginning was a bombay with no feet. I basically hung off a chicken wing and jerked my feet up and kicked against the wall enough to get the momentum to dynamically bump the chickenwing up a few times. Then I could throw my left leg into the crack, torque it, and I was set! Also, by removing the pack that I had been climbing with all day, I felt lighter than air, and although this section was by far the technical crux of the climb, for me it wasn't that hard physically. So I inchwormed up half a body length, clipped the piton, inchwormed the rest, then chimneyed up to nice stance. If you are climbing with a light pack, you could just trail it on this pitch and continue higher, but if heavily loaded like we were, I stopped at a convenient point to minimize hauling and make it very easy to toss rope down.
Visit on ggpht.com
Climbing the OW crux. (by Steph Abegg)
Visit on ggpht.com
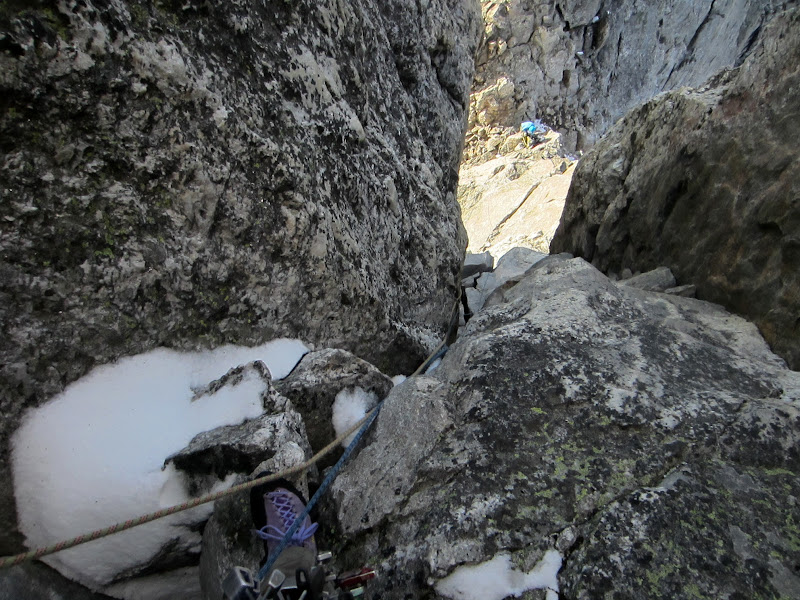
Looking down the P13 OW crux. You could continue to the top of the ridge, but I stopped here for better hauling.
A few weeks prior I had climbed Sun Ribbon Arete on Temple Crag with a 40 lb pack and 10 lb rack (durr), and there I had learned to lighten my pack, gotten in shape to lead pitch after pitch of 5.7 with a heavy load, and I also tried out for my first time how to haul a pack alpine-style (which I did on the 5.10a left var. crux pitch), so by this time I had my improvised system down, which went as such:
1. Put your follower on belay in guide mode and belay them up to the hauling point. Back up the locked off device with a knot.
2. Clip the hauling line through the highest piece in the anchor (assuming it is solid) as a redirect.
3. Tie a sling as a prussic knot onto the hauling line, clipped to the highest piece, to act as a ratchet. Also, if the packs are heavy, tie another sling onto the hauling line as a prussic with a long loop to act as a foot pedal (Basically, spectra slings grab onto my double ropes better tied as prussic knots than Klemheist knots.)
4. Pump away on the foot pedal while holding open the ratchet prussic. Ideally, the foot pedal is long and has a knot or two tied in it so that you can start high, and move up onto the higher step to maximize the hauling distance in one round.
5. Once your body is as low as you can go below the anchor, let the weight transfer to the ratchet prussic and reset the foot pedal.
I found that I can haul packs faster than my partners could follow, so this seems to work pretty well!
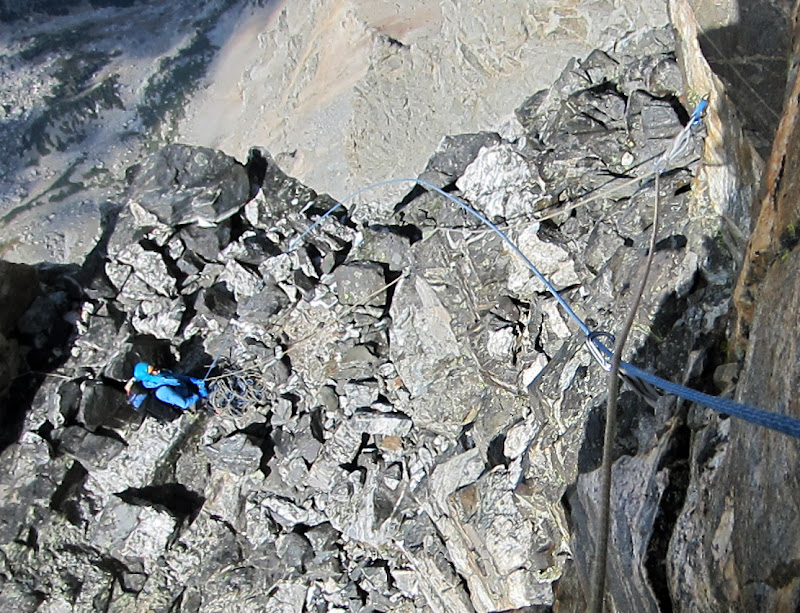
Visit on ggpht.com
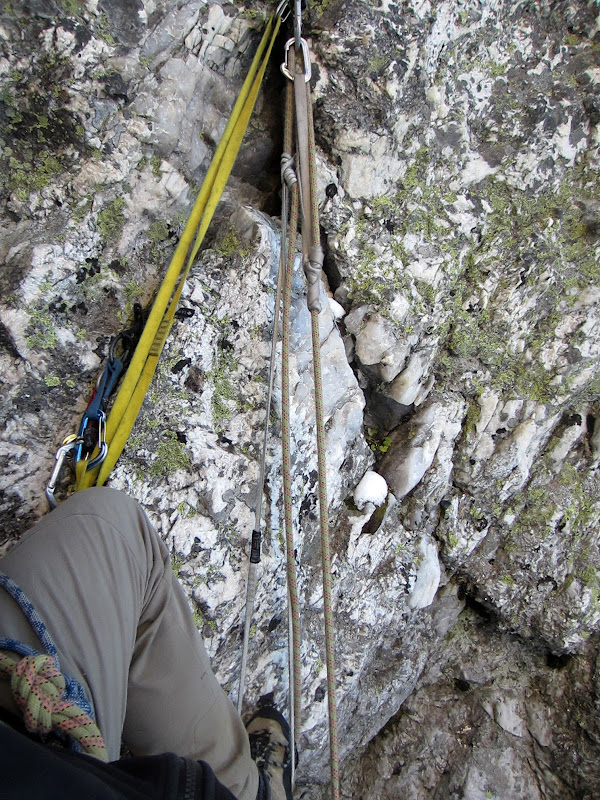
Alpine pack hauling. This was my third time doing this. I think I'm getting the hang of it!
I hauled Steph's pack first until it got stuck in a roof. I then left it hanging on the ratchet prussic, and had enough slack to toss down a coil and haul my pack using a second ratchet prussic. Steph clipped the loop free to a carbiner on my pack, which gave me a 2:1 hauling advantage on my pack, so I easily hauled it up and over Steph's pack until the ice tool on the back caught the next little roof (doh!). I then belayed Steph up until she could free the packs, after which I backed up her belay and continued hauling (note: This is why you DO NOT use your belay device in guide mode for the ratchet system when hauling packs on an alpine climb).
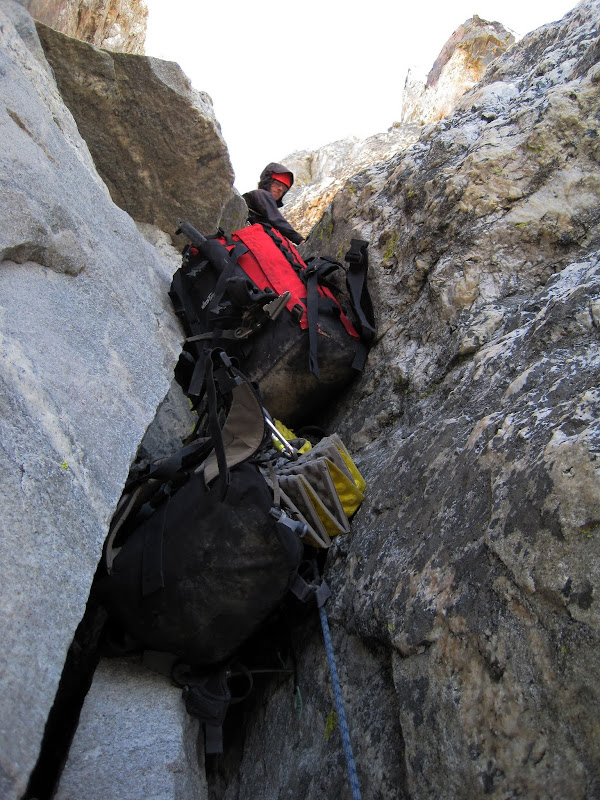
Visit on ggpht.com
Alpine pack hauling sucks, especially with ice tools on your pack. This is why you maintain the ability to belay your second and then secure them mid-pitch. (by Steph Abegg)
Visit on ggpht.com
Alpine hauling Billy. (by Steph Abegg)
Since Steph doesn't like chimneys and OW (despite climbing Steck-Salathe), she pulled on my draw to get the crux over with and joined me at the intermediate belay ledge. From there I put my pack back on (ugh), and took off a far a my rope or rope drag would allow.
Visit on ggpht.com
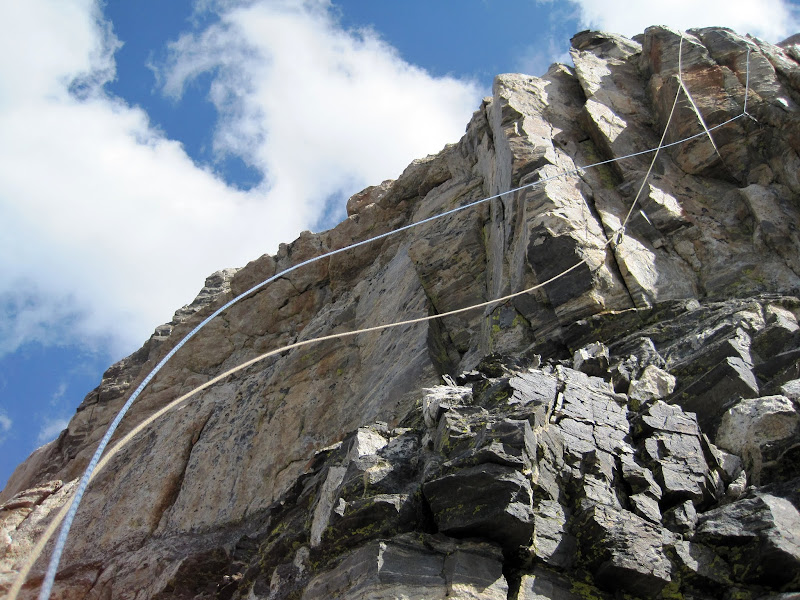
Leading the last part of P13 (our P14). It's about 5.6. (by Steph Abegg)
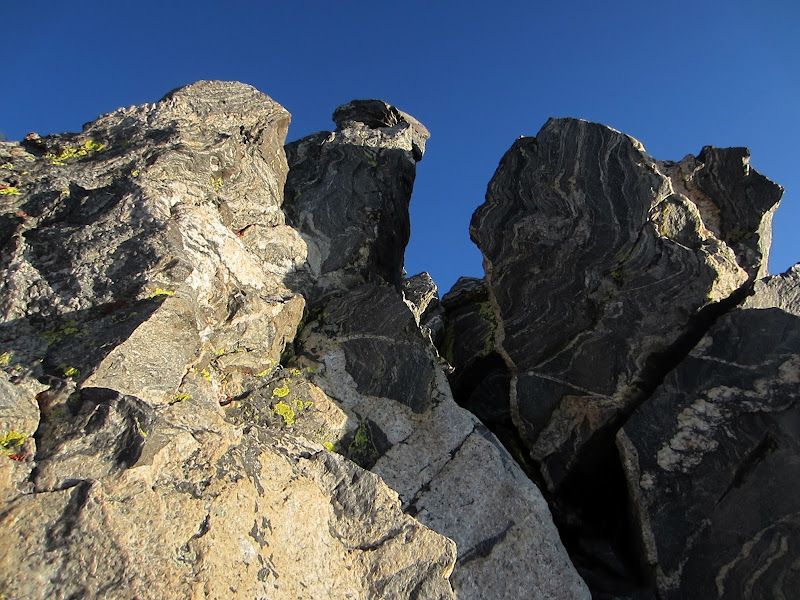
Visit on ggpht.com
Cool rock along the summit ridge on P14.
The route info vaguely says that after the 5.9 pitch you intersect the Koven route to finish. There actually is some distance left to do this, on terrain that was nice to still pitch out.
Visit on ggpht.com
Nearing the end of P14.
Visit on ggpht.com
Final belay on the summit ridge. (by Steph Abegg)
By the time Steph reached me we could see that we would in no way reach the Grandstand today. Hopefully we could find a spot to pitch our tent, as we didn't have bivy sacks as a backup!
Visit on ggpht.com
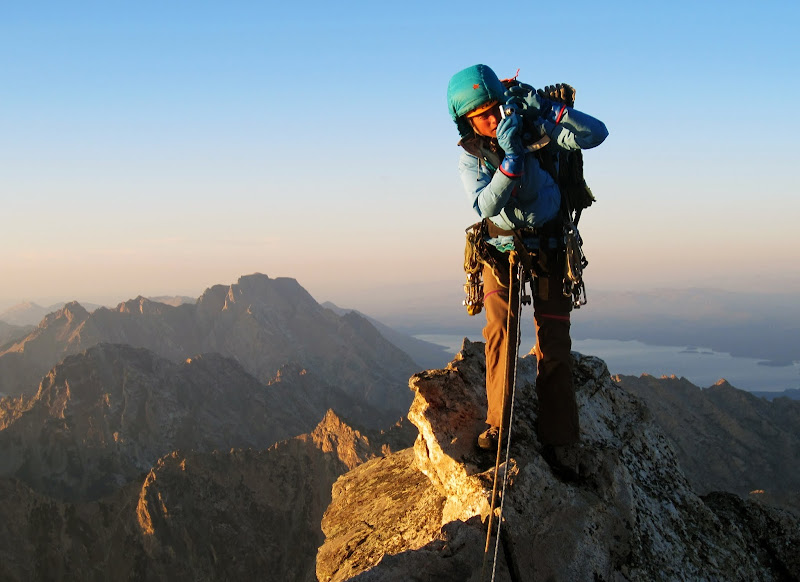
Grand Teton in late day from the Mt Owen summit ridge at the end of Serendipity Arete.
Visit on ggpht.com
More photo tag with Steph on the summit ridge.
We wandered onto so nice ledge where the Koven Route came up, and decided we could make a bivy here work. We left our gear and scrambled the rest of the way to the summit, which is an easy, non-exposed scramble. We went up and left towards a neat rock arch composed of natural voussoirs, and switchbacked right on ledges to intersect the Koven chimney where it was an easy class 3 scramble (it is harder directly off the bivy ledges).

Visit on ggpht.com
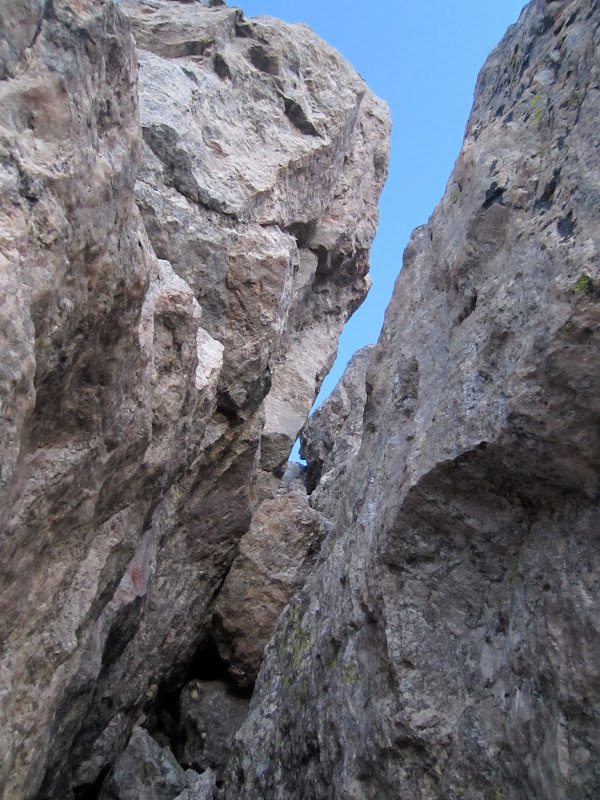
If you see this cool feature, you are on route for the final class 3 scramble to the Koven Chimney.
Visit on ggpht.com
The Koven Chimney seen from the good bivy sites. Don't climb this directly (5.something). Instead, traverse left and then back right to gain the upper chimney (cl. 3).
Visit on ggpht.com
Climbing the Koven Chimney.
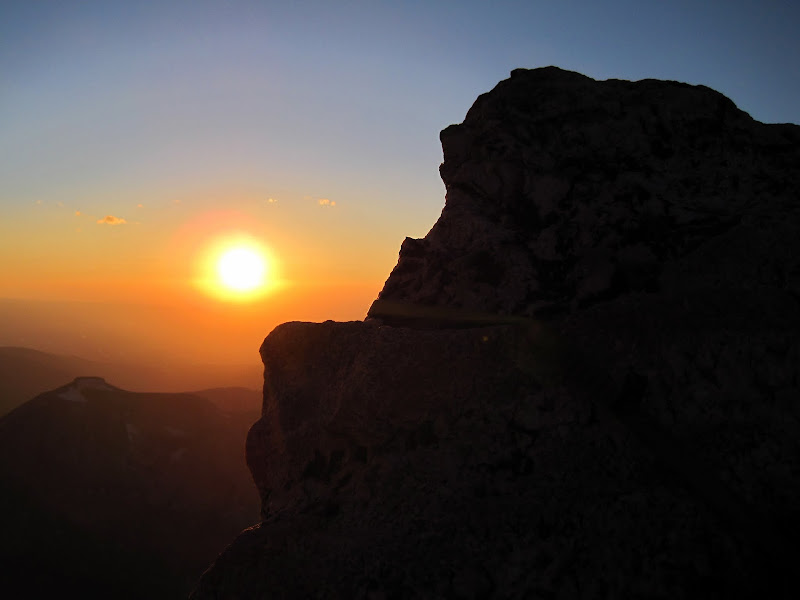
We made it to the summit just in time to enjoy the sunset, then scamper back down to our packs to set up camp.
Visit on ggpht.com
Sunset on the summit of Mt Owen. (by Steph Abegg)
Visit on ggpht.com
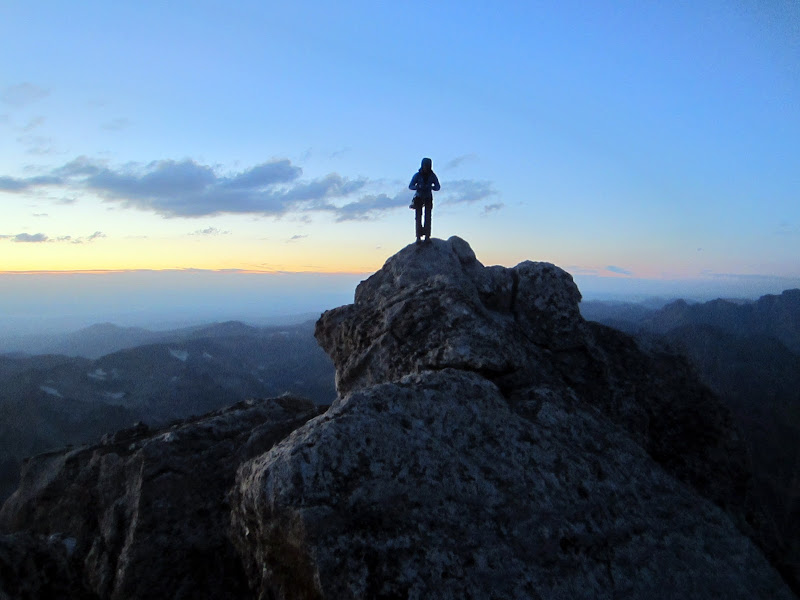
Steph on the summit of Mt. Owen.
Visit on ggpht.com
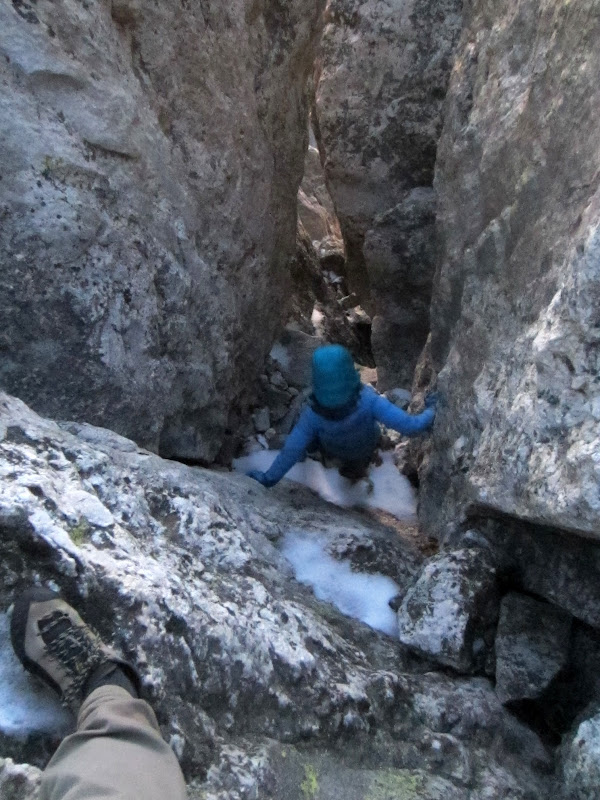
Descending the Koven Chimney. Time to harvest snow for water!
In this case we were fortunate that it had hailed so much the day before, as we had a fresh supply of snow on the ledges and in the crevices to melt for water. While I had my doubts about fitting a tent in the largest bivy site, Steph worked her magic and within minutes we had a platform just barely large enough for the first light. We crawled in, warmed up, and recuperated with freshly melted water and a warm dinner before turning in for the night at the neatest campsite we would have in the Tetons.
Visit on ggpht.com
Night camp on Mt Owen, with the Grand Teton behind.
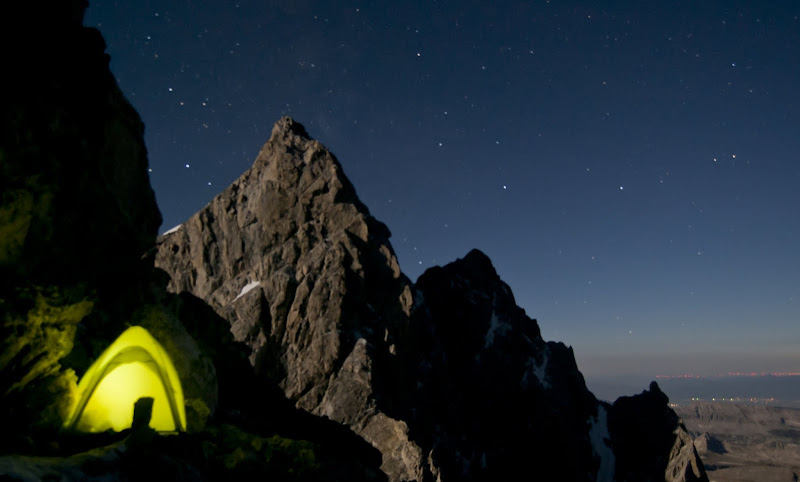
Visit on ggpht.com
Night camp on Mt Owen, with the Grand Teton behind.
Personal Website
Picasa Photo Album
Day 1: Garnet Canyon Approach and the North Ridge of Middle Teton (II, 5.6)
Day 2: Complete Exum Ridge of the Grand Teton (III, 5.7)
Day 3: The Valhalla Traverse (II, cl. 3-4, steep ice/snow, rockfall & icefall hazard)(Carryover Day 1)
-
Day 5: Owen-Grandstand Traverse (II, 5.7, 3-5 rappels)(Carryover Day 3)
Day 6: North Ridge of the Grand Teton (Italian Cracks Variation)(IV, 5.7) (Carryover Day 4)
Day 7: Black Dike Traverse (II, cl. 3-4, moderate snow) and the Southwest Couloir of Mt Teewinot (II, cl. 4)(Carryout Day 1)
Day 8: Mt Teewinot via the Southwest Couloir (II, cl. 4) and East Face Descent (II, cl. 4)(Carryout Day 2)
Day 9: Southwest Ridge of Symmetry Spire (II, 5.7)