This is part of the How to Big Wall Climb SuperTopo book. Videos like the ones above illustrate key points of the book and are meant to be watched while reading the book. Buy the book here or just read this free sample of the text below with photos.
Visit on supertopo.com
Click here to see what is currently on my El Capitan rack.
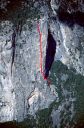
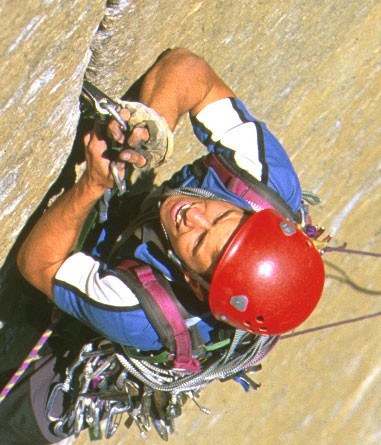 Chris McNamara on The Shield, El Capitan. Credit: Corey Rich |
||
Leading: Placing Gear
Overview
I have some exciting news: you know all that gear you have been placing over the years on trad climbs? If you were like me, you were probably climbing within your ability and not taking lots of whippers. So you never REALLY knew how good those gear placements were. Well, today you get to find help. Today you will stand, bounce, and bounce even harder on that gear. You finally get to rely on all that stuff you have been hauling around over the years.
Skills to Learn
Efficient gear racking and organize, organize, organize.
Bounce test harder than you think.
Maximize your reach.
Try to find the worst possible cam and stopper placement that will still hold your weight.
Essential Gear You Need
Nuts, daisy chains, fifi hook, free biners, gear sling or shoulder-length runners, draws, slings, helmet.
New gear you have earned: cams, nuts, offset nuts.
Optional gear: gloves, self-belay device.
Where to Practice
A 30 to 60-foot crack climb at a 80-degree angle is ideal. However, almost any climb works. My first aid climb was a 30-foot sport climb where I could place tiny stoppers in a seam but still clip bolts to make sure I didnt hit the deck if I fell. Start on top rope so there is no fear of falling. Try as many aid placements as possible. Fiddle around with nuts and cams in as many different ways as possible. Sketchy placements that you would never dare place on a free climb can make suitable aid placements. You will be amazed at what will hold body weight.
Racking Gear
There are two ways to rack gear:
1) For mostly-free walls like The Nose or Salathé, I use a single gear sling. Each cam gets its own biner. Similar sized cams are clipped to each other; stoppers up front. I clip quickdraws in pairs to the harness. Free biners are clipped in groups of five or seven. Lightweight shoulder-length runners go over the opposite shoulder.
2) For mostly-aid routes with a bigger rack I use a double gear sling (I dont like the multi-loop single or double gear slings). On the right side I clip all the cams with the smallest in the front. Each size cam is on one biner clipped at the plastic-coated loop (not the short sewn runner if it has one). Stoppers go to the front. All the biners and draws go on the left side. I clip the should-length runners to the left side of the harness to one biner.
Always keep the rack organized. This may seem obvious but on a big wall there is so much gear and logistics that it is easy to get sloppy and not keep things organized. Spend the extra time organizing. Every minute spent organizing saves two more more minutes on lead. It is especially important to have an organized rack when free climbing so you get the right piece fast and dont hang out, search around, and lose strength. Also, if its a gear-intensive pitch where you will need to ration gear, you want to look down and instantly know what gear you still have at hand.
Reach
Efficient aid climbing is all about reach from one placement to the next. When you have a big reach you have a larger area from which to choose the next good placement. More importantly, the bigger your reach the fewer placements you need per pitch. Even when efficiently aid climbing, each placement will take one to two minutes to deal with. Make 25 placements on a pitch instead of 35 and you save 10 to 20 minutes per pitch. Multiplied by 30 pitches, that is five to ten hours. Also, when you reach farther and leave less gear you will have more options for gear placements high on the pitch. There is nothing worse than using all your good pieces down low and then having to improvise crappy placements up high.
Short people take heartreach is only partially a function of how tall you are. It is mainly a function of how high you were standing on your last piece. And that is all about technique. In aid climbing, a five-foot-tall person who maximizes their reach can place the next piece higher than a six-foot person who does not.
Bounce Testing
The goal in bounce testing is to generate enough force to mimic a small fall. Proper bounce testing is essential for safety, peace of mind, and speed. If you dont properly bounce test
Two Types of Bounce Testing: Aider and Daisy
Aider bounce testing is where you put one foot in the piece you are testing while keeping the other foot on the previous piece. Another technique is to bounce on the piece using just the daisy chain. On most routes I use Aider bounce testing 80 percent of the time and daisy 20 percent.
Pros to Aider Bounce Testing
Pros to Daisy Chain Bounce Testing
In general, the bounce of each piece has three stages: light, medium, heavy.
At first, vigorous bounce testing feels counter-intuitive and scary. After all, you are aiming to get a piece to failsomething you hope wont happen if you actually fall on lead. One mental trick I use is to convince myself I am trying to get the piece to pull out. If I am in A4 or A5 terrain and scared I occasionally resort to yelling at the piece to Get out! If after screaming at the piece and hard bounce testing it is still in place, I feel confident I can move up on it.
Read the rest of this chapter in the How to Big Wall Climb SuperTopo book
Visit on supertopo.com