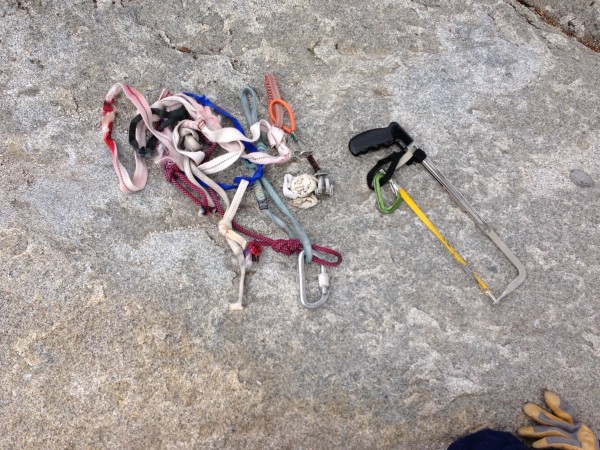
 Our booty haul Credit: Chris McNamara |
||
Maintaining the Big Stones
by Chris McNamara
Youve spent months getting psyched and set for a classic grade sixer. Youve gotten all the beta, heard all the stories and gotten up the nerve to go for it. Halfway up, on the crux lead, you discover something that wasnt mentioned in the heroic first ascent account: every type of rusting and fraying fixed mank fills the crack for as far as you can see.
What next?
If you are like too many wall climbers you swallow hard and decide to trust the shaky fixed gear. After all, you know that most climbers resign themselves to the fact that trade routes will always have their scary mankfests. But it doesnt have to be this way. If wall climbers would use a few quick and easy techniques, even todays over-traveled routes could be returned to the beautiful classics they once were.
But first lets face the sad fact that a great deal of fixed gear shouldnt be there at all. It should have been placed, then removed. All too often the reasons it wasnt removed are either that it wasnt placed properly by the leader, or the cleaner lacked the most important tool for removal, which is patience.
So there it is, a long line of ancient cams, stoppers, pitons, rivet hangers, fixed ropes and webbing. Here is how to deal with it:
Cams & Stoppers
A cam becomes fixed when either it is buried too far in a crack or one of its trigger cables breaks. Removing cams usually takes the most patience and necessitates a subtle and delicate technique, but there are a few tools that can help. The friend of a friend is one device for capturing fixed cams. It cant remove them all, but it works well with buried cams. For cams with broken triggers, needle nose pliers are best to manipulate the frayed wires.
Using a hammer to remove a cam rarely works, yet a surprisingly number of people resort to this. The result is usually the same, a temporarily fixed piece becomes permanently fixed and useless. Seeing a fixed pin is an eyesore but seeing needlessly fixed cams is a nightmare.
A nut tool and a little patience remove ninety percent of fixed stoppers. For the more stubborn pieces, a thin piton and the gentle use of a hammer or carabiner may be required to loosen the stopper so that a nut tool can then fish it out. Again, when using a hammer, the key is to be delicate or you may end up fixing the piece even further.
Pitons
Pins are one of the most commonly fixed pieces and also one of the more avoidable. Welding your pins to the rock may help assert your vision of conquering the big stone, but is expensive and a quick way to get on your cleaners bad side. Also be aware of certain pin traps, placements where it is not possible to remove them.
The first step to cleaning a fixed pin is to find out if it can be cleaned or not. If after a few hammer blows the hammer springs back at you and the pin doesnt budge, it is probably best to leave it. If the pin indicates that it will come out, it is best to focus the blows upward so that the pin scar will be more likely to accept a clean placement in the future. A few winters will usually loosen most fixed pins. If, however, you break the eye of a pin that wasnt ready to be cleaned, it will probably never budge, no matter how many winters pass.
Be especially careful of rurps. It may seem harmless to give the rurp one jerk to see if it can be cleaned, but once multiple parties test pieces this way the cable becomes weaker and eventually breaks.
One trick to dealing with rurps with broken cables is to girth hitch the cable of a number #0 stopper though the eye. Carrying a mini hand swager may seem a bit much, but in the state that many rurps are today, dont be surprised if more people start to bring them.
Rivet hangers
Rivets without hangers can be tricky to deal with. The threads of machine heads will cut right through webbing if you fall and rivet hangers often slide off. To solve this, many parties cinch rivet hangers shut, then hammer closed the uncrimped swage. This is fine until the cable becomes rusted, at which point a thin lost arrow is needed to break the cable. The better thing to do is invest some money in keyhole hangers, which are stronger and reusable.
Fixed Ropes and Webbing
The most noticeable forms of fixed gear to non-climbers are fixed ropes and webbing. Leaving a rope fixed to lighten your load creates a dangerous situation and is littering, which incites the anti-climbing forces.
Leaving fixed webbing should also be avoided, especially on rappels where chains are more durable and less visible. It is not a bad idea to take a knife to cut away tattered webbing at lower out points so your cleaner knows that what is left is good.
Old broken bolts and rivets
Those who still trust their lives to 1/4 bolts should try replacing one someday. Youll be amazed how even solid looking quarter inchers are usually corroded on the inside and how a few winters can reduce the pullout strength of these bolts to a few hundred pounds.
Carrying a solid bolt kit and knowing how to properly replace old broken bolts and rivets without drilling new holes is a skill that every wall climber should learn. It should be made clear, however, that a drill should only be used by someone who knows what they are doing and only if the proper gear is placed. In Yosemite, 1/4 by 1.5 button heads for rivets and stainless steel 3/8 x 2 1/4 for anchor bolts are the standard. If you do not have the time or just dont want to take the time to place bomber gear, do not add just one more pathetic bolt or rivet.
Copper Heads
When to Clean:
Heads should be cleaned whenever they become old and weakened, chiefly when they have a cable that is either a) partially ripped out of the head or b) browned with rust or c) frayed. If you gently weight a long string of these and do not have your partner clean them, inevitably someone takes a huge fall during which the cables usually break, leaving a string of deadheads.
When not to clean:
Copperheads should never be cleaned when they are solidly placed. If everyone who climbed the Zodiac were to clean the heads it wouldn't take long before the placements became blown out and useless.
You should also avoid removing heads in fragile features. The forces exerted on the rock when cleaning and placing heads are often enough to release a fragile expanding flake, leaving a blank section for the next party.
Above all, if you are unsure about the clean ability of a head, leave it. Blowing out a placement or damaging the cable is the easiest way to make enemies among future ascentionist.
The Technique:
Contrary to popular belief, a funkness device is not the way to clean copperheads. The problem with a funkness device is that much of the force is put on the cable, which is often weaker than the bond between the copper and the rock. Therefor, funking a head often results in breaking the cable before the head comes out, thus leaving a deadhead. The way to avoid this and concentrate all of the force on the head itself is by using a punch (1/8 tip, 3/8 handle). Start by tapping the punch between the rock and either the top or bottom of the head. Then lever the head out by tapping the end of the punch into the wall.
A similar technique can also be done by using a bird beak. Tap the beak behind the head, then lever the head out by pulling out on the bottom of the beak. The problem with this is that it generally takes more time and wears down the beak. As a last resort a thin arrow or chisel may work especially for deadheads with all the cable removed. Yet these tools are far less efficient and destructive than the beak or punch and should be used only as a last resort.
Whatever method you choose be sure that once you have started cleaning a head don't stop until has been removed.
The Cheat Stick
It used to be that those who carried cheater sticks were singled out and slandered. Yet lately they have become so popular that a few climbers believe they are mandatory on Yosemite walls. Just understand that although you may feel safer by cheating past one piece of fixed mank, you never know exactly whether the next piece you are clipping is any better. Indeed, some of the recent and more colorful aid falling stories have involved cheat sticks and what are you going to do if you drop it?
That said, if a cheat stick keeps you from nailing - use it.
If there is any one thing to say about fixed gear it is dont trust it. This may sound obvious yet it is amazing how many people save time on routes by just clipping the fixed gear for pro. While this attitude works sometimes, you are setting yourself up for a big ride. Use fixed gear to save time but dont let it sacrifice your safety.