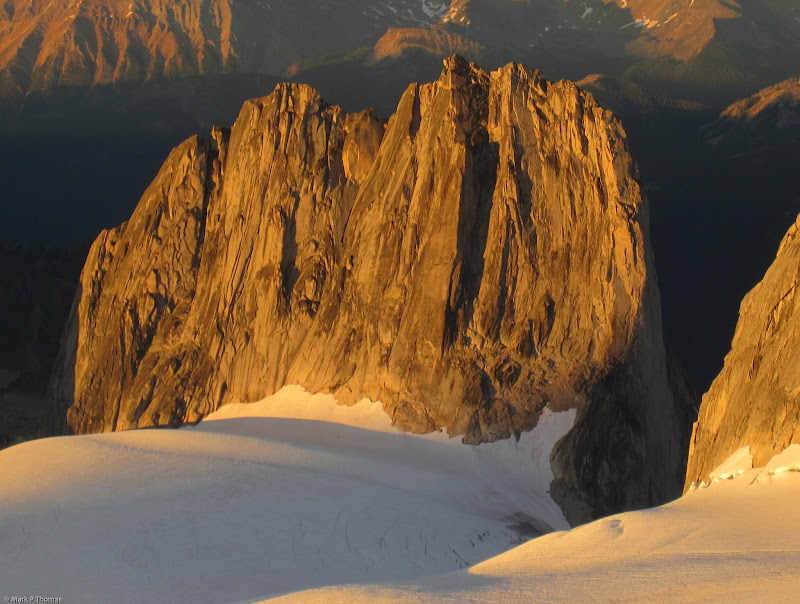
 Alec traversing out on the crux 5.10 face traverse of P18. Alec was too high earlier and found it easier to finish the traverse a little lower here. I found the real crux to be where he is at here, turning the corner. Credit: PellucidWombat |
||
July 31, 2013
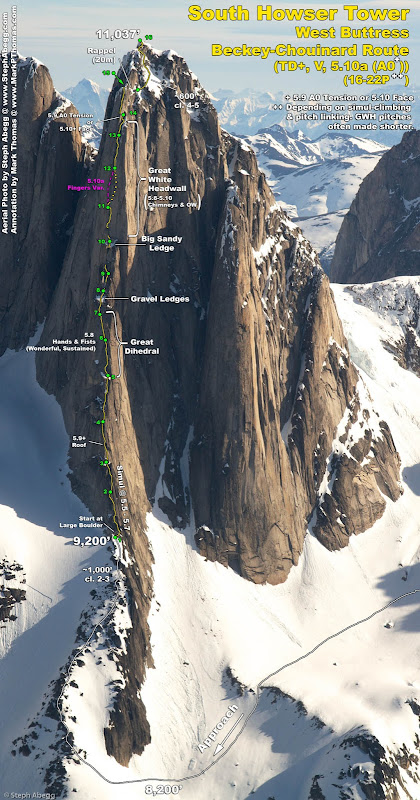
Although poor weather in the Bugaboos had changed my plans with Alec for us to stop by Gimli Peak on our way in, the storms had passed and we had a brief, but solid, weather window. The famous Beckey-Chouinard Route on South Howser Tower (V, 5.10, 19 pitches)was our main objective, and while ideally we would have warmed up on something easier like Bugaboo Spire, we had a perfect multi-day weather window that we couldn't afford to miss.
We stopped and stayed at the hut the first day hiking in, as a heavy rain and sleet storm began just as we reached the Kain Hut. The second day we set up camp at Applebee Campground and traveled over to climb the classic West Ridge of Pigeon Spire on our way to setting up our bivy near South Howser Tower. We decided to bivy rather than a camp-to-camp push as Alec was wary of how much energy he'd have for such a long push, and I was wary of how well my damaged knee could take such a large day (this year I have found that breaking up approaches & climbs helps a lot).
It took us about 2-3 hrs to descend to the toe of the ridge and scramble the first 1,000 ft to the base of the first roped pitch. From there we had many pitches of climbing consistently at 5.8-5.9! The only other people we saw were a guide and client who passed us, but otherwise we had this spectacular route to ourselves on this fine sunny day. It took us 12:45 hrs from the first roped pitch to the summit. We summitted with just enough time to do the 10 rappels for the descent before dark over 2:25 hrs, and reached our bivy just before we needed to turn on our headlamps. 19 hrs of fun!
The timing was perfect as that night it rained on us, and the weather stayed off & on rainy for the next few days.

Visit on googleusercontent.com
Annotation of the route on an aerial photo taken by Steph Abegg on a flight with John Scurlock on September 24, 2011
Visit on googleusercontent.com
Annotation of the route on an aerial photo taken by Steph Abegg on a flight with John Scurlock on September 24, 2011
Visit on googleusercontent.com
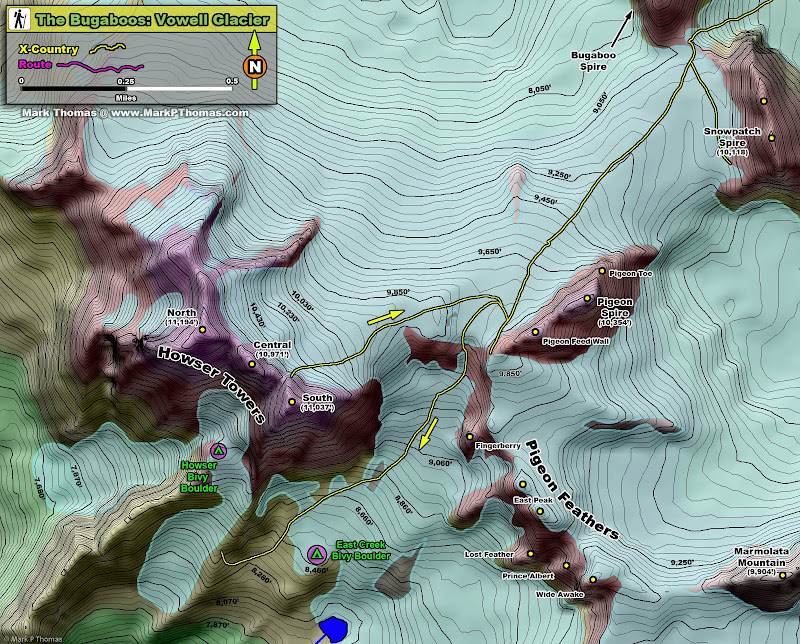
Map of the Howser Towers and areas accessed from Bugaboo-Snowpatch Col
This is a big route and requires an early start. We left our bivy at about 3:30am. In the dark we had to be careful to descend into East Creek through the right chute, and scramble up at the right spot to gain the ridge, but it all fell together easily enough with careful routefinding. We downclimbed some loose cl. 2-3 boulders from the col, then down a 25-30 degree snow slope for a short bit before things leveled off. Then it was mostly a gradual downhill stroll until we could identify a slope leading up to the ridge crest. From here the scrambling was mostly cl. 2 with occasional cl. 3 bits through large boulders, with maybe one cl. 4-5 part (I was lazy with routefinding). Our timing was just about perfect as we got to the base of the route at first light. By the time we were roped up and ready to go, the rock was barely warm enough for reasonably comfortable climbing.

Visit on googleusercontent.com
Alec ready to climb the B-C!

Visit on googleusercontent.com
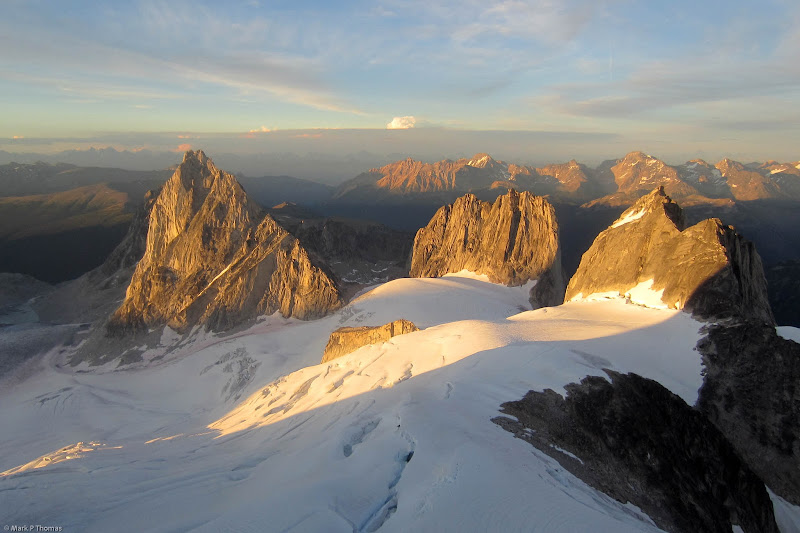
Sunrise at last illuminating peaks to the SW. Flattop Peak, Flattop SW1, Crossed Fish and Little Snowpatch
Visit on googleusercontent.com
The first roped pitch of Beckey-Chouinard starts here and goes to the right around the giant boulders. I recommend simul-climbing the first two pitches. (the topo considers the 1,000' scramble to the start as P1).
To speed things up, we simul-climbed the first two pitches, which helps a lot to get high fast and to establish momentum for the day. There is one part of slightly insecure 5.7, but otherwise it is pretty easy.

Visit on googleusercontent.com
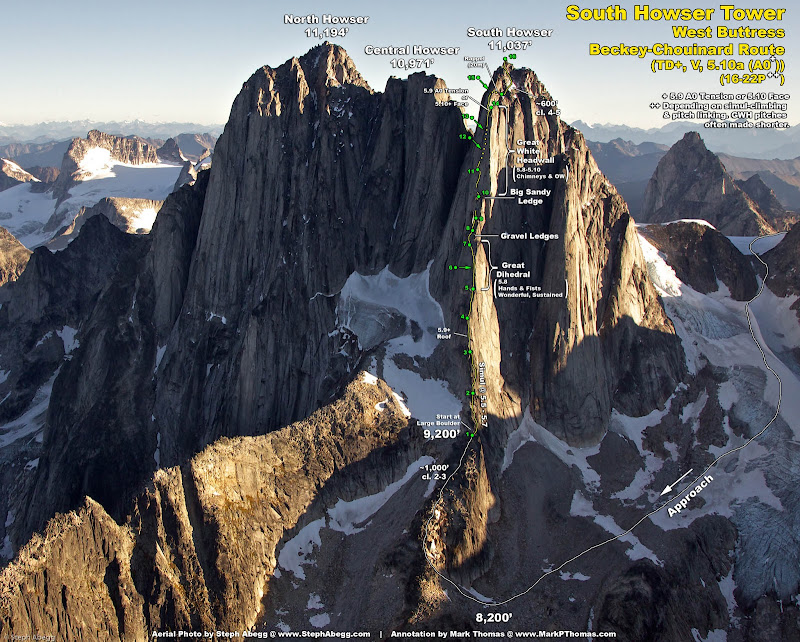
Beckey-Chouinard Route on South Howser Tower. The 5.9-5.10 roof ascends the first tier, then the Great Dihedral makes up the second tier, and then the route wraps around the backside of the Great White Headwall above. Perspective greatly distorts scale from this view!
We roped up for P4, which was one of the crux pitches, with insecure and thin face climbing and flaring seams to start, and then a burly roof to climb over. It sucked following this with the bigger pack on, but perhaps it was better than Alec following the wide pitches with it!

Visit on googleusercontent.com
Alec just past the 5.9-5.10 roof on P4.

Visit on googleusercontent.com
Alec just past the 5.9-5.10 roof on P4.

Visit on googleusercontent.com
Looking down the route from atop P4. Below a guide and client are racing up. They gracefully passed us as we finished the Great Dihedral and reached the big sandy ledge.
Around this time we heard voices from below and saw another party gaining on us. We were surprised, as we never saw their lights following us on the glacier, and we thought we were moving very fast. Oddly, the leader only had a small daypack on, smaller than either of our packs, and the follower wasn't carrying anything! Because of this, and the extreme efficiency of the leader in setting up anchors and belaying, we assumed it must be a guide and client, which proved to be the case.

Visit on googleusercontent.com
Following up P5 (5.8). The rock was still a little gritty and flaring here, but it would soon clean up and turn to splitter jam cracks.

Visit on googleusercontent.com
Beckey-Chouinard Route on South Howser Tower. The Great Dihedral (below) and the Great White Headwall above really stand out. Perspective greatly distorts scale from this view!
Alec finished his block of leads, and next it was my turn. I was looking forward to climbing without that bulky pack, and I was even more eager to climb the Great Dihedral! It looks so nice and lived up to its reputation as a fantastic series of sustained pitches. Getting into it was a tad tricky, with a number of ways to go on broken terrain below. Then I climbed a thin crack before traversing right on a slab to gain the corner. I think Alec ended P5 a bit short, which left me at a small but OK alternate belay shortly above where I gained the corner in the dihedral.
Visit on googleusercontent.com
Leading P6, climbing a little 5.7 tier to enter the Great Dihedral. Above I had to do a little face climbing traversing between cracks to reach the corner.
Visit on googleusercontent.com
The Great Dihedral. 300 ft of fun and sustained. 5.7-5.8 hand jams. I led nearly the entire thing as one long pitch. Lots of leapfrogging cams! Especially #3 C4s. It reminded me of an easier version of Mithral Dihedral.
In an attempt to get the dihedral done in as few pitches as possible, I mostly climbed out the full 60m available to us, rather than stopping at the alcove belay. The alcove belay is VERY comfy, BTW, and while doable, my partially hanging belay just beneath the final lieback was awkward. The alcove belay is just beyond the large roofs in the photo above.
Visit on googleusercontent.com
Beginning the first real pitch of the Great Dihedral. P7
The Great Dihedral is sustained 5.8 at mostly fists in a leaning corner, with occasional sections of thinner hands or mild OW (#4 camalot was nice). What also kept it interesting wast that one was constantly surmounting little steps and roofs, with easier terrain in between where rests could be had. Because the crack was so consistently at a #2-#3 camalot size, I did a lot of leapfrogging as I went to keep it chill without running out of gear.
Visit on googleusercontent.com
Never ending corner on the Great Dihedral. P7

Visit on googleusercontent.com
Never ending corner on the Great Dihedral. P7
I had gotten so close to the top, just one last little roof and I would be on a nice ledge in the sunshine! But alas, by skipping the alcove belay, I ran out of rope about 20' short. Aw well, at least the belay gave me a nice view of the others following.
Visit on googleusercontent.com
Looking down the Great Dihedral from just below the top. P7
Visit on googleusercontent.com
Alec following up one of the wider sections of the Great Dihedral. The guide is below him at one of the standard belays - a very nice ledge. P7

Visit on googleusercontent.com
I just barely ran out of rope below this final lieback-stemming crux at the top of the Dihedral, so I set up a semi-hanging belay. The guide and client passed us here as Alec followed up to the belay and continued on to the large bivy ledge. P7-P8
Visit on googleusercontent.com
Guide and client atop the first of two short pitches (P9 & P10) that take one from the lower to upper big bivy ledges. The Great White Headwall is above.
Once we reached the Gravel Ledges, Alec and I regrouped for a little lunch while we waited for the guide and client to pull ahead a little but. The guide said he had climbed this route numerous times and for us to not worry - he'd dispatch leads about 15 minutes a piece.

Visit on googleusercontent.com
Guide atop P10,with the follower about to start the supposed 5.9 wide and squeeze. I really didn't find this pitch that hard, but it was pretty fun!
This held true until the wide pitches, where he and the client slowed down. The client especially had trouble following the 5.10 fingers, but fortunately at that point I was choosing the wide variation, so I just climbed out beside her, and they gained ground above us as we wriggled in the wide.

Visit on googleusercontent.com
Lovely cracks on the Great White Headwall.
Visit on googleusercontent.com
Beginning the first wide part of P11. This is solid #4 C4 size. Alec liebacked it (easier with the pack). I torqued my feet and armbarred up the crack, sliding the #4 C4 as I went. Above is a squeeze chimney before it cuts right onto a crack on the face. Make sure to take the #4 with you for higher up!
I thought the ratings on this route were strangely inconsistent. For example, P11 is listed as one of the crux pitches, with it being a wide crux. I found it very easy, while the upper 5.8 OW and chimney pitches seemed MUCH harder.
Visit on googleusercontent.com
The second part of P11. Fun wide fists before the easy stepover below the OW.
I found the stepover to be straightforward. Some topos called this part out as the second crux on the pitch, but I disagree.

Visit on googleusercontent.com
Looking down from atop P11. We're getting pretty high! The ridge was first gained just below the horseshoe-shaped bit of snow on the left. Note the bivy rings on the big sandy ledge below.

Visit on googleusercontent.com
Alec getting ready to follow P11. This pitch was pretty steep and just under 60m.
Alec liebacked the lower wide crack, but the last half of the lower step is a 5.7-5.8 squeeze chimney, so there he dropped the pack on a line and trailed it. Smooth transition, then back to jamming!

Visit on googleusercontent.com
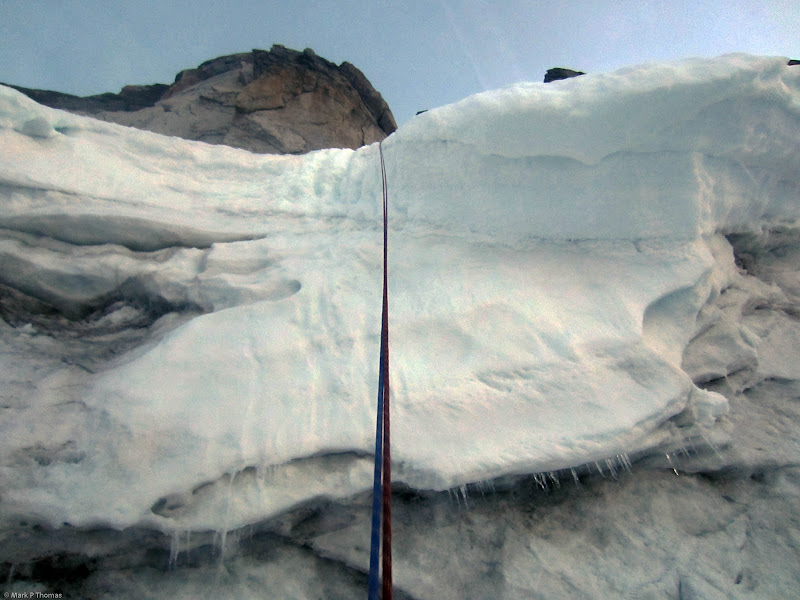
Interesting glacier cave and ice flow contours.

Visit on googleusercontent.com
Guide and follower ascending the 5.10 finger crack variation of P12. I took the OW & chimney to the right, unknowingly linking 2-3 pitches into one long mega-pitch!
The client was having difficulty on the 5.10a fingers and normally we would have had to wait on them here, but we had other ideas in mind - that dark, wide corner on the right! I'm still not sure how one should climb in to it. There are two options, both of which require climbing a ways off of the belay without any pro:
(1) Climb up to the first ledge above the belay (5.7?) and do a long traverse on a ledge to the right, where the wide crack from below continues. Plug in a #4 Camalot, plug in a leg, and resume climbing up!
(2) Climb higher, to the second ledge, and traverse a thinner sloping friction ledge into the chimney system about 8-10 ft higher, before first pro. This option was probably easier, technically, but seriously runout!
I took option 1 and found it to be the crux of the wide on the route. #4 camalot forever, in an irregular crack, so I had to take it out for each movement. Rests were tough, and I couldn't quite plug myself all the way in, but it was also hard to unplug myself with finesse. Very strange, awkward, and tiring climbing. I was very happy once I reached the chimney were I could rest and leave some pro behind me!
Visit on googleusercontent.com
Looking down after the first OW (P12). It was surprisingly tough! The #4 cam was tipped out a lot of the time.
From here it was mostly straightforward until the next OW.

Visit on googleusercontent.com
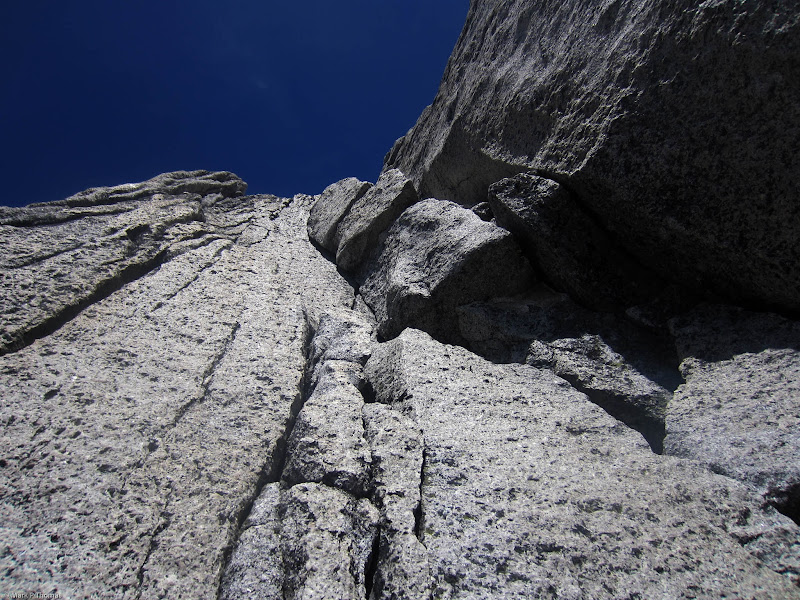
Looking up the next section (P13)

Visit on googleusercontent.com
Looking down from the crux OW (P14) at the little roof and chimney climbed just before. You can see Alec at the start of the pitch.
Visit on googleusercontent.com
This OW (P14) was pretty tricky and often too wide for the #4 C4. Fortunately every now and then I could get a nut or C3 in the thin crack on the left, which also occasionally provided some stemming rests.
This OW was strange. It reminded me of P2 on Reed's Direct in that it has a lean to it, and you are climbing a bunch of half-diamond-shaped holes. Except on this one, the holes were large enough to slot a leg into, and the pinches were too narrow to slide the leg through, so I had to do a lot of coming out, sliding in, coming out, over and over to move up. I also had to take the #4 camalot out for each resetting. Eventually the hairline crack on my left opened up for an occasional thin nut or C3 to leave as a backup! Sometimes I could stem it or some face features, especially higher up where I was getting tired and needed more of a break from the wide crack.
This long endurance-fest ends with another tricky roof-chimney combo, and then a very nice belay ledge in the sun.
Visit on googleusercontent.com
Looking up P15-P16 This was a nice break from all of the tough wide below! I had unknowingly linked pitches to get here, which saved a lot of time, but left us surprised about the next pitch, which we thought was 5.6 but was really 5.8-5.9!
Visit on googleusercontent.com
Leading easy terrain on P15-P16
Visit on googleusercontent.com
Reaching the crux on P15-P16 You must ascend a nice hand crack on the left wall into a tight squeeze chimney before a final 5.6 hands and fists corner.
Visit on googleusercontent.com
The final fun hands and fists section of P15-P16. About 5.6.
On the next pitch, the corner had a lot of loose blocks that were hard to avoid, so I traversed far out right on an easy ledge, then back left higher on a crack while walking a cam (about 5.6?). This avoided the blocks and was pretty easy. Another short corner farther and suddenly I was in a notch that dropped off to a void behind! This was not at all what we were expecting from the topo.
Visit on googleusercontent.com
The notch you reach at the crux face traverse (to the left behind). I reached this unexpectedly as we had unknowingly linked pitches below, and at first I was worried that we were off route!
I spent some time searching around and looking at the topo, trying to make sense of where I was. Could I be off route. Looking to my left, things looked familiar, and I realized that I was already at the 5.10 face traverse! It turns out the topo we had been using had assumed climbers would be breaking up the wide pitches into shorter ones, and by still doing close to 60m pitches, I had inadvertently linked a number of them. Unfortunately that meant that I led some of the pitches that were to be Alec's. Sorry!
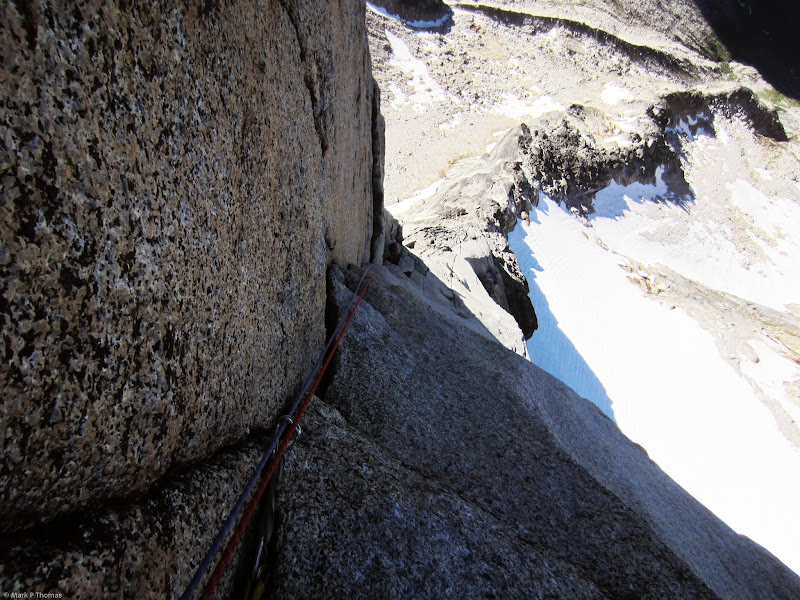
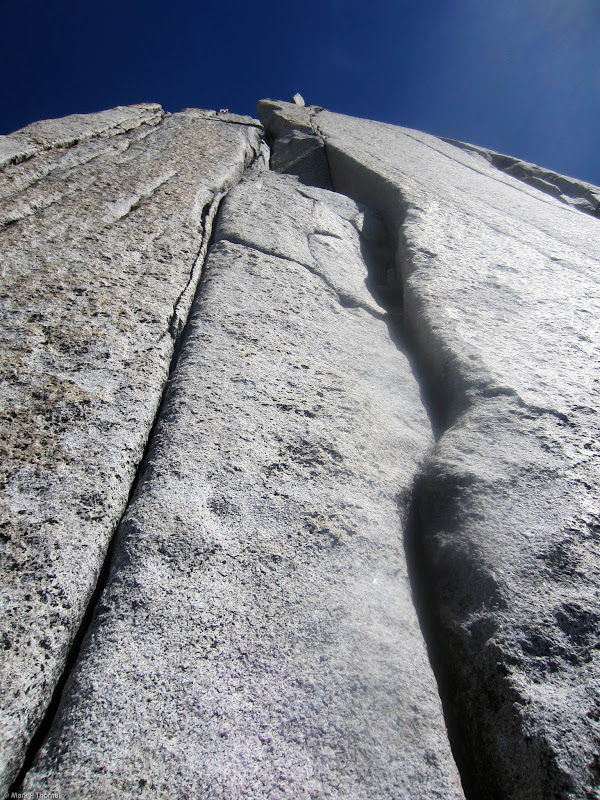
This final crux section involves either a C0 tension traverse with a 5.9 move to turn the corner, or a thin face traverse, once again with the crux being turning the corner, at 5.10a/5.10+/whatever. Some people thought this part was easy, and each topo had a different rating. I'd call it more towards 5.10+, but then again, I suck at face climbing. While the pitons seemed pretty good, this traverse is still a bit dicey as the leader would take a large pendulum back into the corner if they fell at the crux, which is a ways out. It isn't so bad for the follower if the leader takes car to flip the rope and not place pro for a while on the easier terrain in the gully.

Visit on googleusercontent.com
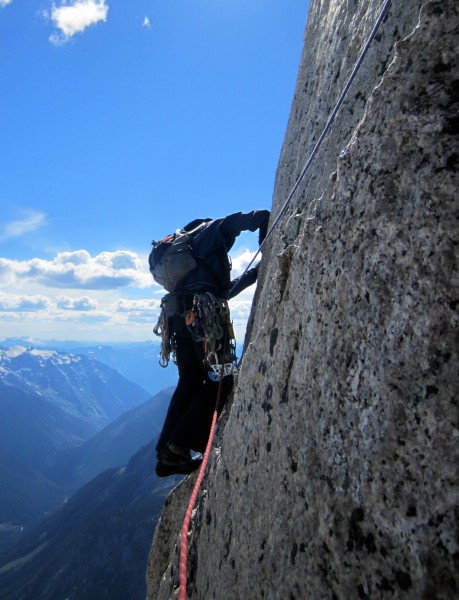
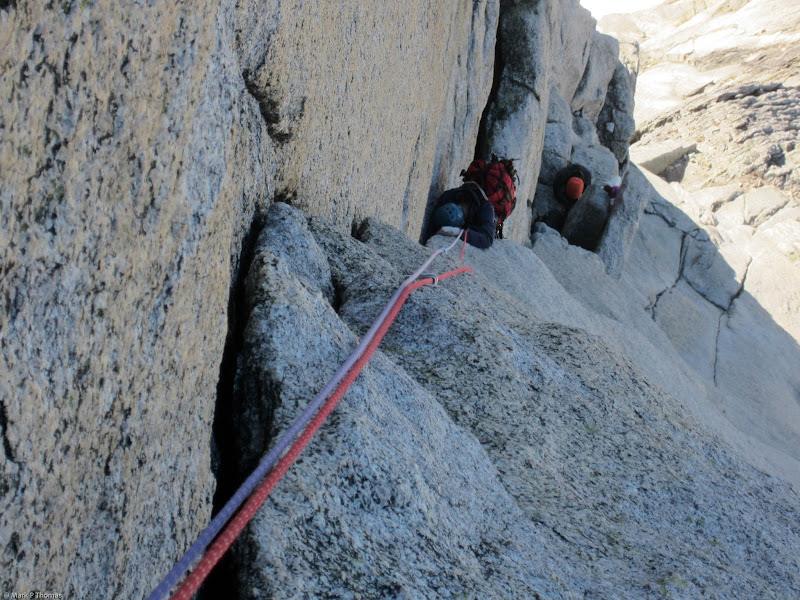
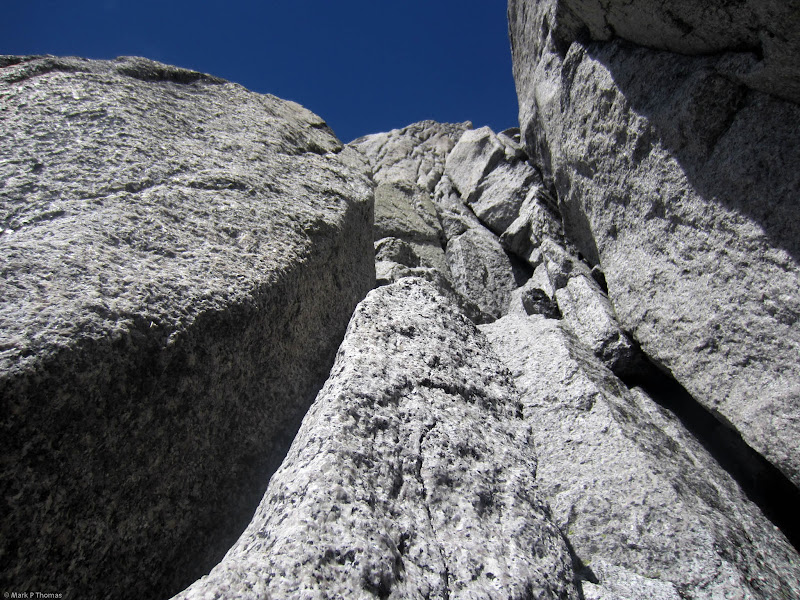
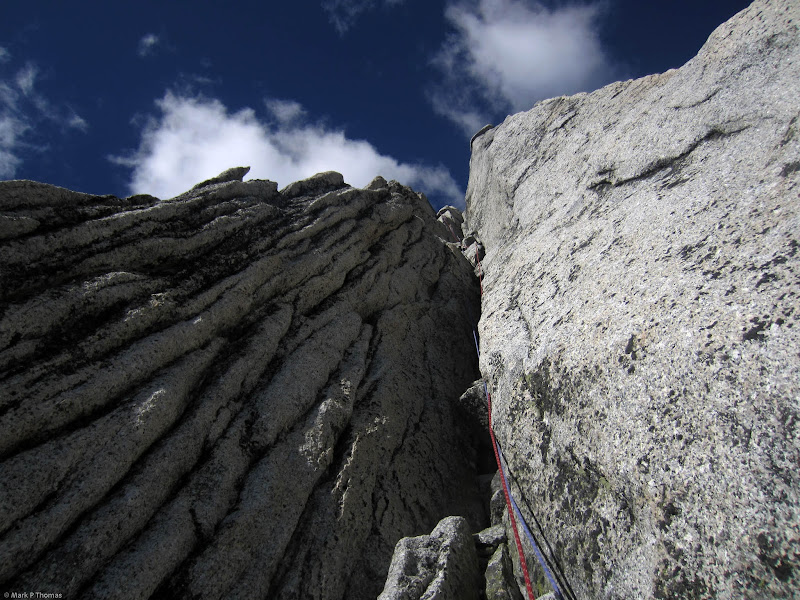
Alec traversing out on the crux 5.10 face traverse of P18. You can see the lower-out tat on the piton on the right. This is the only pro for the entire crux traverse. Alec is too high here and found it easier to finish the traverse a little lower.

Visit on googleusercontent.com
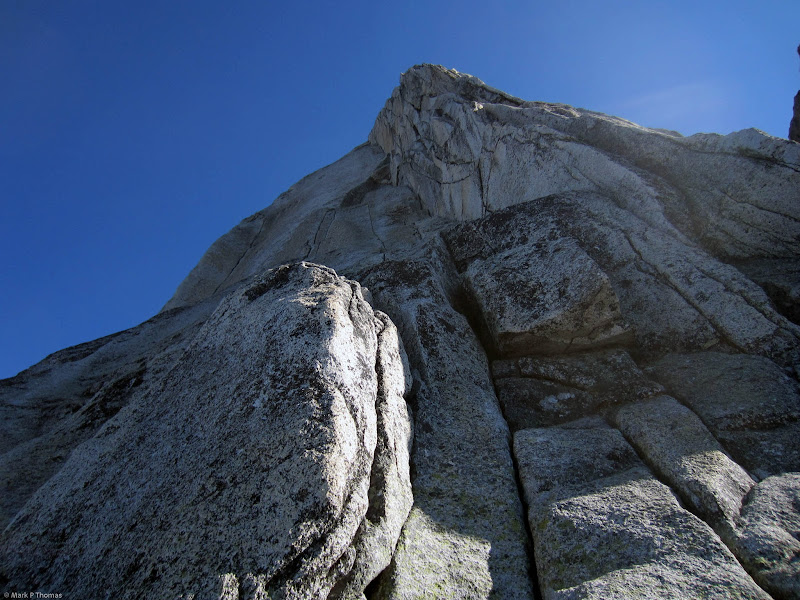
Alec traversing out on the crux 5.10 face traverse of P18. Alec was too high earlier and found it easier to finish the traverse a little lower here. I found the real crux to be where he is at here, turning the corner.
Visit on googleusercontent.com
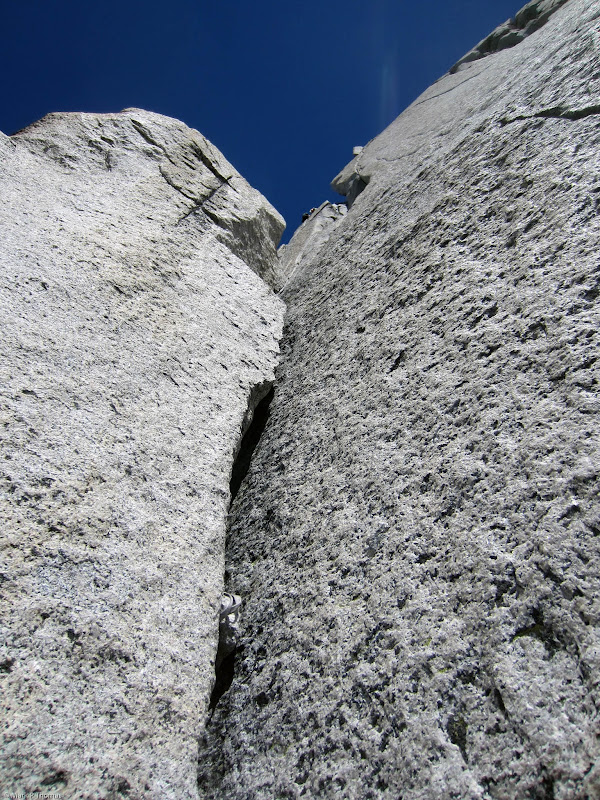
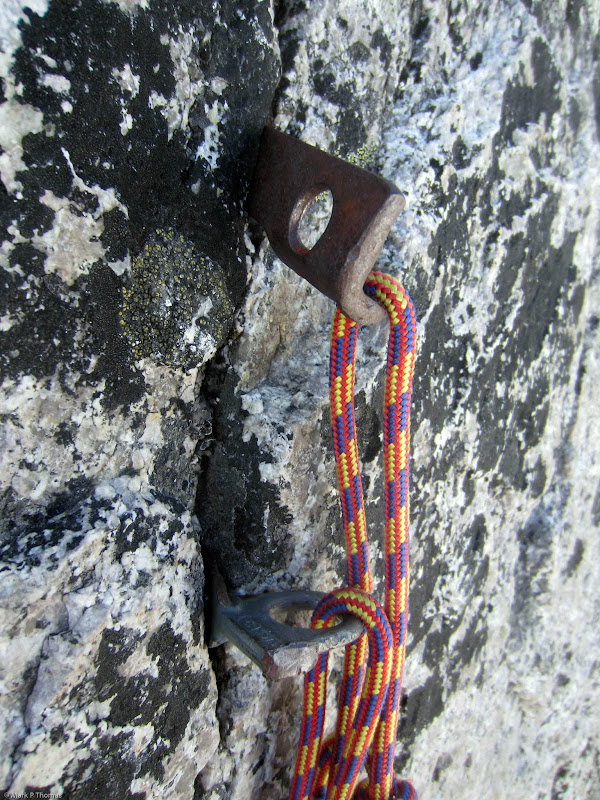
The pitons that protect the crux traverse or allow one to tension around the arete.
Visit on googleusercontent.com
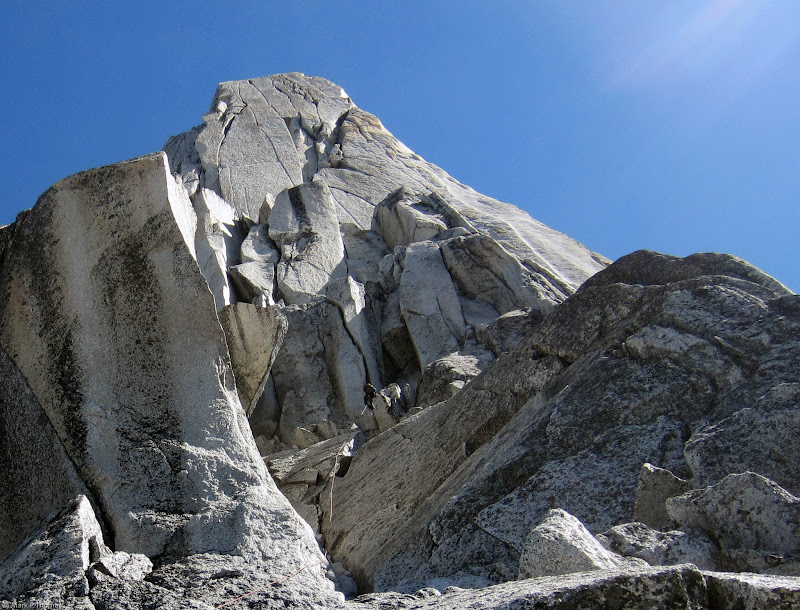
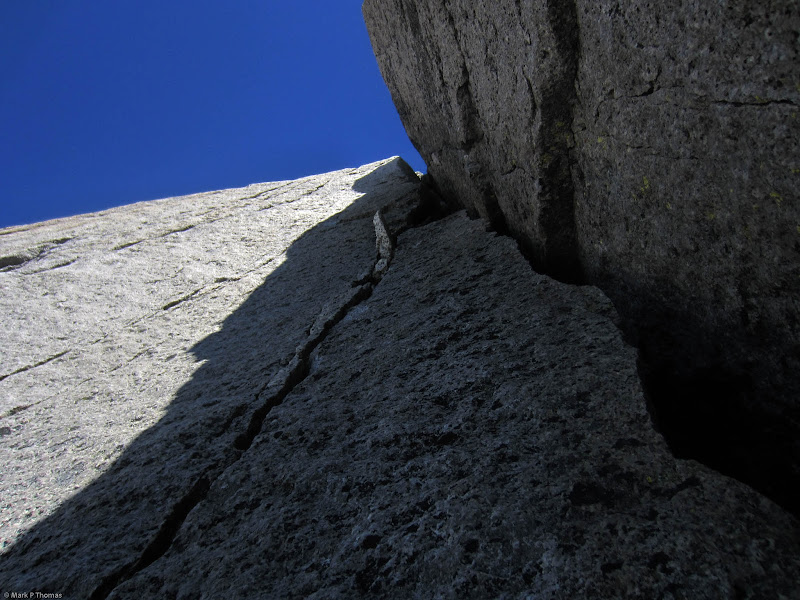
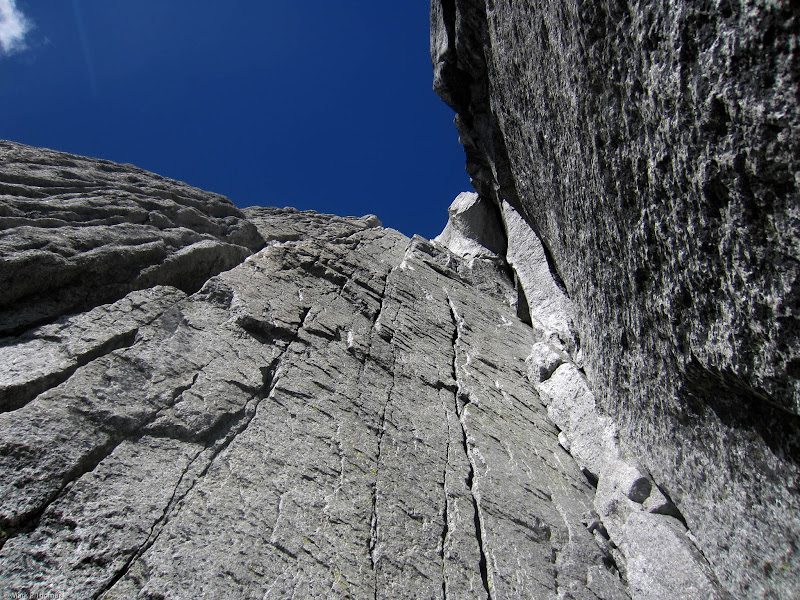
Following up the easy gully after the crux face traverse on P18. This gully is only about cl. 4, so the leader can easily climb high before placing the first piece of pro, to give the follower a better top-rope for the crux traverse.

Visit on googleusercontent.com
The final ridge section to the top of South Howser Tower. You rappel to the right here onto easier ledges.
From atop the easy gully there is a short rappel to a ledge on the right side of the crest, and then from there a few hundred feet of cl. 4 to mid-5th class climbing to the summit. We simul-climbed this, stopping once to regroup due to rope drag. The very end had a fun little knife edge ridge and step across to navigate.
Visit on googleusercontent.com
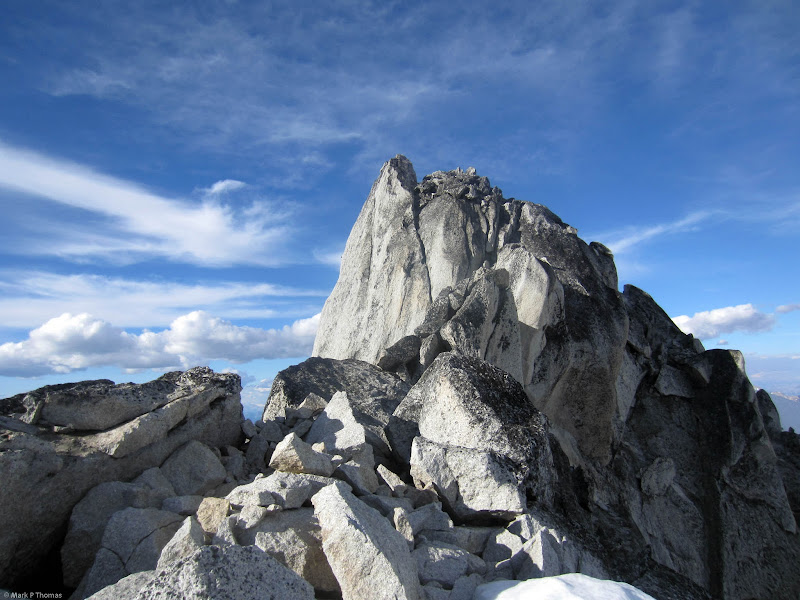
The summit of South Howser Tower!
Visit on googleusercontent.com
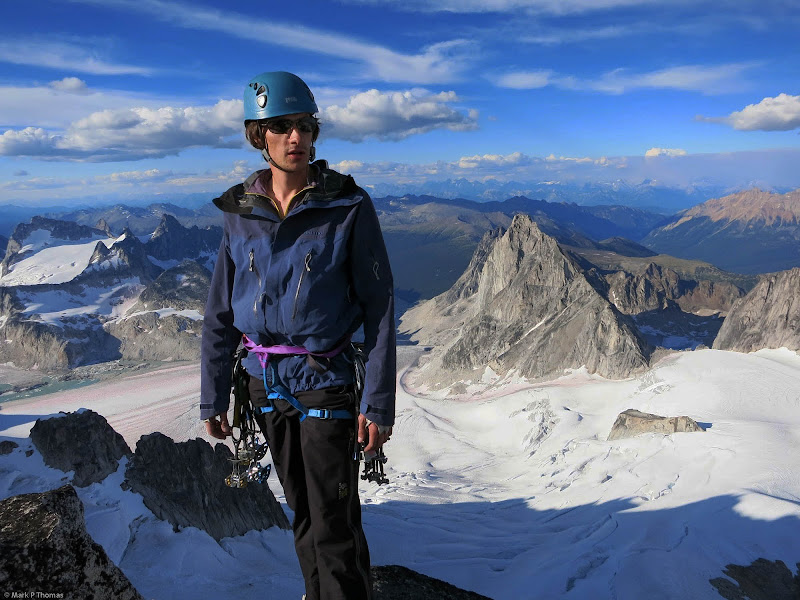
Summit! So psyched.
Visit on googleusercontent.com
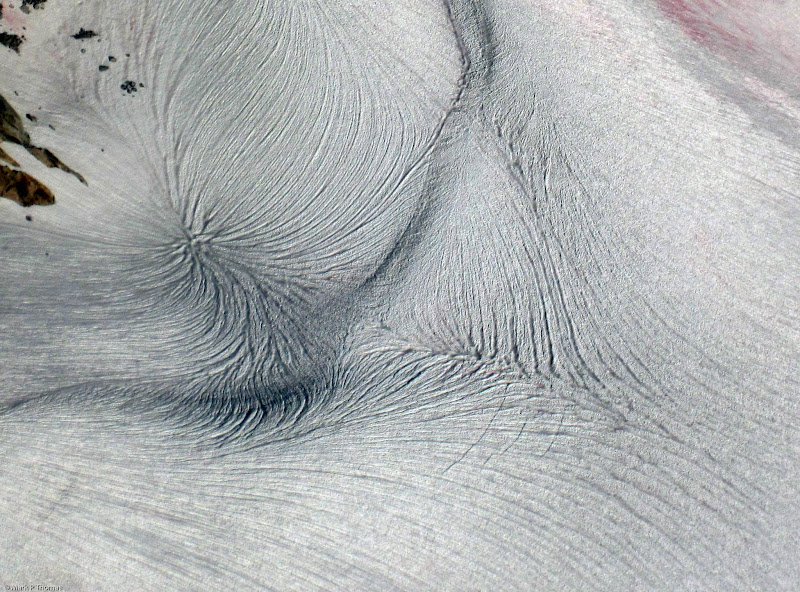
Interesting meltwater patterns on the glacier below.

Visit on googleusercontent.com
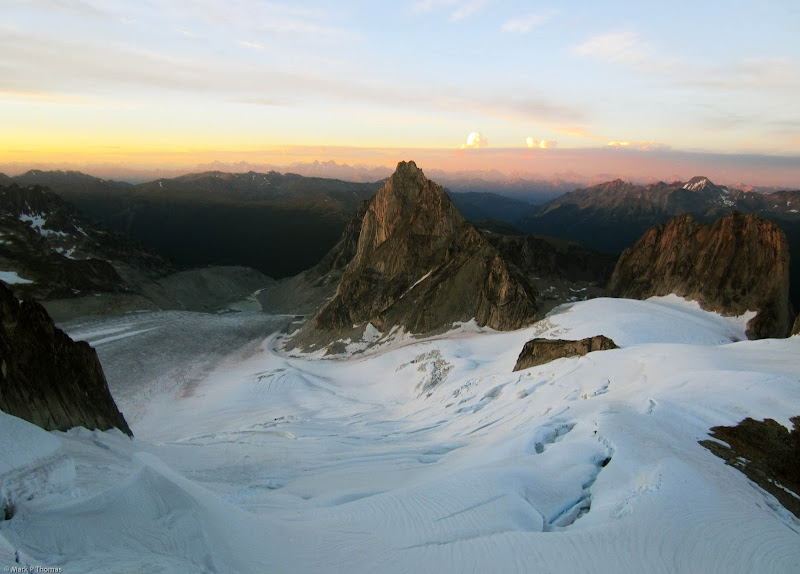
The Vowell Glacier and surrounding spires from South Howser Tower. (Bugaboo Spire, Snowpatch Spire, Pigeon Spire, and the Sphinx (center))
After enjoying about 30 minutes on the summit, it was time to begin the long series of rappels to get down. This part is tricky and one can get in trouble if they don't do it right. Fortunately we had printed off a few different sources that when combined, allowed us to find our way down mostly fine. The only exceptions were that we couldn't find the first proper rappel, so did 2 different rappels on slings to start, and near the end I accidentally when down a corner/gully that I shouldn't have, but Alec was able to rappel down to the side in a way that I could escape my position.
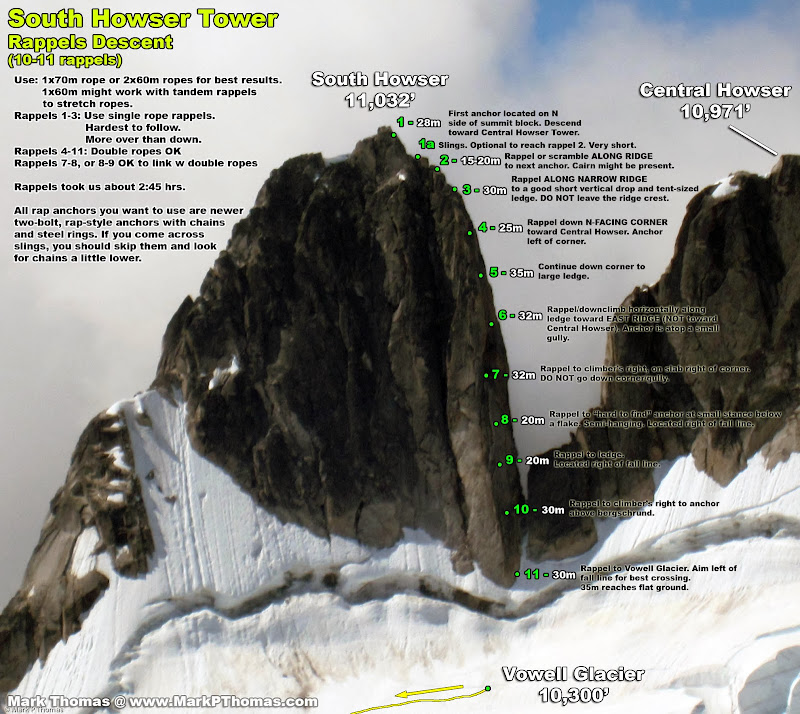
Visit on googleusercontent.com
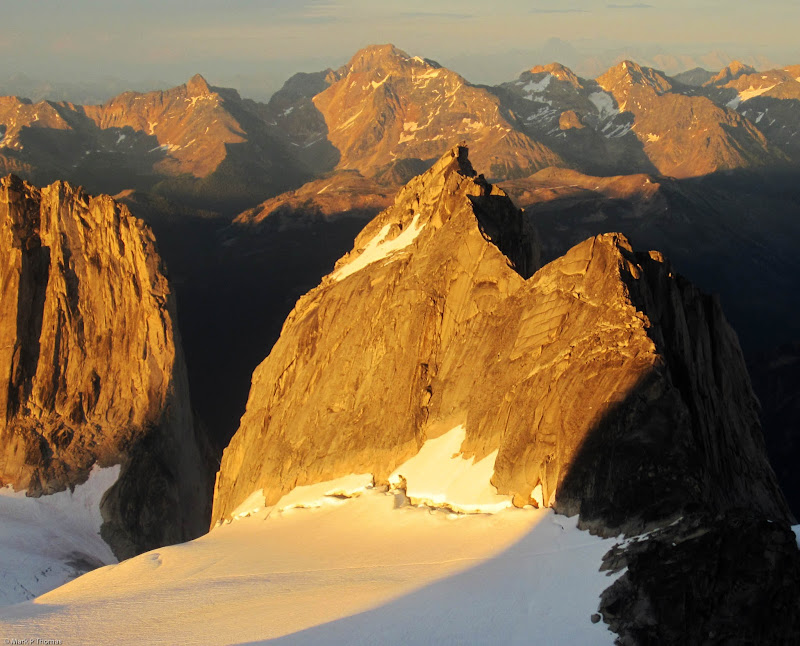
South Howser Tower from atop Bugbaboo Spire. (August 3, 2013)

Visit on googleusercontent.com
Steep view down the rappels towards Middle Howser Tower. It is one more steep rappel to the large ledge below, where you go left (right from this view) on a low angle ledge to the final set of rappels aiming right, straight down to the glacier.
Visit on googleusercontent.com
Sunset on Bugaboo Spire, Snowpatch Spire, Pigeon Spire, and the Sphinx (center) from the rappels on South Howser Tower.
Visit on googleusercontent.com
Sunset on Pigeon Spire from the rappels on South Howser Tower.
Visit on googleusercontent.com
Sunset on Snowpatch Spire from the rappels on South Howser Tower.

Visit on googleusercontent.com
Sunset on Bugaboo Spire from the rappels on South Howser Tower.
Visit on googleusercontent.com
Fading light on Bugaboo Spire from the rappels on South Howser Tower.
Visit on googleusercontent.com
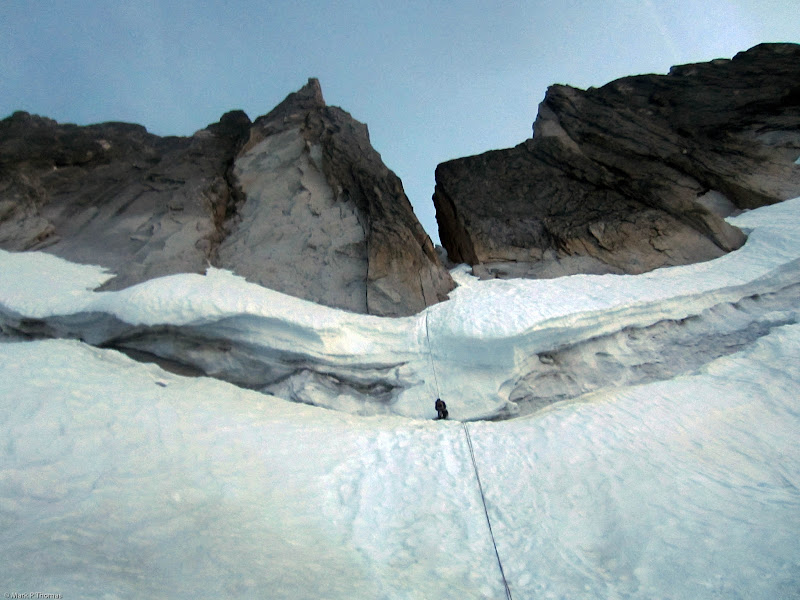
Final rappel into the massive bergschrund. Now to climb back out!
Visit on googleusercontent.com
Alec on the final rappel over the massive bergschrund. The last few rappels had brought us down the buttress above from the step on the skyline.
We made it down just before dark, and barely made it back to our bivy site before needing to turn on our headlamps. What a perfect long day out in the mountains! The Beckey-Chouinard route has been by far my favorite rock climbing route of all time.
Originally I had wanted to push back to Applebee Camp that night while Alec was in favor of breaking up the deproach, but by the time we reached the bivy and our extra food, I gave in to laziness, so we bedded down for another night before hiking out to Applebee. I was so tired that I didn't even close up my bivy sack, and I slept right through the rain that ended our first weather window for climbing in the Bugaboos . . .

Visit on googleusercontent.com
Annotation of the route on an aerial photo taken by Steph Abegg on a flight with John Scurlock on May 15, 2012
Visit on googleusercontent.com
Annotation of the route on an aerial photo taken by Steph Abegg on a flight with John Scurlock on May 15, 2012

Visit on googleusercontent.com
Map of the Bugaboos Area. While not too large, there is a lot of world-class climbing to be found here.
Links:
Picasa Album
www.MarkPThomas.com - if you want to see a KMZ file of the route in Google Maps/Google Earth. Also, I have pitch-by-pitch notes at the end of the report here.
Personal Website
Rack:
2 x 0.4"-3" (#0 C3 to #3 C4)
1 x #4 C4
12-14 alpine slings
Notes:
Bivying:
Bivying near Howser is in the gray area of being OK by the provincial parks, so check with the Kain Hut attendant to be up to date on what locations, if any, are considered OK, and in what manner. It has been banned outright off and on in the past.
Pack Strategy:
This is an important and tricky thing to work out, as the route is so long, and has a lot of wide, that carrying packs is difficult. However, because it is so long and exposed, with need to travel on glaciate terrain and to be prepared for wind and potential bad weather, it is risky to travel too light as well. See the Glacier Travel logistics for what we chose to do with that extra gear.
For us, what we tried and seemed to work well was bringing 2 packs: a moderate-sized camelback for the leader, and a larger pack (compressed Andanista Wild Things) for the follower. The leader carried a 3-liter camelback, a light jacket, and a small amount of food. The follower carried 1-2 liters of water to refill, both pair of boots, the glacier travel gear, and the bulkier jackets, in addition to some of the day's food, follower's light jacket, and first aid kit.
Alec only needed to trail the pack for a couple of sections on the wide climbing above the big sandy ledge, and no hauling was needed. As a follower, he was able to stay farther out and stem more on the wide sections. I was able to wear the follower pack on all of the pitches that I followed, with the toughest parts being pulling the 5.9+ lower roof crux, and the 5.10 face traverse near the end.
Approach/Descent Glacier Travel Logistics:
The descent to the base of the route is more serious than the glacier walk-off after the climb. We didn't find the routefindig hard or crevasses worrisome - in the conditions of the terrain (well-trodden path) and snow (not quite freezing) that we traveled in, we could have gotten by leaving our crampons behind and traveling unroped as we never traveled near any crevasses, and the angles rarely got all that steep (note, that nighttime freezing or lack of a path would have made crampons much more useful). Having one ax for the follower might be a good idea for insurance, though.
With our 60m doubles, we could easily reach completely flat snow on the last rappel, and you could get pretty close even with a single 60m. There is nothing nearby to slide into if you had to slide the last little bit. From there it is an easy, low-angle walk back to the col. There are a couple of small crevasses that are easy to avoid with proper routefinding, and it was no worse than the walk in from Applebee campground.
So in short, for our conditions, bringing 1 pair of crampons and 2 axes was overkill. We could have done just fine with one axe.
Other Bugs/BC Rock Climbing Trip Reports
South Ridge of Gimli Peak - A Lesser-Known Canadian Classic
Pigeon Spire (W Ridge)
-
Crescent Tower (Lion's Way) - A Great R&R (Rain & Relaxation) Climb
Bugaboo Spire (NE Ridge)