Vic Klotz
Trad climber
San Diego, CA
|
 |
We were here on June 26, 2018. Unfortunately, we had to bail partially up the corner left of Salathe Ledge, where the vertical part of P-2 starts. Your on a 1/2" rivet and the next available anchor is a bolt about 10 feet up. Maybe my eyesight sucks (I'm 61), but all I found here was a 1/4" downward facing slot about 1 1/2" long that wouldn't take any the tiny gear or cam hooks I brought (as suggested from the list). I did however, see two bashed in nuts filling the seam, but the wires were gone. So IF I were to return, I'd bring a micro cam and maybe a cheater stick. I agree with others that another 4 or 5 Cam is handy for P-1.
Prior LA Ascents 1984 and 86.
|
Paul Silvis
Trad climber
San Francisco
|
|
Climbed the spire on 9/25/16.
For the approach, don't turn towards the Yosemite Falls lookout -- keep going to Yosemite Point & head right down the slab. A 70m + 35m rope was more than enough to reach the notch. My backup knot got stuck and cost some time.
I only brought one BD #3 & #4 -- a second 3 would have been useful for the end of p1. I didn't use the 4.
I used a rivet hanger on p2. A single offset (BD gray-purple) came in handy on p2. A yellow X4 just barely fit into a shallow pocket & made the C2 a bit easier. I never needed the cam hook.
Bring more water than you think you need -- the dusty trail will dry you out.
|
jeff constine
Trad climber
Ao Namao
|
|
1) 300' static 1)60m rope, static to the tree, rap in tow up the big line to the tip. Rack 1).75 .50 1" 2" 2)3" 1)4" a few rivet hangers a bunch of draws. Super mellow and easy. The hike up was the hardest part.
|
Floridaputz
Trad climber
Oakland Park Florida
|
|
Just climbed this in early June. We hiked in from Tioga road and camped at Yosemite point. The rap in was as expected. We used 2 static 60 meter ropes and a 60m lead rope. We used the Juniper tree as an anchor. About 20 ft out are a nice set of bolted anchors if you need them. You have to pass the knot, practice this ahead of time. The notch is very roomy and not exposed. Bomber anchor to belay off. The pin scars off the deck eat Aliens and is straight forward. I brought a full rack of BD cams, a set of Aliens, with a few xtra cams in the small sizes and many slings. Also I brought a BD 3.5, 4.0, 4.5. The off width crack was the hard part for me. I had a tough time for the 1st 15 feet but cruzed the rest. I leapfrogged the big cams. P2 the traverse, was loads of fun. I did not use a hook. A few rivets and a sling move and you are back to bolts. At this point I kicked back and enjoyed the tremendous exposure, the raging falls and the beautiful summit. I did need to top step a few times and I'm 6'. We used the suggestion of attaching the Jugs to the static lines and rapping until you are tight on the ascenders, then jugging to the top. 6 hours rim to rim and we took our time. where else can you climb that history, be 3000 ft off the deck, with a 3000 ft waterfall in the background and climb a fricking cool spire and only have to lead 2 aid pitches. I felt like I cheated something or someone. It was way too much fun. Just brush up on you aid skill before you go.
|
whitemeat
Trad climber
San Luis Obispo, CA
|
|
Did this yesterday for the 3rd time...
A 60M rope WILL MAKE IT to the notch by itself. but, it will not reach the notch if you anchor off the tree, so, you scramble near the edge and find the 2 bolts, if you anchor from there, it will reach FOR SHORE! then all you need is 2 60M ropes.
The rack if aiding most every move...
1 yellow/blue metolious size offset master cam
1 orange/yellow metolious size offset master cam
1 #2 BD camolot
2 #3 BD camolots
2 #4 BD camolots
2 wire rivit hangers
1 big hook
2 60M ropes
no nuts needed!!!!!!!
a lot of draws!
|
Wade Icey
Trad climber
www.alohashirtrescue.com
|
|
go ahead and bump
|
Jay Wood
Trad climber
Land of God-less fools
|
|
The climbing was pretty straightforward when we did it 2 weeks ago.
One or two wire rivet hangers, a larger hook, some big cams, espec. if you aid the off-width section.
To make it mellow, rig up an 'extendo-draw' (wire-stiffened 2' sling) for the two or so reachy moves.
Not sure about the 70m rope.
Have fun!
Oh, the tyrolean is now rated SL2
|
ron gomez
Trad climber
|
|
I just hope some of the stuff right off the "deck" has been replaced! Man when I did it LONG time ago, the first piece was tattered wire, the second piece was non existent, the third was worse than the first two and I think the forth was was broken pin that we just slung some webbing over and frenched to a hold. Then the rest was cake!
Peace
|
troy norman
Trad climber
camas,wa
|
|
Seems like it has been some time since anyone has posted anything new about L.A.S.
Planning on climbing in mid July. Any new recent beta out there? Blowned fixed pieces, etc..?
Can the traverse from the tip to the rim be done with one 70m?
|
Floyd Hayes
Trad climber
Hidden Valley Lake, CA
|
|
I climbed this for my second time last week with a party of three; my first was in 1983, so it was fun to return. The juniper tree on the rim is the correct anchor, which makes it easier to return on lower angled terrain than if you anchor from one of the pines. I wrapped the end of my 60 m rope twice around the juniper before tying a bowline knot, and wound up passing the knot (between two 60 m ropes) a few feet beneath a small ledge; had I wrapped the rope around the juniper four times instead of twice I probably would have passed the knot much more easily from the ledge. I passed the knot using the simple method described by Clint Cummins in an earlier forum thread titled "Passing a knot on rappel":
"Having 2 ascenders and 2 aiders is the easiest way.
* rap down close to the knot
* put your ascenders on the rope, above your rappel device (you are clipped into slings on the ascenders, high enough so they take your weight)
* move your rappel device below the knot, and wrap the rope below it around your leg
* move your ascenders down the rope until your rappel device takes your weight
* take your ascenders off the rope"
To prevent the end of the rappel rope from snagging beneath the notch (and to make the rappel safer), we simply clipped it into the harness of the first to rappel. Your hand won't be happy if you use a thin lower rope for the rappel, as we did.
I carried along a full set of cams plus a few extras of the smaller and larger sizes, and wound up using everything I had except for my second C4 and the tiny 0 and 00 cams. I made about 9 placements on P1 and 6 placements on P2. I also carried several small wired nuts but needed only one, which I used at least three times to snag a hangerless bolt (and then back-cleaned it). I had led less than 10 pitches of aid, mostly >20 years ago, so I was essentially a beginner; I struggled to get up the lower part of the wide crack on P1 and there were some long reaches on P2 (especially on the traverse), so I would not describe the climb as "easy." I used a nut tool to hook my last long reach and wished I had thought about using it earlier. At the end of the traverse on P2 it took me several minutes to finally spot a BROWN (unexpected color) hangerless bolt on the left, which was essential to reach the next fixed piece.
I led on the end of the rappel rope and trailed a third rope which the second and third ascended. The third--my 17-year-old son--ascended the trail rope while belayed on the lead rope, but found it difficult at times to reach gear clipped into the lead rope; I should have clipped in the trail rope a few times. The trail rope was used by the second and third to rappel to the bottom of the Tyrolean traverse rope. The traverse was very strenous; be sure to study beta on how others rigged it up and practice it at least once before doing it on Lost Arrow. We threaded the traverse rope as well as the rappel rope through the rappel rings and had to tug each very hard to pull them free.
|
Clint Cummins
Trad climber
SF Bay area, CA
|
|
For Bruce's question below, I climbed this route in July (with a partner), and we used only 2 60m ropes, following drdave's August 2007 beta below.
This includes the method to return to the rim, where you put your jumars onto the 60m fixed line to the rim, and rappel with the other 60m rope from the tip; your weight transfers onto the jumars. (This is similar to following a long pendulum). The one 60m rope doubled is plenty to span the gap between the tip and the wall below the rim where you jumar on your fixed rope. No problems.
Incidentally, we used a 9.2mm lead (and lower rappel) line, and an 8.1mm second line (fixed to the rim, static for less wear while jumaring).
We used crazyfingers's rack suggestion (with the 2 red Aliens or actually #3 TCUs), which worked just fine. Bringing one each of small Aliens (blue, green, yellow) or TCUs (#1, 2) might be wise, in case any of the fixed gear disappears. We did not bring a hook.
One more suggestion. When fixing the rope on the first pitch for the follower to jumar, route it over the horn which is out right of the belay anchor. That way, the rope does not go deep into the fist/squeeze and trash your partner's knuckles when they move the jumars up.
See my photo trip report in the Supertopo Forum:
http://www.supertopo.com/climbing/thread.html?topic_id=685450
|
Chris McNamara
SuperTopo staff member

|
|
Hi Chris,
I have a question about soloing the Lost Arrow Spire Tip. I was planning to fix two 60m ropes and climb with the tail as another poster has said is possible. I had intended to rap back into the notch, and jug the fixed lines back up. However, your beta below surely suggest that the rap off the top might be even more fun than the tyrolean travese I did 20 years ago.
How many ropes do I need to do this? Will the 2 x60 m fixed ropes allow me to solo the climb and then rapppel onto them fixed line as you describe below? It's unclear if I need more than 2X60m ropes since you describe a " double rope rappel off the spire" . Thanks- I did indeed buy your book.
 bruce bruce
Hi bruce
i am pretty sure you need 3 ropes: two to reach the notch and one to lead with. however, you could probably get away with two 70m ropes. that would be 460 feet of rope. you would use conservatively 300 to get anchor below the first pitch. then have 160 left over to lead the first pitch and even more to lead the second pitch (you would have to clean each pitch by rapping the lead line). the tricky thing is the rappell off the top. i am not sure 130 feet of rope (one of the 70m ropes doubled) is enough to get all the way over to the other wall across from the spire - if you came up short that would be real bad. i think it would work but i am not sure.
Chris McNamara
|
Himia
Trad climber
Sedona, AZ
|
|
Thanks for the beta on gear, took everything in your recommendation. We did it in three pitches just to savor the setting longer -all with great belays. Could have skipped one #2 and the # 3.5 if you leap frog the two #3's and #4 in the OW pitch. I did also bring 2 Alein offsets in the Red/Yellow range which may have brought the rating towards A1. Also did use a fair bit of backcleaning and thus the gear list below worked well. As usual I would have liked a few more biners. We did use the large hook twice and thus did not free climb until the summit which is a few moves of 5.5? after the last bolt. But I agree not a first time aid route.
Also, good tip on the 300' line, we brought a 9mm. Thus one 300' static and one lead line. With the 300' static it makes the 140' ft. span from the spire to the rim easy to set and clean, similiar to a standard rappel, just sideways. The static rope was trailed by the leader and ran clean while leading. We then used our second rope as the 'lead' rope. On top we used our second 'lead' rope to rappel down onto the Trol line as suggested by Chris Mac.
A great day!
|
crazyfingers
climber
CA
|
|
Climbed this route June 2008.
Gear I used: Orange Alien, two #2 Camalots (did I? not sure...), two #3 Camalots, one #3.5 Camalot, one #4 Camalot, extra large hook, three small stoppers (as rivet hangers). One double length sling, ten alpine draws.
Gear I brought w/o using: #.75 Camalot, two #1 Camalots, whole set of stoppers, smaller hooks, cam hooks.
Gear I wish I had brought: two Red Aliens.
One could get away with leaving behind the #4 and free-climb the 5.9, but I was wearing loose approach shoes and had the cam anyway.
The big hook came in handy only once and was totally unnecessary. Two wired stoppers/rivet hangers would be plenty, as you can back-clean them and aren't needed for protection at all.
I wished several times I had a pair of Red Aliens.
Make sure your rap ropes don't get sucked behind a flake right below the ledge with the anchor trees. Also, make sure to mind those ropes during the route, so they don't get snagged.
Very easy aid climbing with AMAZING views and a fun, but tiring, tyrolean finish.
|
drdave
Trad climber
SoCal
|
|
Got a request for more detail on how I soloed this with two ropes and thought I'd post it here so everyone can read it.
Here's what I did (using 2 ea. 60m ropes):
1) Tie the two ropes together and rap into the notch passing the knot.
2) At the notch you'll have about 30m of rope left, pull this up snug and fix it to the starting anchor (nice bolts).
3) Lead the first pitch on this 30m "tail" of free rope.
4) Fix the free end at the first pitch anchor, then rap down it to the notch and release the rope from the starting anchor.
5) Jug back up to the first pitch anchor, pull the rope in snug and fix it again. At this point you'll have nearly a full length "tail" of free rope.
6) Lead on free end (to top), fix, rap, release, jug.
I didn't tyro across, used Chris' suggestion in his supertopo tip of Nov. 2002.
|
drdave
Trad climber
SoCal
|
|
Did this solo over Easter weekend. Took 2 60m ropes and was able to climb the route in 2 pitches using the free end of the rope after rapping into the notch.
|
ThiVer
Boulder climber
Belgium
|
|
We climbed this route with 6 climbers. As Belgians we are not used to climb like that but the trip was awesome. We made a movie of it wich you can see on
http://www.urbanclimbermag.tv/videos/videoInfo.php?video=693&most=1
This movie is a good source of information...
Good luck to anyone who goes there.
|
crotch
climber
|
|
The hike in from 120 isn't as flat as you'd think. Coming back out to the road, you're looking at a gross elevation gain of >2000 feet.
|
Doug Hemken
climber
Madison, WI
|
|
What a unique route! The feel of a big wall from the moment you rap over the edge into the notch until you get back to the rim again.
Do not put a knot in the end of your rap line, the final pitch of the LA Chimney eats knots for breakfast. When I rapped down below the notch to free my mistake, I found someone else's cut rope tail down there, too.
Not having the ST with us, we took a standard free rack with some big cams. A third big cam would have been nice.
Christina, my partner, got to lead to the top of the spire as her first ever aid lead - yeehaw!
The tyrolean was more time-consuming and more strenuous than we expected.
|
RockMD
Big Wall climber
Arizona
|
|
Hey Rockgirl, from a fellow AZ climber here is my advice. On the rap down, there is a mid anchor, have your second or third stop here and do it in two raps. This makes it so that only the last person has to pass the knot. When I did the route in 04, we used 3 ropes. I don't know if you would be able to lead the route on the remaining end of a 2 rope system; maybe if you did it in 3-4 pitches vs 2. Don't know ???
As far as clipping to the rope, I used 2 lockers with opposite and opposed gates. I then had my jumars clipped to my belay loop. As a back up, my partner had me on belay with the 3rd rope. Another reason to use 3 vs 2 ropes. ???
The knot. There are probably some people who will disagree with me on this one, but this is what we used. For the tree on the rim, we used a double bowline follow through, backed up with a figure-8 bite on the rope. If you want to see it, check out www.iland.net/~jbritton/. This made it very easy to undo the knot when we were finished, but still remain very safe.
Have fun with the route, and where climbing shoes on the final pitch, that friction climbing can be a little heady in old approach boots.
|
August West
Trad climber
Where the wind blows strange
|
|
For tying the ropes, treat it as a normal rap situation. So I would use a double eight on a bite for fixing one rope and the EDK for tying the ropes together. And don't tension the ropes up tight. Leave some slack so you don't put high loads on the rope/anchor.
As far as the traverse itself goes. There are options. Don't hang too far below the rope. Clip in straight to the rope with a locking biner for a backup.
When I was a noob, I actually set up a practice traverse between a couple of trees before doing this climb. If you have any doubts at all, I highly recommend doing this. The rim is higher than the top of the spire. So set up your practice on a slope and traverse from the low tree to the high tree.
|
rockgirl
Sport climber
Bend, OR
|
|
I need some Tyrolean beta. My understanding is that once you reach the top, hand tighten the line to the rim and fix it at the top of the spire. First person goes across, bringing the second rope with them. Then the second person ties the two ropes together at the spire and the first hand tightens and fixes them at the rim. Now the questions:
1) What rigging do you use for the Tyrolean? One or two ascenders? And what kind of back-up? Just your daisy clipped to the line?
2) What kind of knot do you use for a) fixing the lines and b) tying the two ropes together for retrieval off the tyrolean?
Finally, a question for the poster who said you can do it with 2 60m ropes... Are you saying there is enough rope to lead on the line that is tied to the rope that is fixed at the rim?
Thanks for the answers to my questions. Hopefully my asking them doesn't mean I'm totally unprepaired to do the route!
|
Damian C
Trad climber
Berkeley
|
|
Easy there Big Guy...
If this is one of your first aid routes with significant exposure, follow my advice below. You will feel well protected zipping it up with the extra 3 or 4 lbs. (not 20 lbs) of gear. Obviously Sir HalHammer is a bit more salty than I.
|
HalHammer
Trad climber
CA
|
|
Don't follow the below poster's advice. Particularly about all the tons of large cams. You could bring a couple # 4's or even just a #3 and #4 and find a way to get by on that offwidth just leap frog a bit yah think? Rivet hangers totally optional. Hook optional if you can climb 5.9 or fiddle with that nut. Aiders optional if you can aggressively french free bolts. Bring enough quickdraws/slings to be able to clip every other bolt for pro. Offset aliens and nuts is totally ridiculous for one of the easiest aid lines in the valley. Do you like hauling an extra 20lbs on a 3 mile uphill hike? Didn't think so.
The climb is riggable with 2 60 meter ropes and a little improv to make sure your leader always has enough rope (that means don't try to stretch the pitches all together yah over eager folks) we did it with 2 ropes splitting it up in 3 pitches.
The whole route can be french freed for extra fun.
|
Damian C
Trad climber
Berkeley
|
|
Actually, I didn't see any way around using 1 rivet hanger and one nut loop on the first part of the second pitch. I was very glad I had them. We started the climb pretty late in the day and I am not a very fast aid climber so we had to bail at the 2 bolts above the "hook left" section. You can avoid the hook move pretty easily by using a fixed nut (take Chris' advice though and bring a large hook just in case). I had a standard hook and it wasn't really big enough. Also, I took Black Diamond Cams (old ones, not C4) numbers 3, 3.5, 4, & 4.5 for the offwidth and I used every one of them. Plan carefully so you don't have to lower down for the right piece. HB offset nuts and offset Aliens are also perfect on this route. Bolts were mostly in good shape, and there are 5 decent to good bolts on the summit. Amazing and immediate exposure! Have fun!!!
Here's some pix of the trip commemorating the 20th anniversary of Scott Balcom's first slackline walk.
http://share.shutterfly.com/action/slideshow?a=67b0de21b330afc565e4&sid=8AaNGTRi5ctGFY&auto=1&idx=-1&m=1&d=1133857661371
|
Cman
Big Wall climber
Ft. Collins
|
|
You don't need rivet hangers at all. Quick draws, a few small cams (yellow alien), a four ( - and 4.5 if aiding) camalot for the OW, sky hook, and not too much more. This climb is very very bolted. Enjoy!
|
sprout
Trad climber
clovis, ca
|
|
I'm thinking of doing this route later this spring/summer. Are rivet hangers still needed? Almost sounds like its been bolted...? Do you really need rivet hangers, or can you get by some other way? Thanks!
|
Vic Klotz
Trad climber
San Diego, CA
|
|
Hey old guys! If you did the arrow years ago (1984, and '88 for me), you probably remember it different than what Mac's Guidebook shows for today. Back then, you only needed a few wireds and 20 or so biners. NOT SO ANYMORE!
Now, pay attention;
Right off the ledge, the old angles are gone. Just pin scars now. TCUS/SplitterCams are recommended. At the next stance, don't go left under Salathe Ledge before continuing upward. The old piton and a bolt are GONE! The only thing I saw in June stemming around this corner was alot of rotten granite (wouldn't hold a hook), and a leeper bolt hanger about 13-15' up.
So listen to Mac. Lug up some cams for the slot on the right side under Salathe ledge. You won't have to go home (like I did) for not bringing enough gear.
Mac was right. So PAY Attention!
|
Greg Barnes
climber
|
|
Hey Luke!
That was Jack Hoeflich who did the replacement work last year, while working overtime and only getting a day in every few weeks.
I doubt that Jack moved the bolt unless the old one broke in the hole or the rock was really rotten, there's a good chance that the other hole/remnant you saw was an original excess hole (there are a LOT of 1/4" drill bits broken off, cratered holes, bat hook holes, etc, even on free climbs - the protection bolt on the last pitch of Scorpion in Tuolumne had 5 cratered/weird angled/ who knows? 1/4" holes within 2' of the old bolt).
Too bad about the rain, better luck next time!
|
Luke
Trad climber
CA
|
|
Hey, Ed, everyone-
Sounds like you all had an amazing time up there! Glad you enjoyed it- and thanks to all of you for looking out for us and being there- just really wish we could have been up there with you. You're right, the exposure coming off the left end of the Salathe ledge- wow! Looks like we owe you all a couple of cold ones now ;)
And for the ASCA folks- thanks to whoever replaced many of the bolts and rivit heads on the Direct, even though I must say, I was a little surprised to see all this shiny metal up there. And FWIW, replacing the bolt at the narrower part of the OW on P3 maybe 8-10inches higher than the old one makes it *particularly* difficult to clip, IMO... Or maybe it's just not a pitch for everyone? The first few pitches of this route are a blast, really would have liked to continue on up. From the base, P7-13 look totally wild. But they'll always be there- just some other time for us I guess. And did I mention that wind at night? ...
|
Ed Hartouni
Trad climber
Livermore, CA
|
|
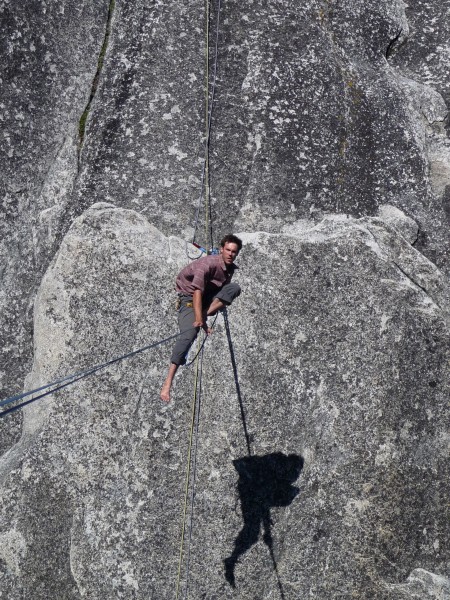
Oh My! what a climb... ultra-classic. Did this yesterday (5/31/04) with Gary, Annie, Jed and Josh. Perfect day though a bit windy in the morning. Sun then cooling high overcast but just "totally awesome".
I agree that this shouldn't be a first aid climb, but it was mine after a 30 year hiatus from aid climbing. I took the first pitch to the Salathe Ledge, Jed the second to the tip.
SuperTopo rack is good, but take a BIG hook, not the little hooks I had. But you can also figure out how to get across the hook move on the second pitch without a hook...
My only technical innovation was to bring a 300' static line, which made it a lot more controlled, one rap to the notch, then setting up the escape to the rim was easy as pie.
What I will remember for ever is the exposure, which gets your attention big time. Dropping into the notch is what starts it, how steep it is. The notch is dark and cold early in the morning, getting everyone down takes a bit of time not well spent thinking about the route. Then you "walk the plank" out to the belay bolts. The first move is into the corner left foot on the flake and "just step up". Yeah, and exam the utility yard far below!!! zowie.
The other exciting moment for me was just off the Salathe Ledge, I was cleaning this pitch. After clearing the first bolt you get to lower out and left 15 to 20 feet. You get a real nice view of the upper falls below you and to the left, and a lot of air under your feet. I found myself holding a really large breath. The second lower out wasn't so bad for me, lots of corners and such around. The first one is out to absolute smooth, vertical, exposed rock.
Once on top three of us lowered out and two of us did the classic Tyrolean...
One thing I can recommend is that the Tioga Road approach (from T19 trail head) probably isn't a good thing if you're humping your pig off the wall... and it makes this climb a long day.
Also, while the exit from the notch is described as unpleasantness to the max, being there makes you believe that if you ever reneged on a promise to drop ropes for someone's escape, you would endure enough hate and loathing for many lifetimes! It looks to be wickedness itself getting out of there.
Everyone should do this route... everyone.
|
WC
Trad climber
Flagstaff, AZ
|
|
Eddie,
It looks like one of Karl's beta sentances was cut off. I'll try to fill in the gaps, but it's like having Luke Skywalker instead of Yoda teaching about the force. :) (And, my memory is a little fuzzy.)
I do remember one spot where the second will need to lower out from a bolt to aviod taking a swing. This spot is maybe four or five moves off the belay. You aid off a bolt, through some pin scars, then stand up high and reach said bolt. At this point the route goes straight left for 10-15'. If you can, back clean some gear after you make the little traversing moves. That will make the lowerout easier for your second. When I climbed this route my second didn't have a great amount of jumaring experience, but what she lacked in experience she made up with in guts. She didn't have anything to lower out with (cuz we didn't know she would need anything) and she just let go and took a swing. It doesn't sound like much sitting here at the computer desk, but when you are up on the Arrow Tip you will completely understand. In short inexperience for the second can be OK as long as they don't mind taking a swing.
One more thing; get an early start. When we climbed this route it pretty much took all day car to car. (and that was in August) The days in November will be a little short, so don't be afraid of hiking at daybreak.
Best of luck on this thing. Give us a post on the current conditions what you get back.
WC
|
Karl Baba
Trad climber
Yosemite, Ca
|
|
I first tried to get to Lost Arrow with a minimum of hiking by climbing Yosemite Point Buttress to do Lost Arrow. Big Mistake!
There are a few little tricks to Lost Arrow and the second will have to lower out off a fixed piece once on the last pitch, but
Mostly, it's a long day including the hiking and the logistics of the retreat make doing it as your first aid climb daunting. You could be highly screwed if you manage to twist your ropes before pulling the tyrolean lines, for instance.
If you have a clear concept of how aid systems work and you've managed to do an aid climb with reasonable efficiency before, you're probably ready. At least in November there's not as likely to be a crowd. Hike in from Porky flat, spend the night on the rim, do the climb, hike down the falls trail and shuttle cars if you want the easiest time of it.
Peace
karl
|
Eddie
Trad climber
Yosemite, Ca
|
|
Thanks a bunch, Karl and WC.
Last question, hopefully: I read that its not a hot route for someone's first aid route, but how bad is it for a second's first aid route? There seems to be some traversing--anything particularly tricky for the second? Does the second need to re-aid sections? Do they need hooks? Duecy? Upside down pendulums? Or is it not that big a deal, it will just take a little longer?
thanks, Eddie
PS How do you get to the rim without hiking?
|
WC
Trad climber
Flagstaff, AZ
|
|
Eddie,
As always Karl has great beta. For what it's worth, here are my two cents as well.
Brass HB offset nuts do work well in many of the pin scars. Aliens might be better, but I wouldn't know for sure as I didn't own any when I climbed the route.
Heed the advice from below as the hike is pretty long and very up hill. I took two and a half sets of cams, and that was WAY too much gear. Offset stoppers, some regular stoppers (a couple extra small ones to sling rivit heads with), one set TCU's or Aliens, singles of hand size cams, and doubles of large hands through OW cams. (I don't think that you need a #5 camalot or #6 friend to protect the top of the OW, but of course my memory is a little fuzzy...)
It's a long but very fun day, and the summit is among the best I have ever experienced.
Have fun up there. :)
WC
|
Karl Baba
Trad climber
Yosemite, Ca
|
|
Hi Eddie
Did it about a month ago for the third or fouth time.
" I haven't read about it anywhere, but are there any concerns/precautions/problems with the dragged rappel ropes getting caught as you climb the spire? "
Natural paranoia should suffice. Just pull in enough of the dragged ropes so they don't drag around in the notch where there are lots of rocks and boulders to get wrapped up in.
"Is the mandatory free climbing something worthy of climbing shoes, or is it straightforward in approach shoes, boots? "
Doable in approach shoes in my opinion.
"When is the best time of year to climb it?
Is it still reasonable in early november?"
Climbing in the sun in Early November in the Valley is usually fine. The route is near the rim so it's pretty doable from when the snow melts from the rim until the snow falls back again.
Any recent-conditions beta?
Nothing to report. Some big cams for the wide crack, rivet hangers or wired nuts for the rivets, and Yellow and Red Aliens for some pin scars are recommended. Some HP Brass offset nuts might work if you don't have aliens but I'm guessing. Larger hook and cam hook as well.
"thanks, Eddie"
Have fun. The climb is not worth it for the sake of the climbing, but the view and spire are spectacular.
Karl
|
Eddie
Trad climber
Yosemite, Ca
|
|
Few questions about the spire:
I haven't read about it anywhere, but are there any concerns/precautions/problems with the dragged rappel ropes getting caught as you climb the spire?
Is the mandatory free climbing something worthy of climbing shoes, or is it straightforward in approach shoes, boots?
When is the best time of year to climb it?
Is it still reasonable in early november?
Any recent-conditions beta?
thanks, Eddie
|
Matt
Trad climber
Yosemite, Ca
|
|
Long funking hike.
We were 12 hours car to car, but we snoozed a bit by the river and let our sweaty shirts dry out, and we were generally in no particular rush.
I am 5'-5" and P2 was my 1st aid pitch ever- seemed ok (if a pain in the ass at times) a bit of rain added to the exposure and made it seem kinda wild, even w/ all those beautiful ASCA bolts (thanks guys!).
There was a section early on where I used red/yellow/red aliens up some pin scars, I think I hooked 4 hangers w/ wires (all bomber except that last bent one, which I backed up w/ side by side cams, #1 & #2). We had more gear than we needed.
If you are short, you may want one or two stiff QDs. I just stepped up high, took a draw and used it to pull up on the bolt like an undercling, I had no problems reaching bolts that way.
More slack in the line makes the traverse easier.
Did I mention the long hike?...
|
Chris McNamara
SuperTopo staff member
|
|
- the belay for the first pitch has bolts so its a perfect aid soloing anchor.
i wouldn't do a traditional Tyrolean Traverse. instead, place you jumars on the rope leading to the rim then make a double rope rappel off the spire. as you rappel down, your jumars on the rim rope will pull you over to the rim. then you just pull your rope through the spire anchor and jumar to the top. this way you never have to return to the spire.
if you do want to do a traditional Tyrolean, the way you described in A) sounds good but will mean you will be hiking 4 ropes up the falls trail!
good luck!
|
Aaron
Novice climber
Mill Valley, CA
|
|
Looking for info on Soloing the Lost Arrow spire. The only two problems
that I have right now.
Is there a good upward anchor at the base of the first pitch?
How can I do a Solo Tyrolean Traverse? The only solutions I can think of is
to either:
A) drop two ropes from the top of the tree, attach to a third rope to get to
the notch, that way when I pull the ropes up I will have two going direct to
the tree.. Good solution?
B) Do the rope handling in the normal manner and traverse once, set the
second rope, return to the spire and then traverse a third time to get off.
Any input would be appreciated.
|
Dan A
Intermediate climber
Mill Valley, CA
|
|
5 stars for history, location, exposure, and super ease. approach keeps the traffic down.
definately don't need 2x 4.5s as per Chris's topo. 1 or even up to #4 ok, you can free last move out of ow.
i only used 1 #4(yellow) HB brass offset twice on P1, no other nuts, my partner used 1 med nut on p2. fun easy free and fr-aid on p1, some is mandatory.
watch for loose flake you stand on for 'airy step left' to start p1, and loose blocks on Sala. ledge.
we stopped at a little ledge on the rap to tie next rope and turns out the know was 10 feet from top of spire when we pulled tight. bummer.
hike at night, its a lot cooler
bookem
|
billie bob
Advanced climber
Mill Valley, CA
|
|
C2? I don't think so. I'm 5 feet 10.
The first pitch is totally fixed until the OW, then it's 4 moves with #2,3,4 camalots. The second pitch has 2 med stopper moves and 1 alien move right off the ledge, then it's FIXED TO THE SUMMIT. (OK, there is some shoelace hanging from a pin that I moved off)
10 feet off the ledge to the top I didn't have to place a thing, though I can see where shorter people place the tricky #2 camalot or hook after the broken rivet. Use adjustable daisies and topstep, and you can clip and go. bolts are brand new!
|
Tom
Advanced climber
Mill Valley, CA
|
|
This beta is actually for the Arrow Direct.
When I did this route, we fixed two pitches and slept on the sandy slabs at the base. Since it seemed well hidden from the Valley, we built a cheery little illegal campfire.
WHAT A MISTAKE!
Just after dark, a strong swirling vortex wind kicked up suddenly out of nowhere. The amphitheatre formed by the Forbidden Wall, Yosemite Falls wall and Yosemite Point Buttress acted like a cyclone chamber. One minute we're sitting in calm air, and the next our fire is being swept down the hillside toward the top of the Lower Falls. Luckily, we were able to chase the embers and put them out before the entire manzanita forest burst into flames.
We did the route in September. I don't know if this freak weather pattern holds throughout the year. Apparently, the heat coming off the walls rises, kicking up the strong vortex winds. Maybe it's worse in the summer.
|
Drew Van Boerum
Intermediate climber
Mill Valley, CA
|
|
We climbed the route in 2 pitches. Prior to descending to the notch, some climbers gave us a hanger and two nuts for the first bolt leaving Salathe ledge. IT IS ONLY THUMB AND FINGER TIGHT. Someone take a wrench and tighten it.
The first pitch I used the following gear: 2 slings, hook, 1.5 friend, 2 #3 BD cams, 2 #4 BD cams.
The second pitch I used the following gear: two nuts about 3/8 to 5/8 inch, hook, two wire rivit hangers, 1 #(.75) BD cam, 1 #1 BD cam, and tons of biners.
|
TOM ROHRER (AKA THE MAD BOLTER)
Advanced climber
Mill Valley, CA
|
|
I AM GOING TOMORROW TO RAP THE RIGHT SIDE CHIMNEY TO UPGRADE THE RAP ROUTE (TEE-HEE-NEH'S LAMENT) FROM NOTCH TO GROUND: ABOUT 10 RAPS (OCT 2 01) WILL UPDATE BETA ON CONDITION OF ANCHORS - W/DIGIPHOTOS
|
Steve Fettke
Intermediate climber
Mill Valley, CA
|
|
As you exit the 5.9 off-width onto Salathe ledge there is a big loose rock right on the edge. It looks like a great hold but would easily come off right on top of you with 2 other good sized rocks. It would probably be good if someone pitched them off but I don't know the protocol for doing that safely.
Also, a small tri-cam is handy on the A2 section off Salathe Ledge.
One more thing, the rim anchor tree is a juniper. There is a pine tree that's also about 15 feet tall and almost 2 feet wide that we thought was the anchor at first. It's pretty obvious when you see the worn path from the juniper, but it could save a few minutes of having to figure it out.
|
jynckx
Intermediate climber
Mill Valley, CA
|
|
what is the difference between the letters "A" and "C" in terms of rating an aid climb?
Chris McNamara answers:
"A" ratings are used on aid climbing pitches where a hammer is necessary to place pitons or copperheads. "C" ratings are used on pitches where you do not need a hammer.
Note: Sometimes a "C" rating is followed by and "F" (e.g. C2 F). The F stands for "fixed" which means that the pitch can be climbed without a hammer only if all the fixed gear is in place. You should bring a hammer and a few pitons just in case the fixed gear is missing.
|
| | | | | | | | | | | | | | | | | | | | | | | | | | | | | | | | | | | | | | | | | | | | | | | |