| Route Name |
Formation |
Climbing Area  |
|
|
Review |
|
|
Pat and Jack Pinnacle |
Yosemite Valley, California USA |
2 |
5.10d |
|
|
|
El Capitan |
Yosemite Valley, California USA |
1 |
5.10a |
|
|
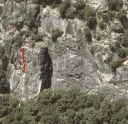
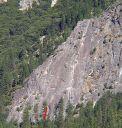
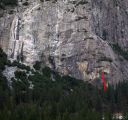
| Bijou
5.10c, Five and Dime Cliff
Photo:Chris McNamara |
|
Five and Dime Cliff |
Yosemite Valley, California USA |
1 |
5.10c |
|
|
|
Camp 4 Wall |
Yosemite Valley, California USA |
1 |
5.10b |
|
|
|
Manure Pile Buttress |
Yosemite Valley, California USA |
1 |
5.10a |
|
|
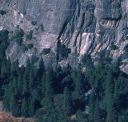
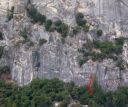
| Revival
5.10a, Church Bowl
Church Bowl has on of the easiest approaches in the Valley.
Photo:Chris McNamara |
|
Church Bowl |
Yosemite Valley, California USA |
1 |
5.10a |
|
|
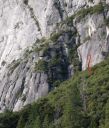
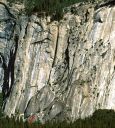
| Just Do Me
5.10d, Schultz's Ridge
Photo:Chris McNamara |
|
Schultz's Ridge |
Yosemite Valley, California USA |
1 |
5.10d |
|
|
|
Royal Arches Area |
Yosemite Valley, California USA |
1 |
5.10a |
|
|
|
Arch Rock |
Yosemite Valley, California USA |
2 |
5.10c |
|
|
|
Schultz's Ridge |
Yosemite Valley, California USA |
1 |
5.10d |
|
|
|
Lower Cathedral Rock |
Yosemite Valley, California USA |
1 |
5.10c |
|
|
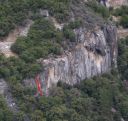
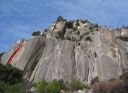
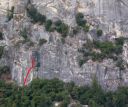
| Babble On
5.10a, Pat and Jack Pinnacle
Photo:Chris McNamara |
|
Pat and Jack Pinnacle |
Yosemite Valley, California USA |
1 |
5.10a |
|
|
|
Pat and Jack Pinnacle |
Yosemite Valley, California USA |
1 |
5.10b |
|
|
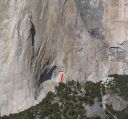
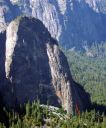
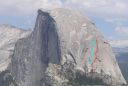
| Two Hoofers
5.12 or 5.10b A0, Half Dome
Two Hoofers follows the blue line.
Photo:Chris McNamara |
|
Half Dome |
Yosemite Valley, California USA |
7 |
5.12 or 5.10b A0 |
|
|
|
Lower Cathedral Rock |
Yosemite Valley, California USA |
2 |
5.10c |
|
|
|
