| Route Name |
Formation |
|
|
Review |
|
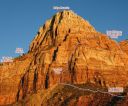
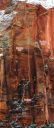
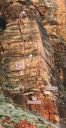
| The Organasm
II/III 5.10 C1 or 5.12, The Organ
Photo:Bryan Bird |
|
The Organ |
2 |
II/III 5.10 C1 or 5.12 |
|
|
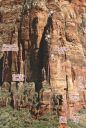
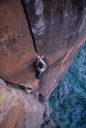
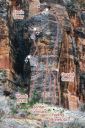
| Rub it Raw
I 5.10, Cragmont, Tunnel Wall
Photo:Bryan Bird |
|
Cragmont, Tunnel Wall |
1 |
I 5.10 |
|
|
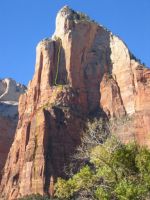
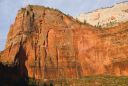
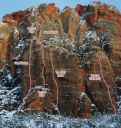
| South Face
II 5.10, Angels Landing
Photo:Eric Draper |
|
Angels Landing |
3 |
II 5.10 |
|
|
|
Bridge Mountain |
10 |
IV/V 5.11- A0 |
|
|
|
Cerberus Gendarme |
2 |
II 5.10 |
|
|
|
East Temple |
6 |
III 5.10 |
|
|
|
East Temple |
8 |
IV 5.12+ or 5.10 C1 |
|
|
|
Kung Fu Theatre, Tunnel Wall |
4 |
III 5.10+/11- |
|
|
|
Cragmont, Tunnel Wall |
4 |
II/III 5.10+ |
|
|
|
Mt. Spry |
8 |
IV 5.10 |
|
|
|
Cerberus Gendarme |
2 |
I 5.10 |
|
|
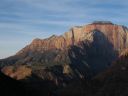
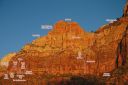
| Golden Gate
IV 5.10, Sub Peak of Bridge Mountain
Photo:Bryan Bird |
|
Sub Peak of Bridge Mountain |
4 |
IV 5.10 |
|
|
| The Headache
II 5.10, Headache Area, Tunnel Wall
Photo:Bryan Bird |
|
Headache Area, Tunnel Wall |
3 |
II 5.10 |
|
|
|
Kung Fu Theatre, Tunnel Wall |
1 |
5.10 |
|
|
| Cat Hole
III 5.10, Ataxia Tower, Tunnel Wall
Photo:Bryan Bird |
|
Ataxia Tower, Tunnel Wall |
4 |
III 5.10 |
|
|
|


