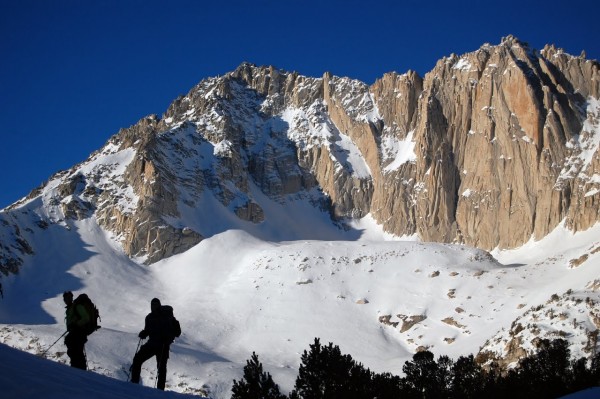
 January 29th, 2011 - Ruby Wall seen above us as we passed Ruby Lake. Credit: PellucidWombat |
||
Ruby Wall has had a hold on my attention since I first saw it on a winter visit to the area in 2011. According to Galen Rowell "David Wilson and I did eight long pitches of some of the finest climbing we have found in the entire Sierra one August day." (From Moynier and Fiddler's "Climbing California's High Sierra"). With a recommendation like that, who could resist?!
Visit on googleusercontent.com
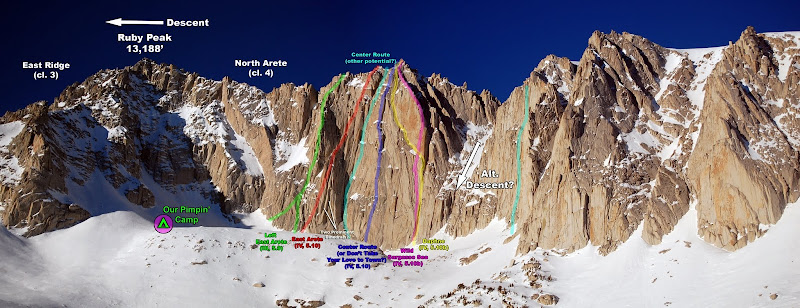
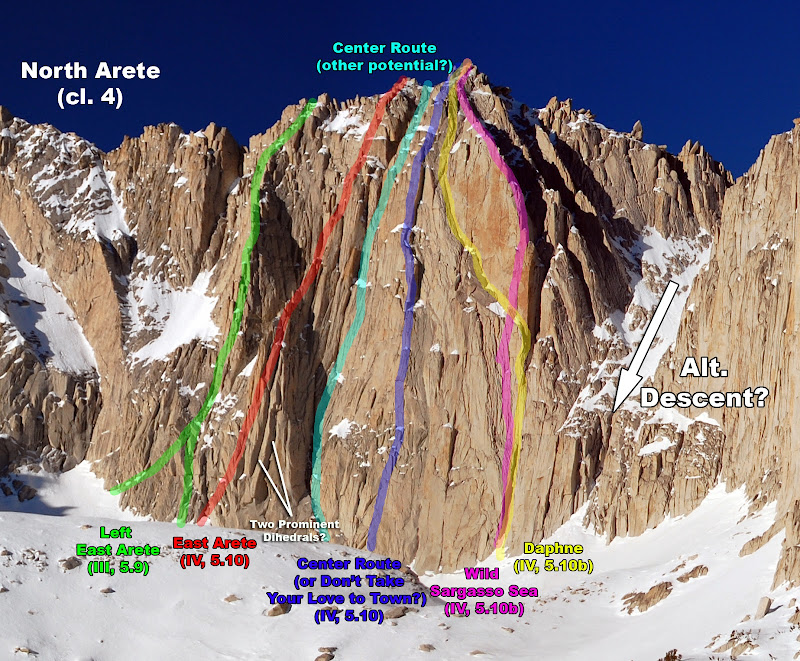
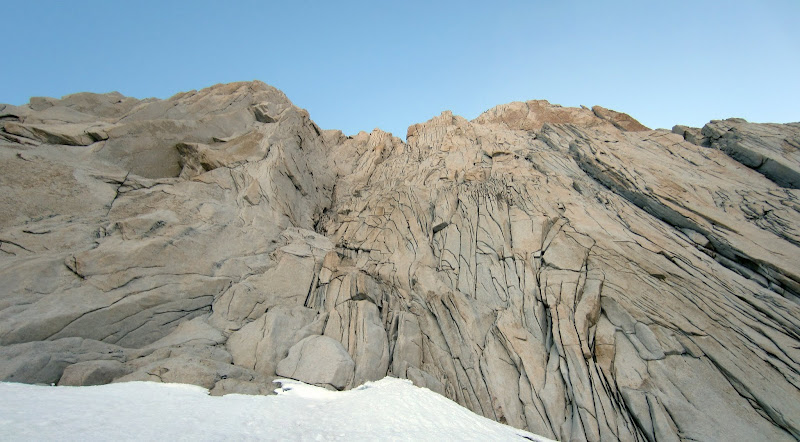
January 29th, 2011 - Nice walls and aretes on Ruby Pk (planning photo - route lines were best guesses, but are not quite accurate)
Visit on googleusercontent.com
January 29th, 2011 - Nice walls and aretes on Ruby Pk (planning photo - route lines were best guesses, but are not quite accurate)
This 2013 Memorial Weekend, Nic and I set up camp at the base of the wall to enjoy some fun adventure climbs away from the crowds. We didn't know too much about the wall, and the little bit of information out there was vague, misleading, or flat out wrong, but this just added to the FA-feeling of climbing here. Unfortunately the rock and cracks aren't nearly as good as it had appeared from far away. This first day we made it about halfway up the East Arete (IV, 5.10) and were shut down by an impasse . . . another time perhaps? At least working out the right (and wrong) way to do the first two pitches saved us time climbing the Left East Arete two days later.
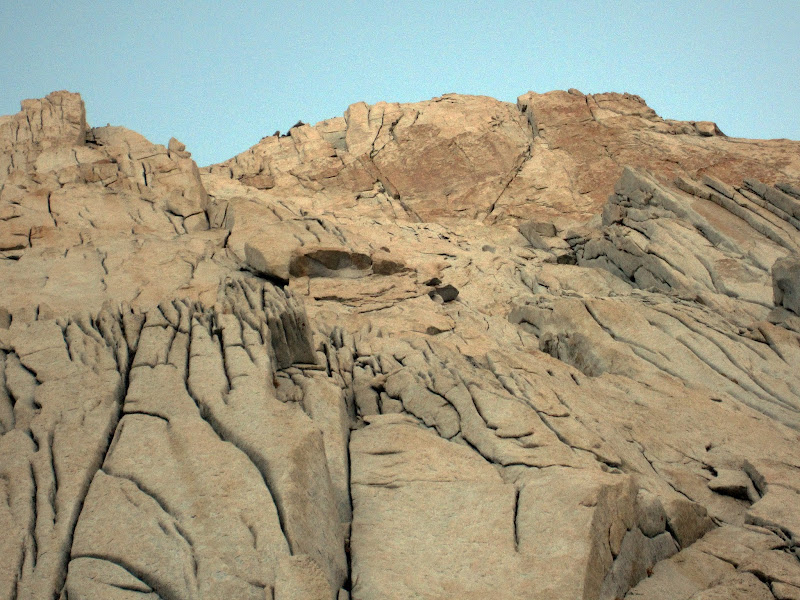
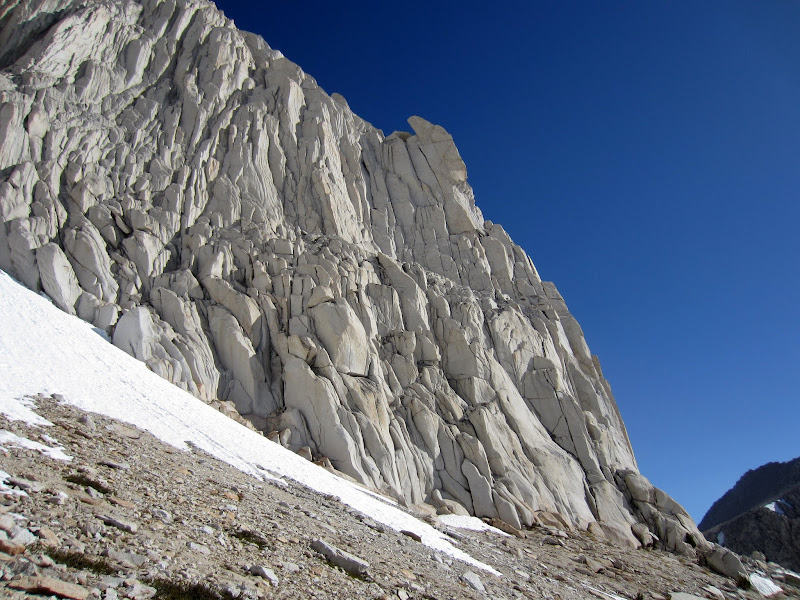
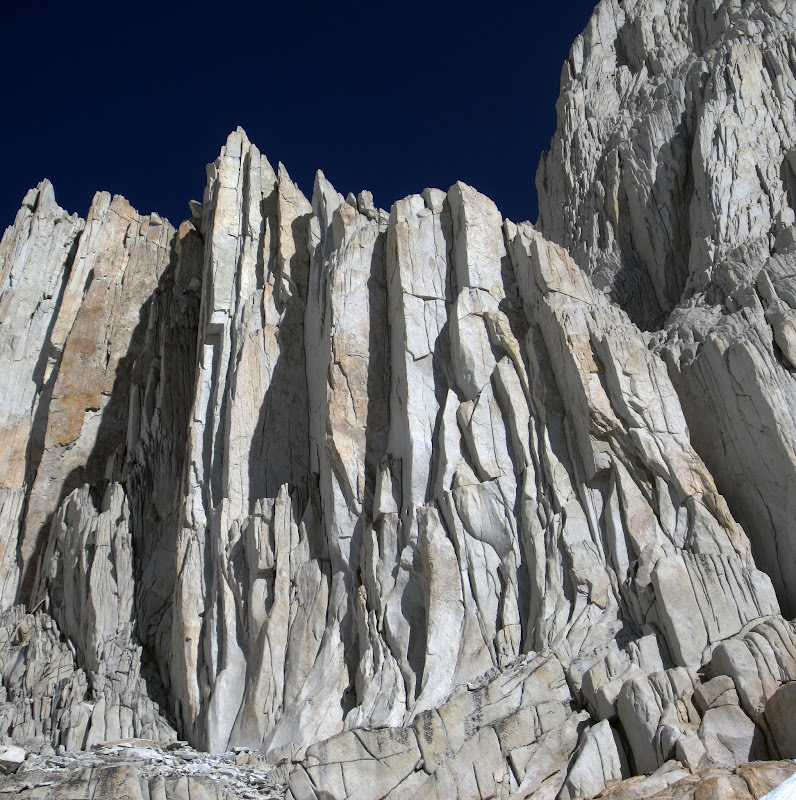
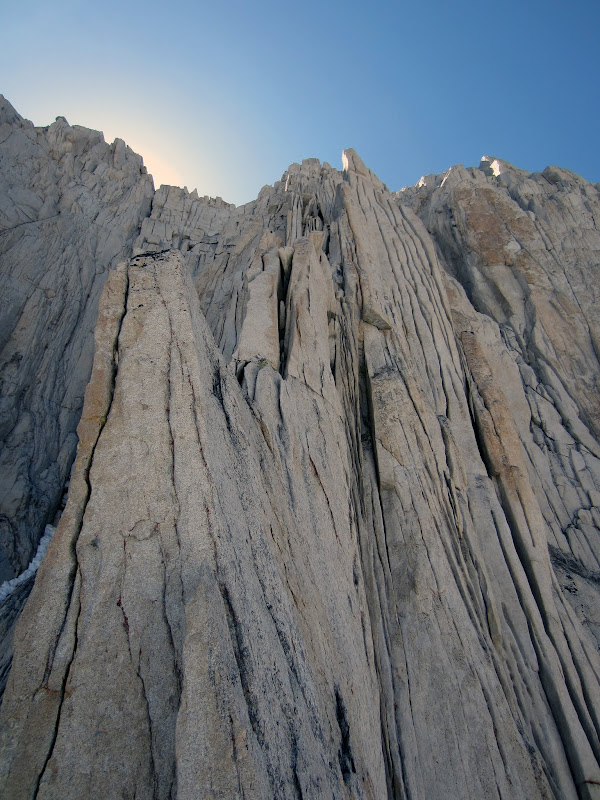
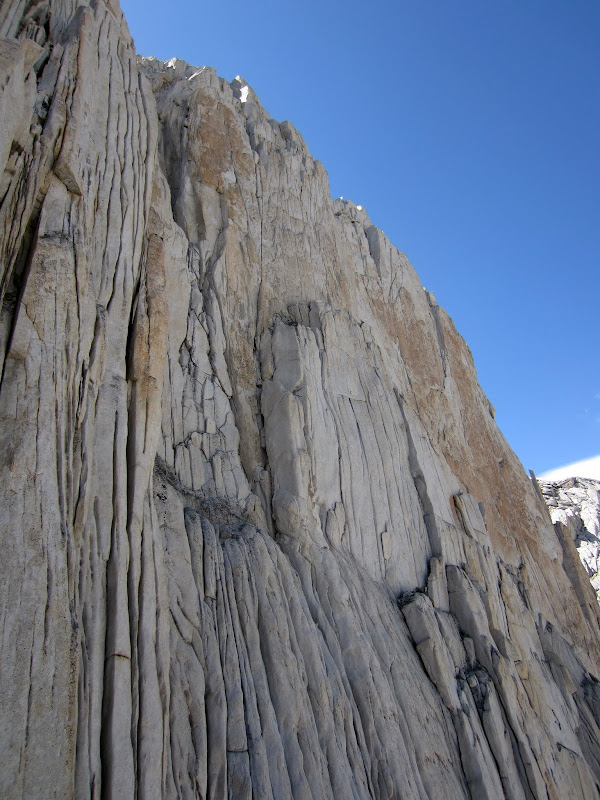
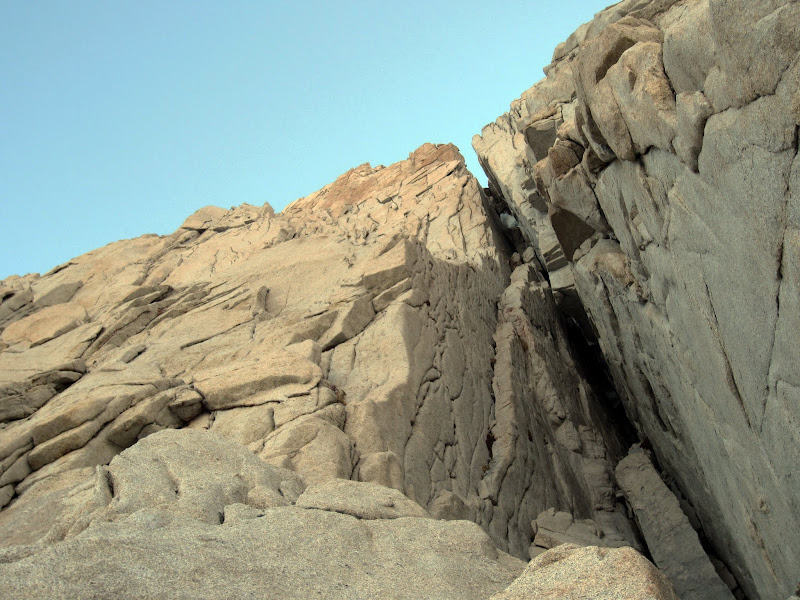
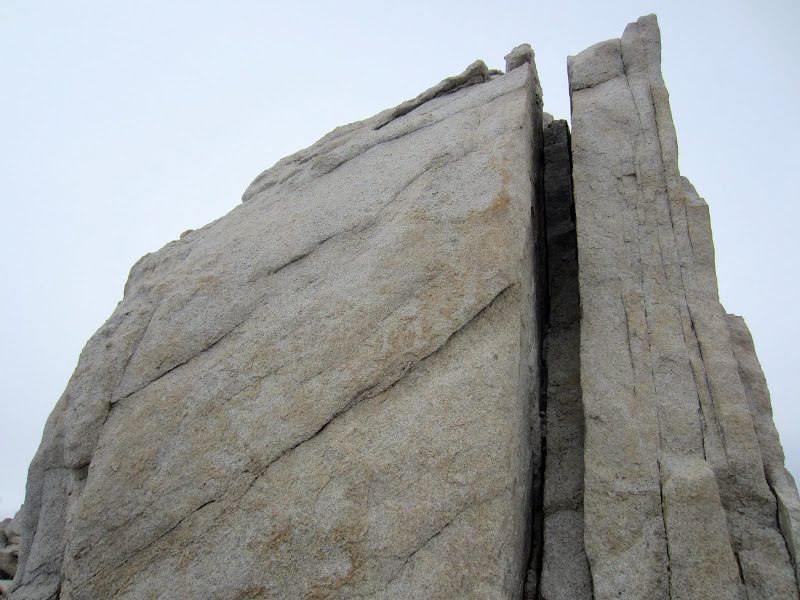
While a beauty from far away, upon closer inspection, Ruby has a bit of a skin condition . . .

Visit on googleusercontent.com
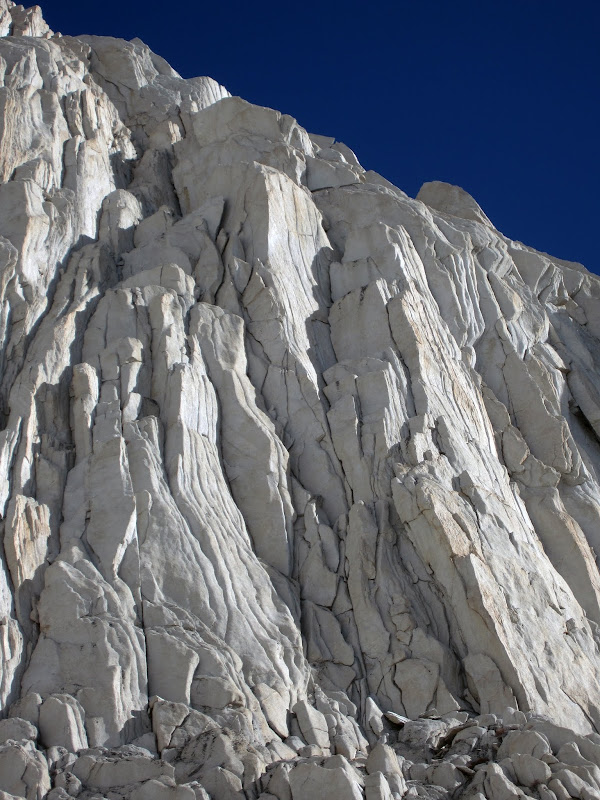
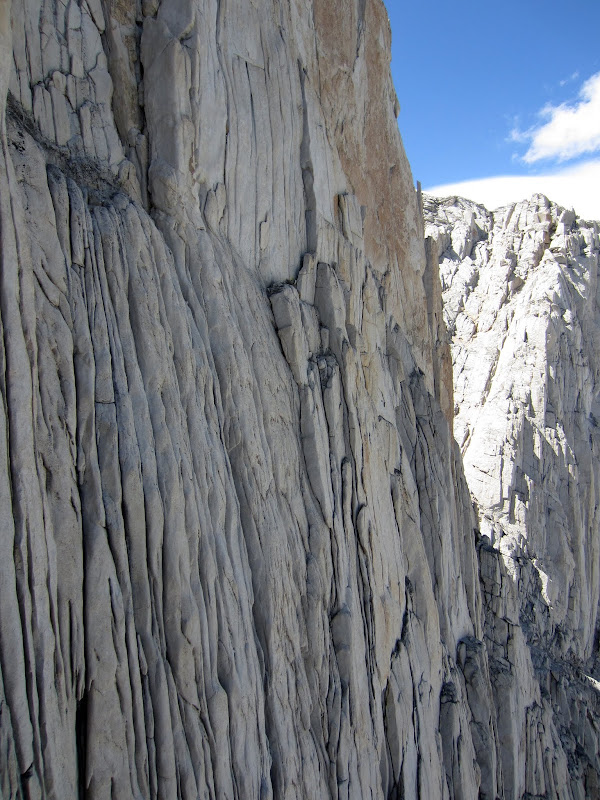
Crack textures on P4 of the Left East Arete.
Visit on googleusercontent.com
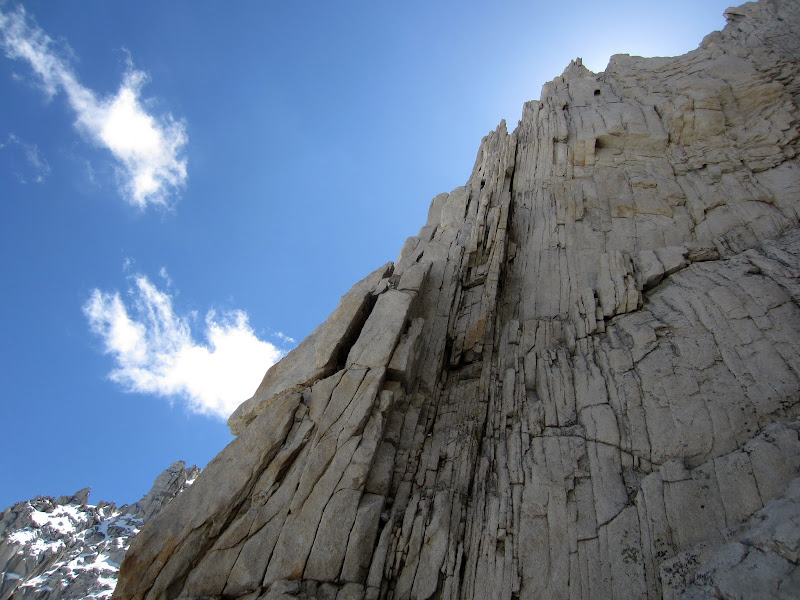
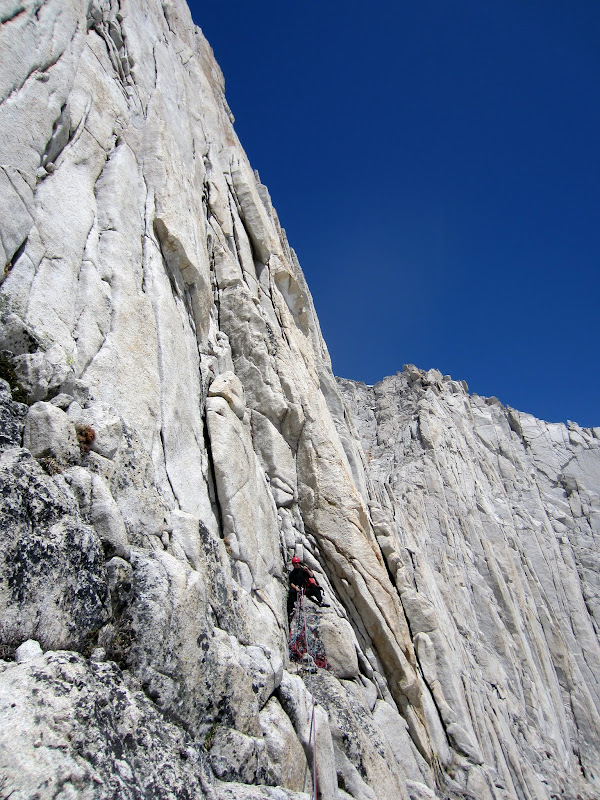
Looking up the Left Ruby Wall.
I have since learned from Ruby Wall what rounded, flared cracks look like from a distance. Until you've experienced such cracks, you might not notice or care, but it makes them much more difficult to climb and protect!
The route that I was most interested in was the East Arete. Assuming that Galen Rowell's description held for other parts of the wall, it sounded wonderful:
" . .. Parts-of the route are very steep, but in places there are five to six cracks to choose from within a foot or two of one another. The climbing is consistently 5.7-5.9, with a couple of 5.10 spots."
What we discovered was that the quote about the cracks, while sounding quite nice, is actually what makes the wall quite challenging! A more accurate wording would have been:
". . . in places there are five to six cracks to choose from within a foot or two of one another. However, most of these cracks will take you off-route and merely serve to confuse the lead climber in their routefinding and make topos and written descriptions nearly worthless. Also, nearly all of these cracks are flaring, and usually shallow or wide, and very difficult to jam or protect."
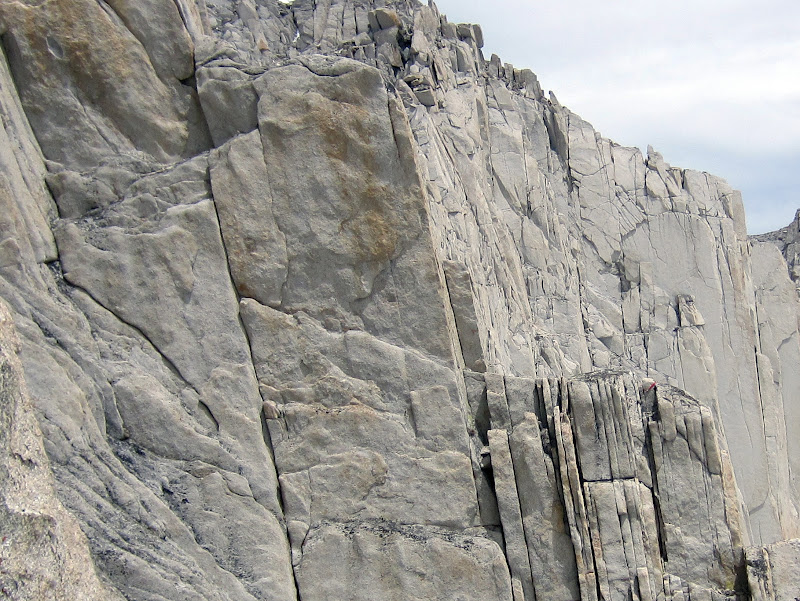
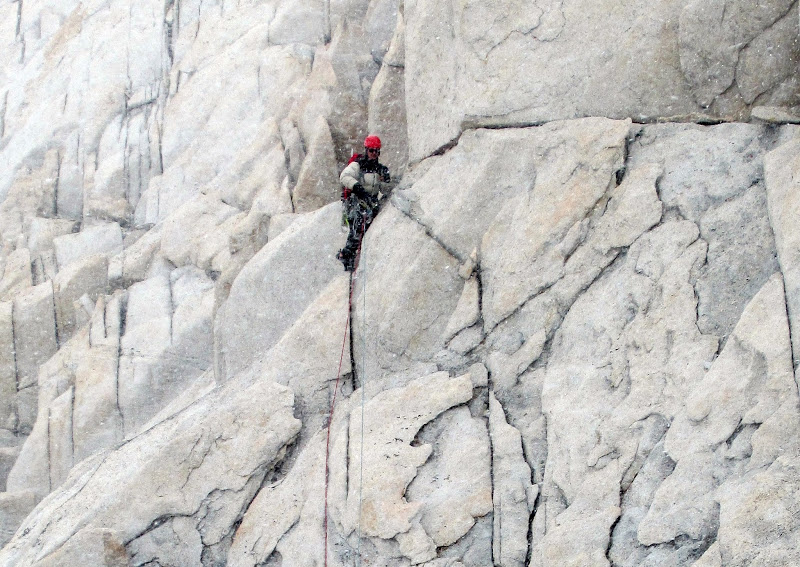
[Click to View Linked Image]
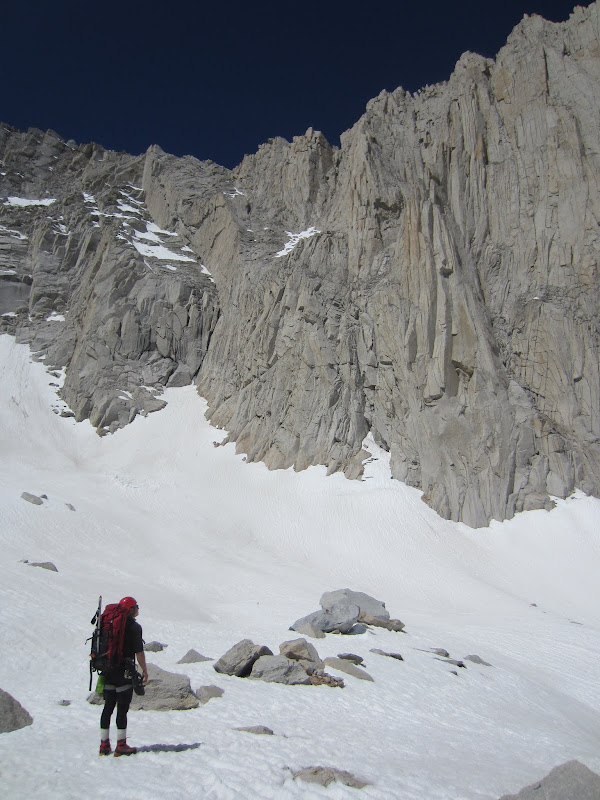
Ruby Wall Left, with Nic returning. The wall is larger than it appears, as perspective is greatly compressing the upper section.
May 25, 2013
Approach
Nic and I drove straight from work Friday, and got a late enough start that we started from the trailhead with no sleep, heading up just after sunrise. There were many other climbers heading in to Rock Creek to climb Abbot, Dade, or Bear Creek Spire. When they asked us where we were going with all of our climbing gear, our response of "Ruby Wall" led to blank stares.
The trail is very easy, and not too steep. However, as Nic is stronger on rock than I, and I am stronger on trail than Nic, we both got chances to see each other at our weakest.
[Click to View YouTube Video]
[Click to View YouTube Video]
Nic was getting tired hiking with a heavy pack. He was soon to learn that stopping to rest comes with it own challenges.
The cross-country travel around the north side of the lake was a bit of a pain (and turned out to be much more so in the dark when we hiked out!). I suspect a longer traverse on the south side might have been better. Anyways, as soon as we neared the first of the 3 main walls of Ruby Wall, we knew that we were in for some fun exploration!
Visit on googleusercontent.com
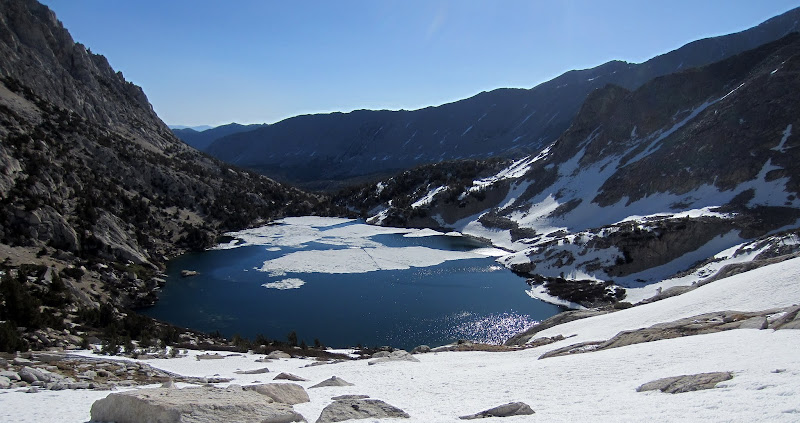
Looking back on Ruby Lake. The lake started out frozen in the morning, but as the sun came out the larger ice shards freed up and drifted towards the outlet, where they re-froze. By the time we left, all of the lake ice had melted away. (by Nic Risser)
Visit on googleusercontent.com
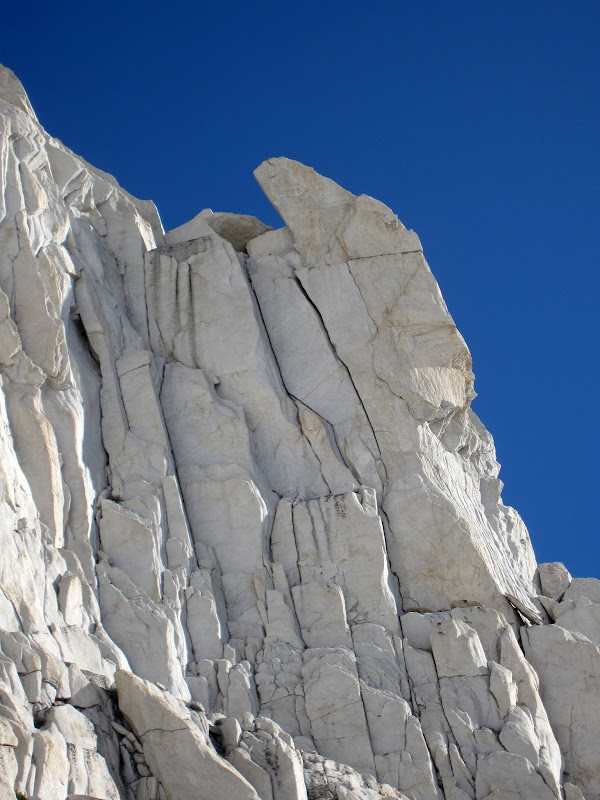
Ruby Wall Right and 'The Thumb'.
Visit on googleusercontent.com
'The Thumb' on Ruby Wall Right.
Visit on googleusercontent.com
Ruby Wall Right, detail.
Visit on googleusercontent.com
Ruby Wall Middle High Res Panorama
Visit on googleusercontent.com
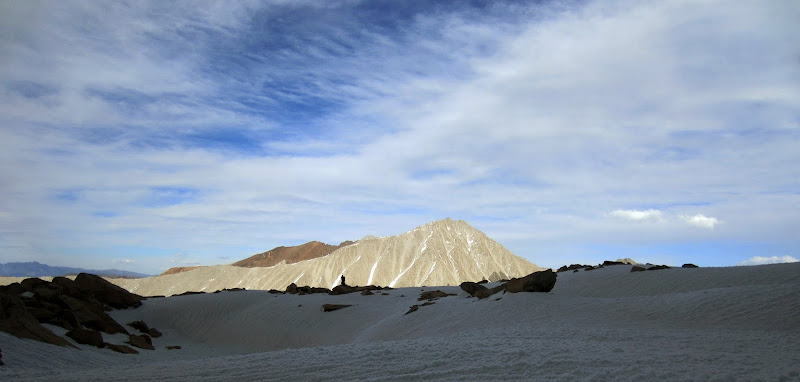
Nic looking back at the aretes on Ruby Wall as we near camp at 12,200'.
We reached camp and had things set up by about 9am, and were charging the wall, ready to tackle our first climb by 10am. A little late, but we had less descent to do as our camp was spitting distance from the base of the climbs!
East Arete (Attempt)
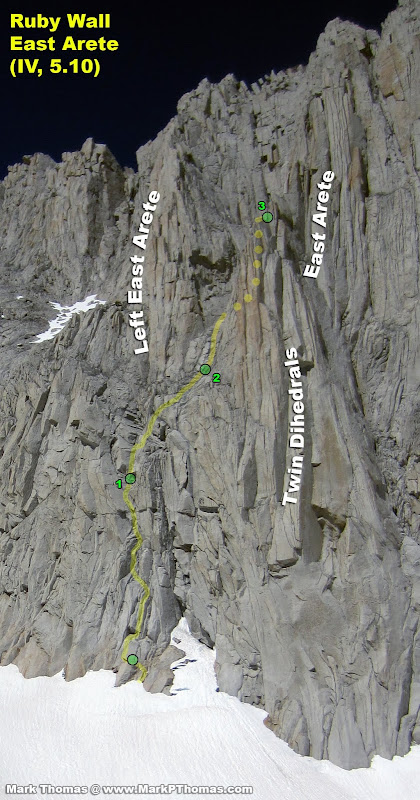
Visit on googleusercontent.com
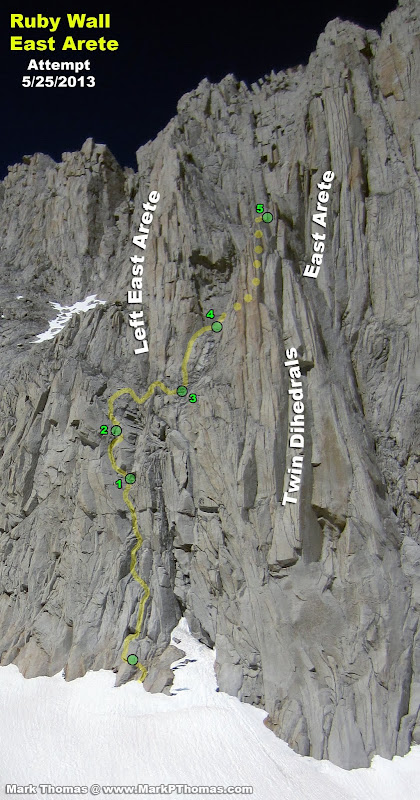
Our attempt of the East Arete. P2-P4 are not the optimal way to go.
So we approached the wall casual, talking excitedly about all of the interesting looking variations to try. However, we were about to get spanked. One problem was it was very hard to match up and topo or route description on where to start! The most obvious feature marking the start of the route was a permanent snowfield. This was not too helpful this time of year. In fact, I wonder how different the base is once the snow has melted out. Another tricky thing is with the snow on the approach and descent (which likely would freeze at night), and cold daytime temps in the shade, we both had to climb with boots, crampons, ice axe, and puffy jackets in our packs, in addition to food and water for the day. The larger packs on both of us would make everything harder and more 'alpine' in feel - especially all of the chimneys and corners.
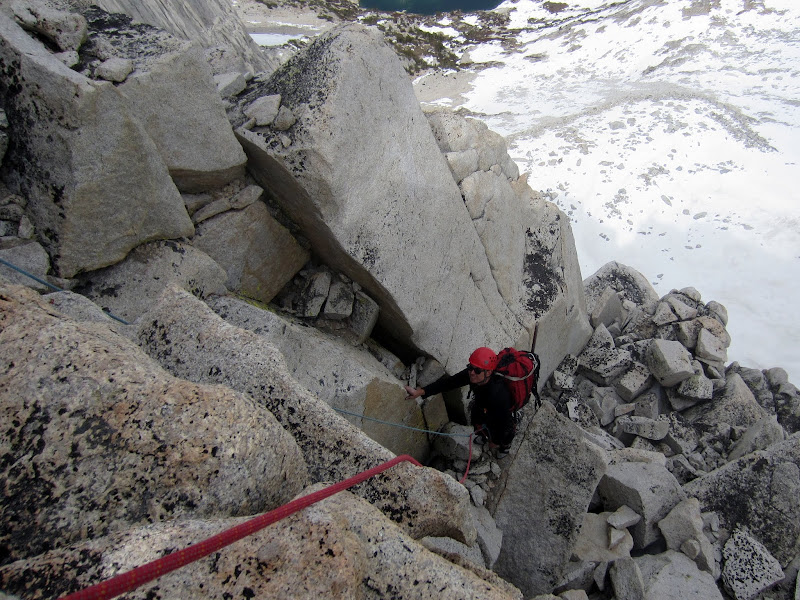
Visit on googleusercontent.com
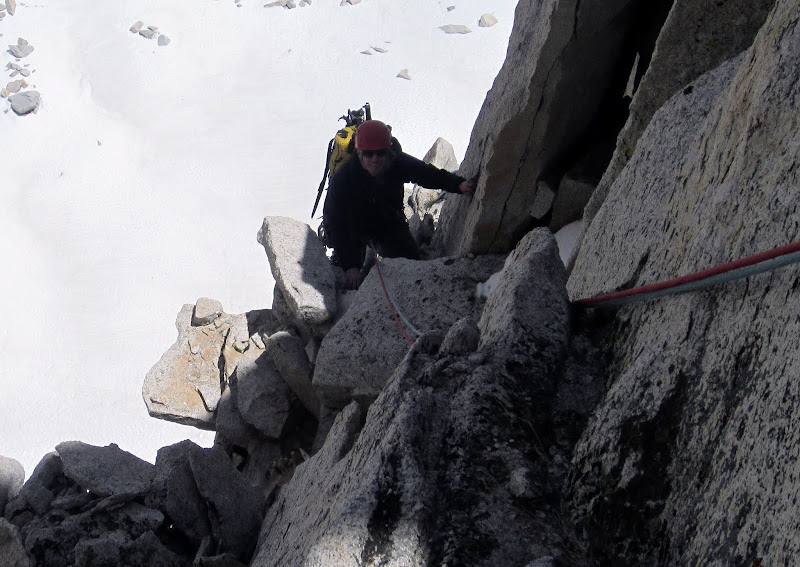
Reaching the ledges for starting the East Aretes Routes. We had to climb up these a little ways to reach a spot where we could change from boots to climbing shoes.
Visit on googleusercontent.com
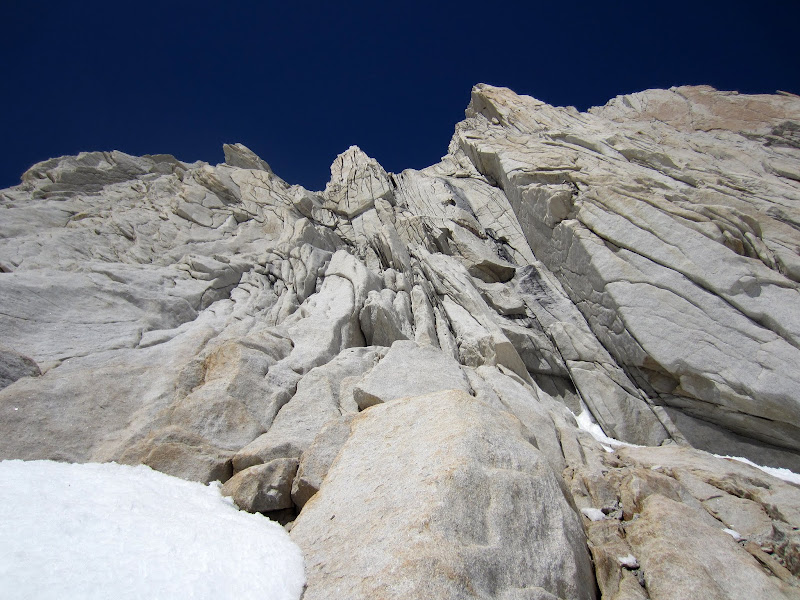
Starting up P1, which leads to both of the East Aretes. There are a few ways to go here!
Visit on googleusercontent.com
Wide crux on P1. Halfway up you can escape the corner a bit and stem. This was annoying with a pack on.

Visit on googleusercontent.com
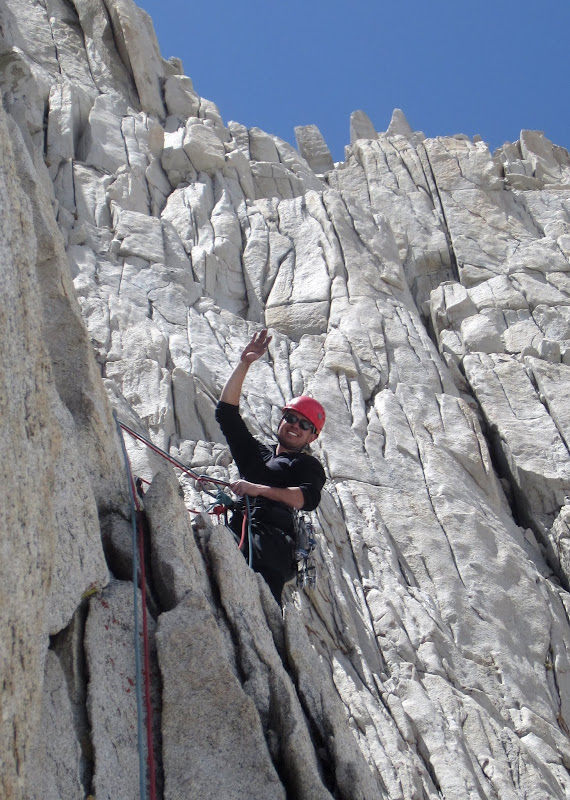
Nic finishing the wide crux on P1, on the stemming part.
Atop P1, there were two ways to go. The chimney had no pro and looked tough with a pack on, and I didn't want to haul, and the way left looked fine and likely to reconnect. It was education to do this, but don't go that way!
Visit on googleusercontent.com
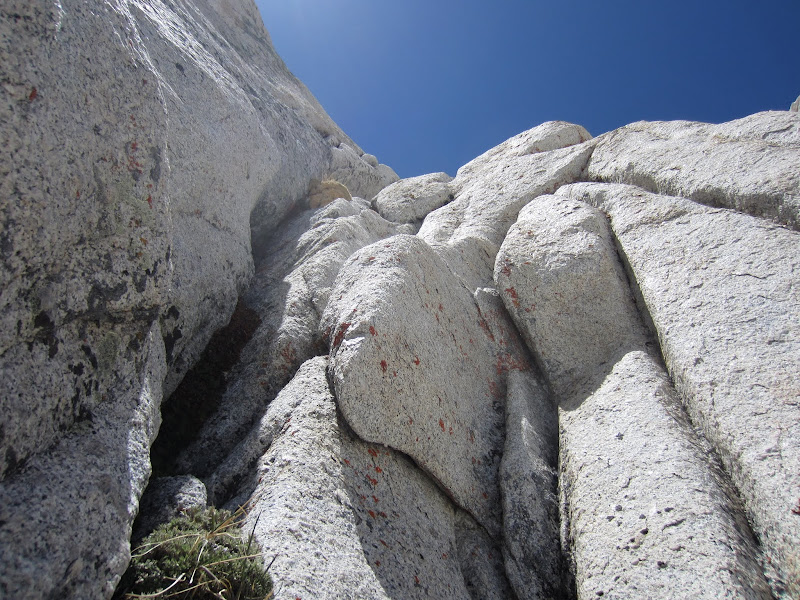
Looking up the P2 chimney, the way we should have gone . . .
Visit on googleusercontent.com
Looking at the way we went for P2. It looks nicer, but it gets nasty and off-route.
Visit on googleusercontent.com
P2 flaring cracks and hummock crux. This has been one of the few times that I had to mantle a hummock. Above this is a 15-20 ft friction traverse, with very flaky granite.
Seeing as this was taking us off route, and was more dangerous than I felt comfortable leading, I stopped short and belayed Nic up to get through this part and find a way back right.
Visit on googleusercontent.com
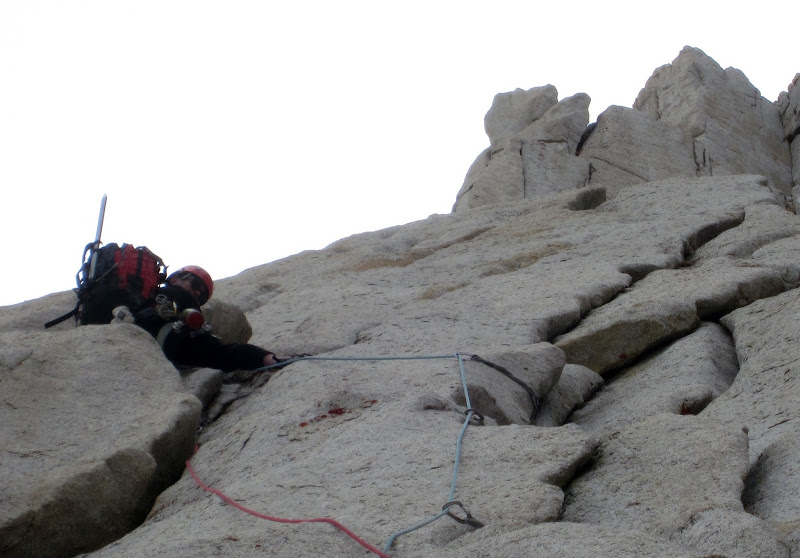
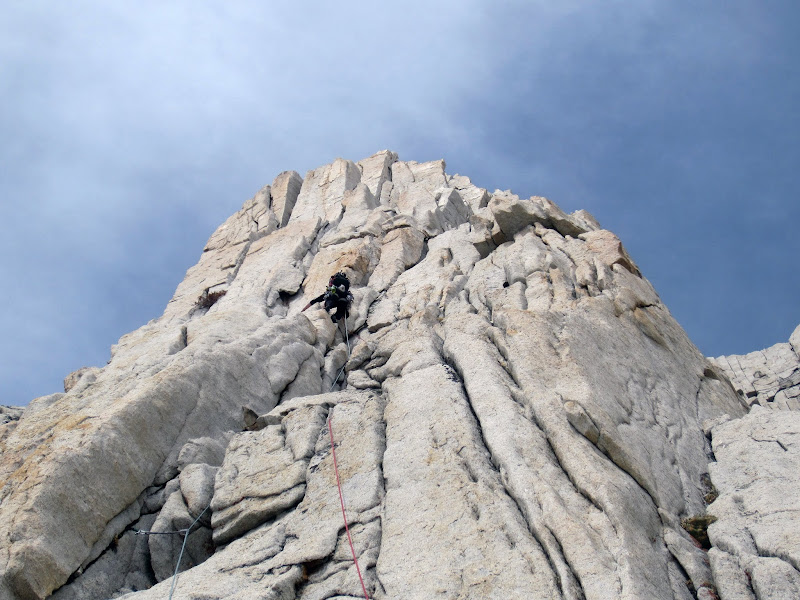
Nick leading above the crux on P3. Climbing through this next 30 ft required some strange balance and friction moves.
This is where we went wrong. We had a key photo showing that the next pitch for the Left East Arete went up and left from here (we were still undecided on doing Left or Rowell's East Arete), but we were focused enough on the nice big ledge above that we overlooked it. Nic stopped short (where he should have belayed for the next pitch of the Left East Arete), and suggested I run up to the better ledge. I tried this corner, which was a lot worse than it looked! More hummocks, dirt, grit, and flaring cracks with iffy jams and pro. On rappel I saw that it is better to take the right side of this wall even though it looks steeped and thinner.
Oh well, we still were undecided on whether to climb it or the East Arete anyways, and we couldn't definitively tell where either one started, either. It looked like we were at the first reasonable spot to get onto the crest of the East Arete, so we changed plans and headed that way.
Visit on googleusercontent.com
Left East Arete. Once we were in the shade the temperature immediately plummeted to the low 40s or high 30s. It was harder to keep climbing! As this wall faces east, that meant that on the next two days we'd want to get as high as possible by about 1-2pm before the cold slowed us down.
We saw a reasonable way onto the East Arete. You can traverse up and left on a low 5th class slab, then back right on ledges to traverse around the crest midway up the wall. Or, on the ledge, you can then climb directly up the vertical cracks at about 5.8-5.9. It is looser than it looks though!

Visit on googleusercontent.com
Nic Stemming his way onto the East Arete. Funky rope is from the big traverse he did from the left.
Unfortunately, just as we got to the crest, we got shut down by an impasse. If this was one of the 5.10 cruxes, then it was certainly 5.10R for leader and follower, on flaky granite.
Visit on googleusercontent.com
East Ridge impasse. It is hard to see here, but the flake in front of us is about 12' high, and the narrow face is vertical to overhanging, and leaning hard to the side (overhanging to the left). The crack might not take good pro, climbing would be very tough, ending with a wild a-cheval. Climbing the face on the right would be 5.10ish on flaky, gritty rock, traversing about 20 ft or more with no pro, so basically R for leader and follower. A bit too much for today . . .
Visit on googleusercontent.com
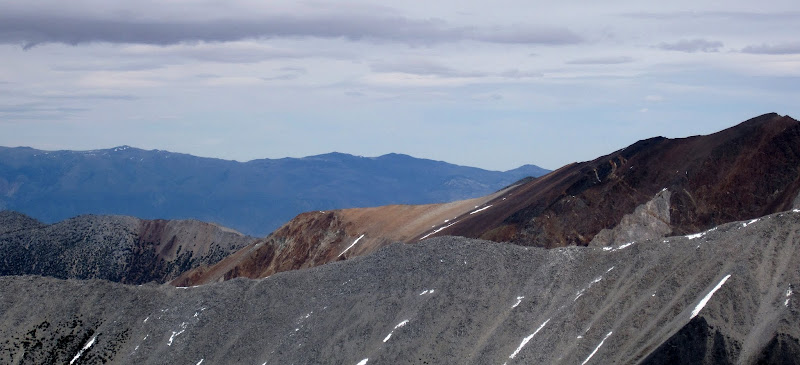
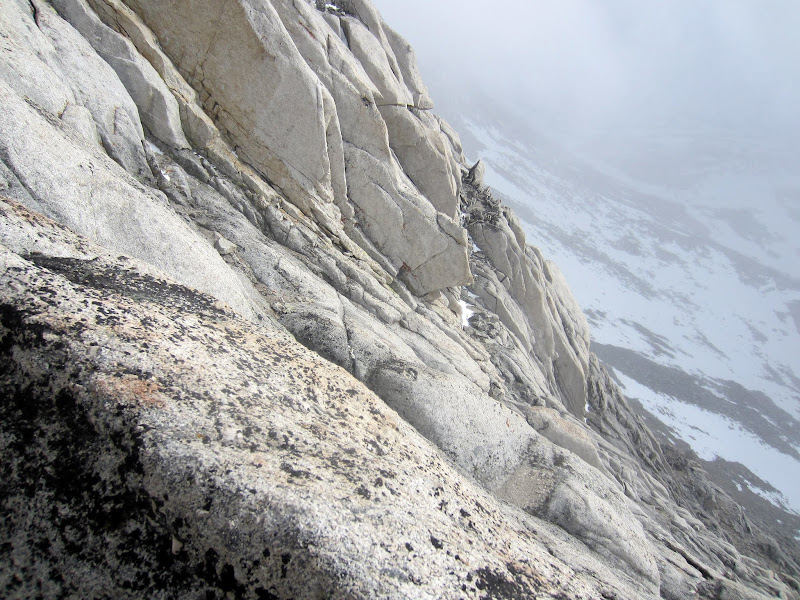
Gold Wall from the East Ridge impasse.
Visit on googleusercontent.com
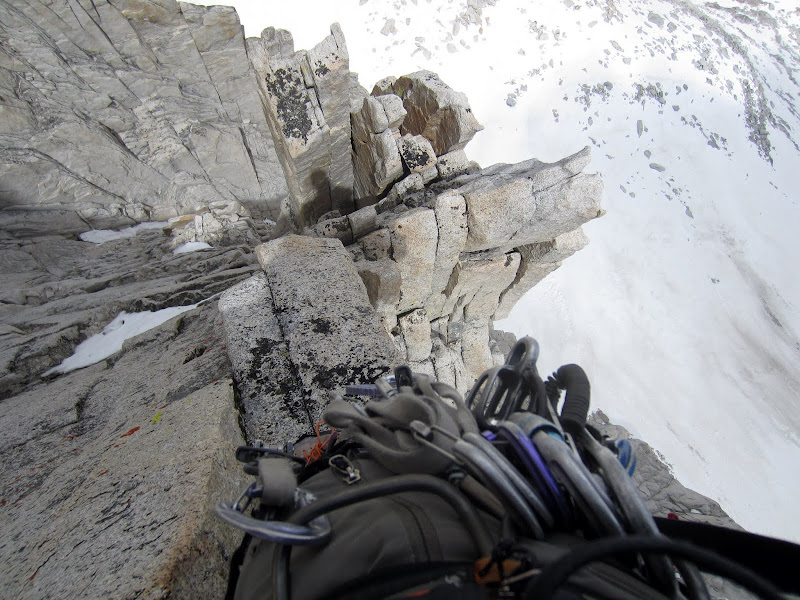
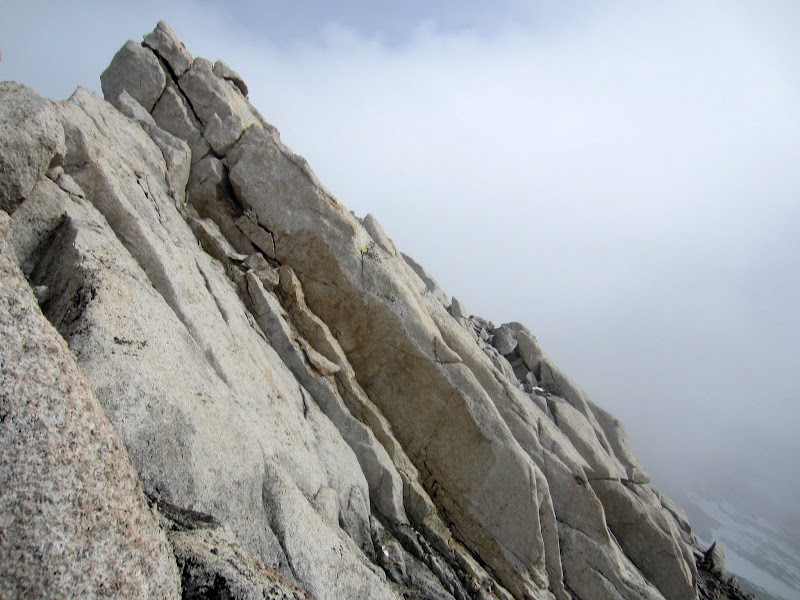
Main Wall from the East Ridge impasse
Visit on googleusercontent.com
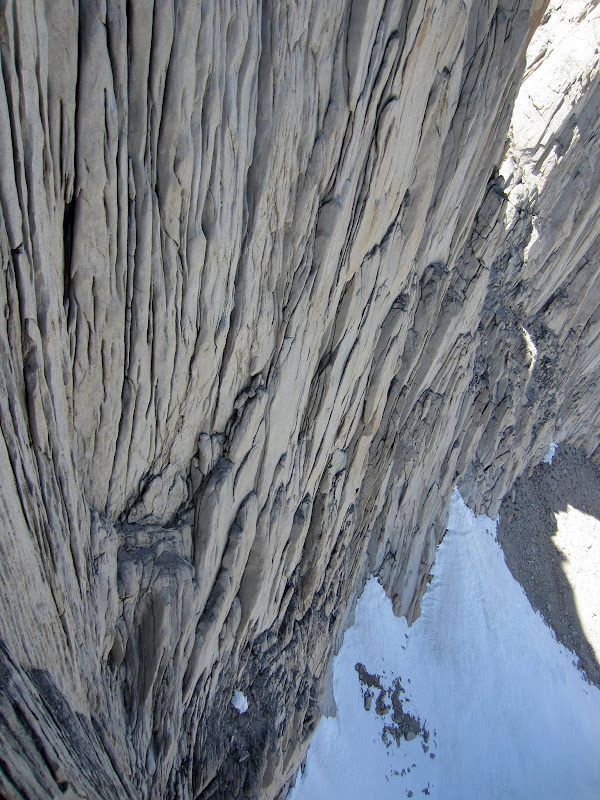
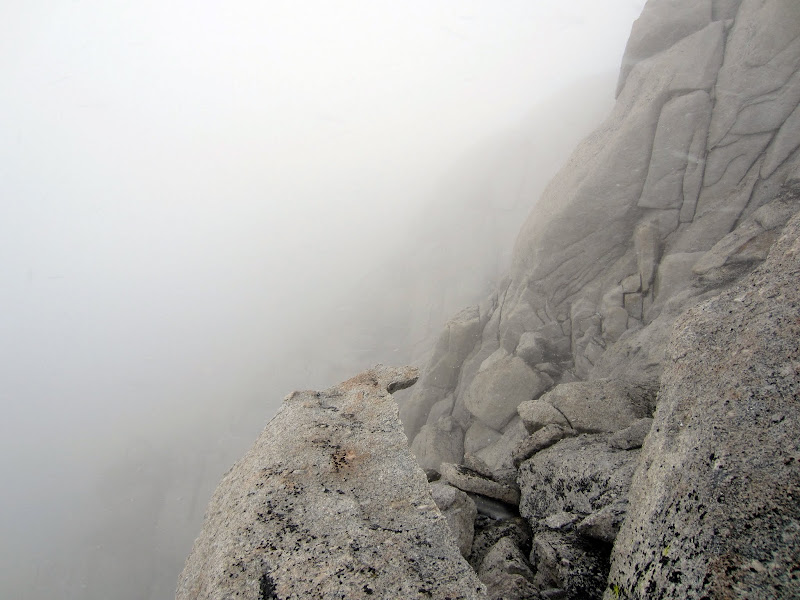
Looking Down from the East Ridge impasse.
Nic had also been slowing down in his climbing, really feeling the altitude at this point. It was also VERY cold, making it difficult to keep up the motivation to continue climbing. Between that and the ambiguity on where we were and should be going, we bailed and spent the remainder of the day closely checking out the potential starts to where we thought the other routes went. (Note: The annotated photos in Moynier and Fiddler do not match the few topos provided, and Secor's annotated photos differ yet again!)
Recon
Visit on googleusercontent.com
Center Route start.
Visit on googleusercontent.com
Daphne start. This chimney is huuuuge!
Visit on googleusercontent.com
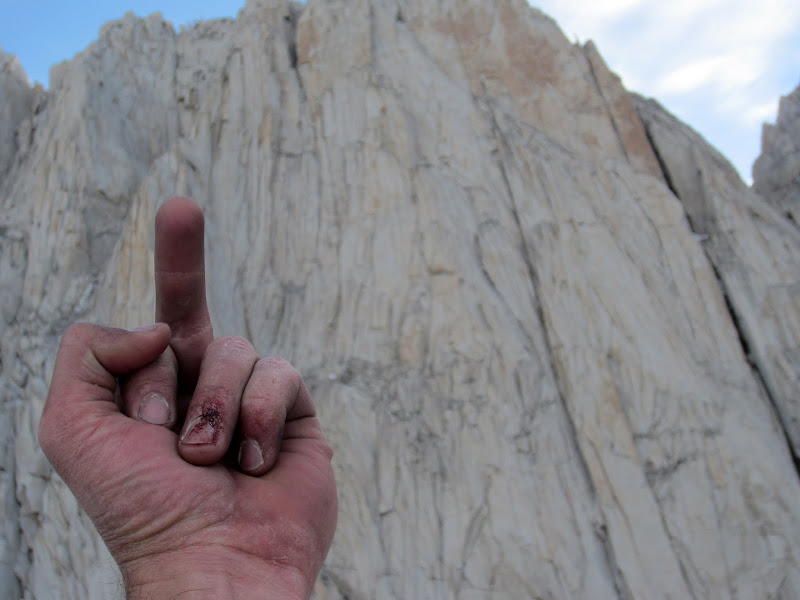
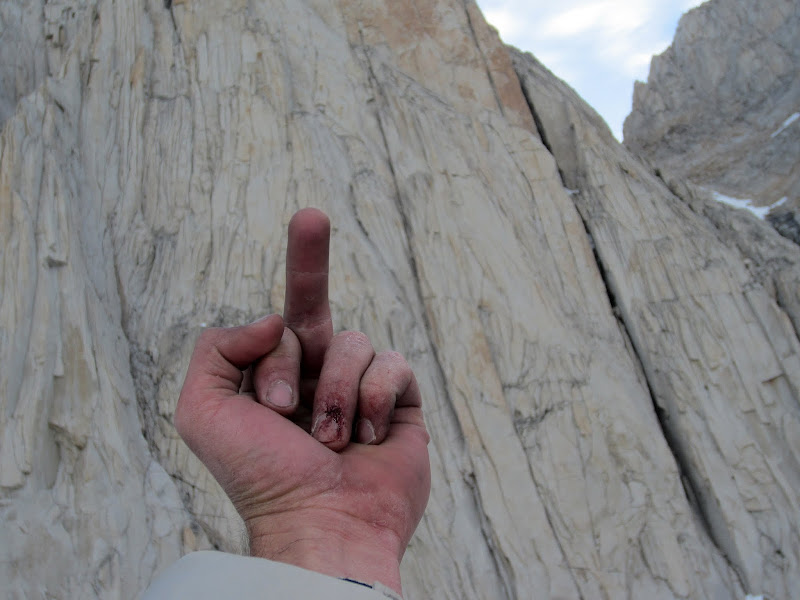
Nic expressing his feelings to the East Arete. (by Nic Risser)
May 26, 2013
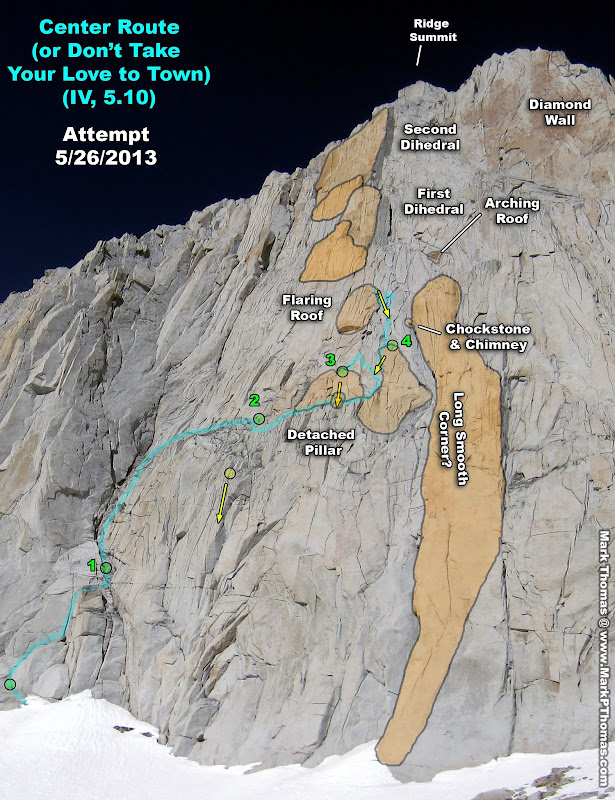
Don't Take Your Love to Town (or Center Route?) (Attempt)
Day 2, we tried out the Center Route - or Nic was convinced it was the 'Don't Take Your Love to Town' route. Either way it didn't matter as the most sensical line we could find incorporated both descriptions. We made it high, but reached another impasse. Perhaps with lighter packs (no snow descent) and warmer nights (to risk a bivy) we'd stand a better chance at finishing the route. At least we should be able to do the first 5 pitches faster.
Visit on googleusercontent.com
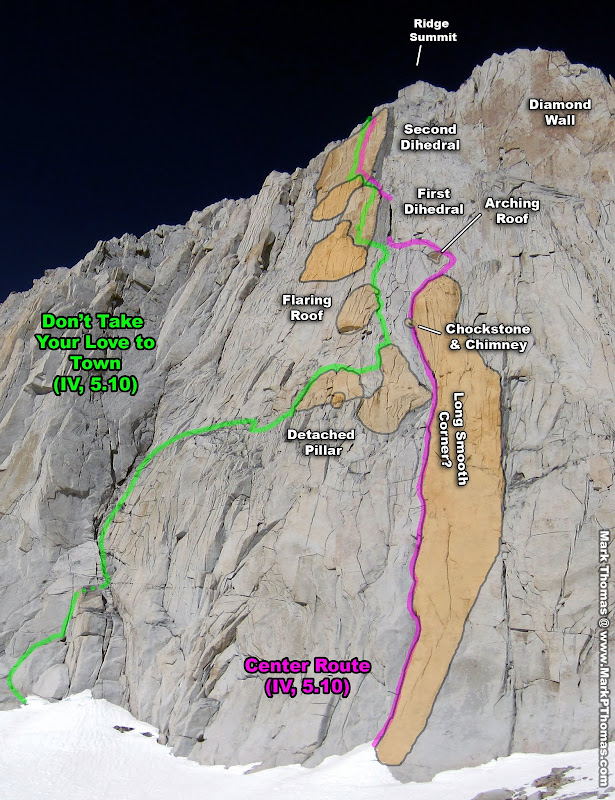
Ruby Wall Left. This wall is larger than it looks!
[Click to View Linked Image]
Ruby Wall Left and Middle, high-res panorama

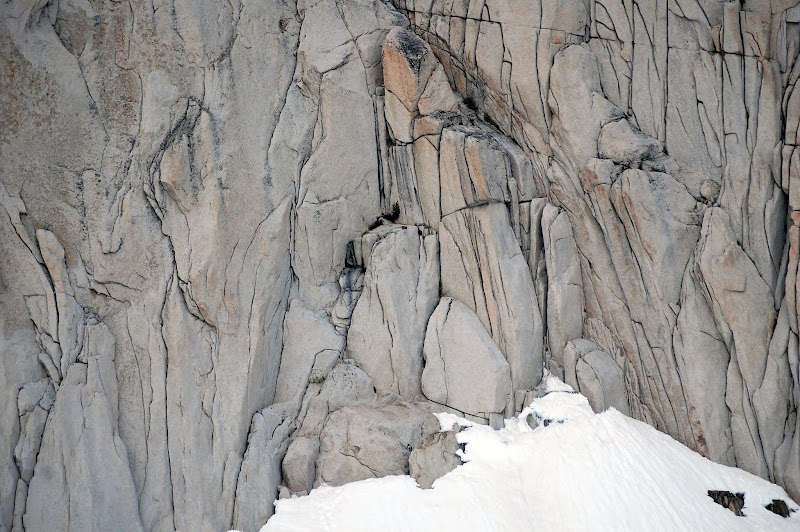
Visit on googleusercontent.com
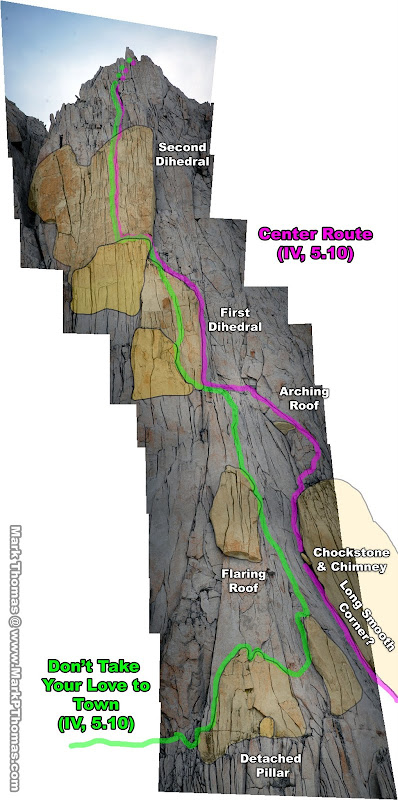
Center Route - High-Res photo composite of pitches 3 and higher. You traverse in at the bottom from the left.
Nic had really been wanting to climb "Don't Take Your Love to Town". I had really preferred to try Rowell's Center route, described earlier. However, we couldn't really match topos or descriptions to the entire length of the wall or entire annotated photo in any source, and what we could match up, made it look like where one route faded away, the other picked up. So we decided to just take the most reasonable line and discover from that what route we were on! The main feature we found to follow was the large ledge and OW-flaring roof.
Visit on googleusercontent.com
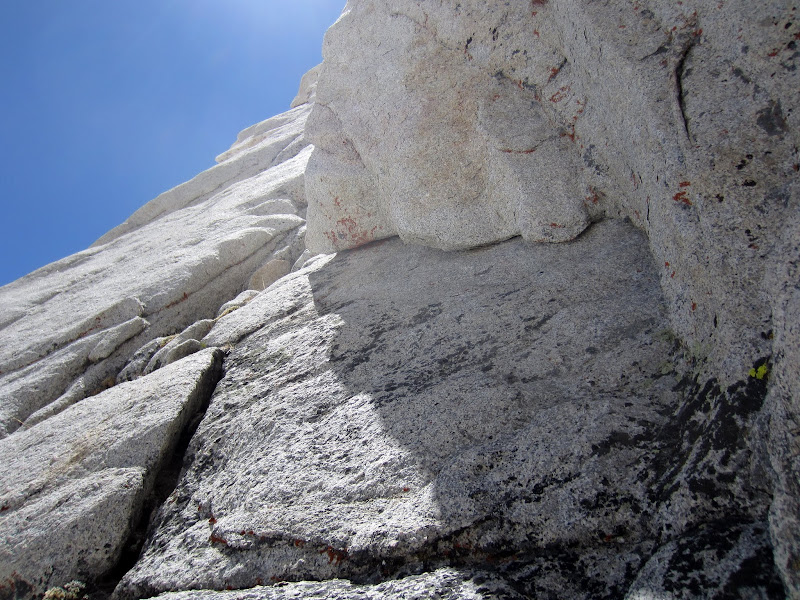
Center Route - First Pitch Area. Where to start? The route info seemed to match several lines that we could pick out. One in the right corner had some fixed gear higher up.
Visit on googleusercontent.com
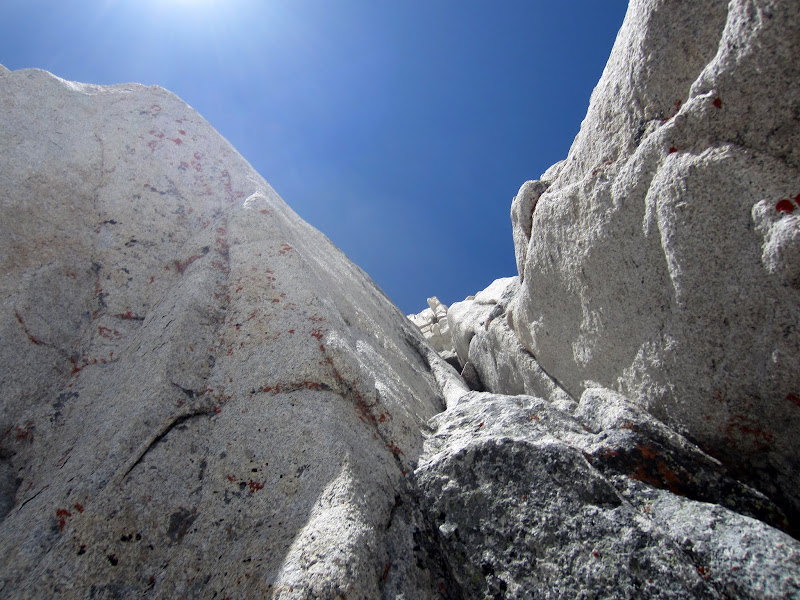
P1 5.10 mungy, wet, gritty, rounded, flaring twin cracks. Nice lead, Nic!
Visit on googleusercontent.com
Nic leading P2. Fairly straightforward, about 5.7-5.8. Watch the loose blocks though.

Visit on googleusercontent.com
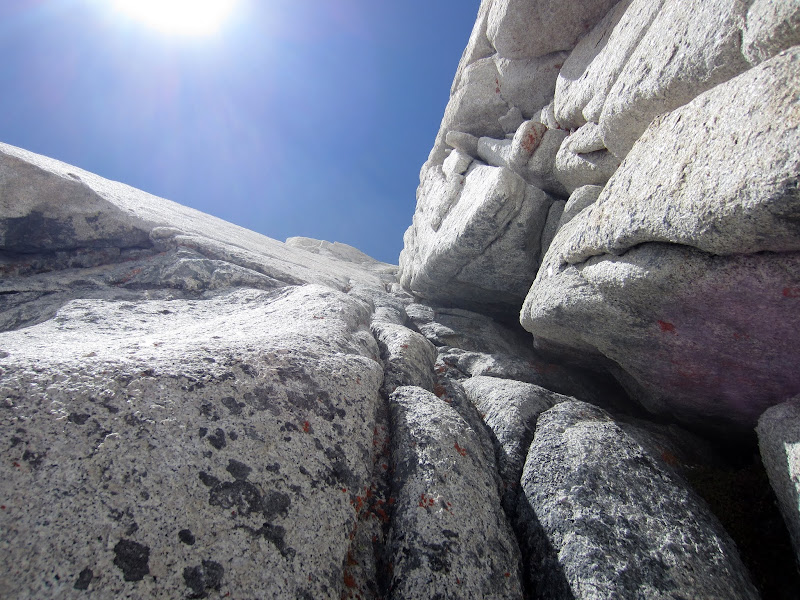
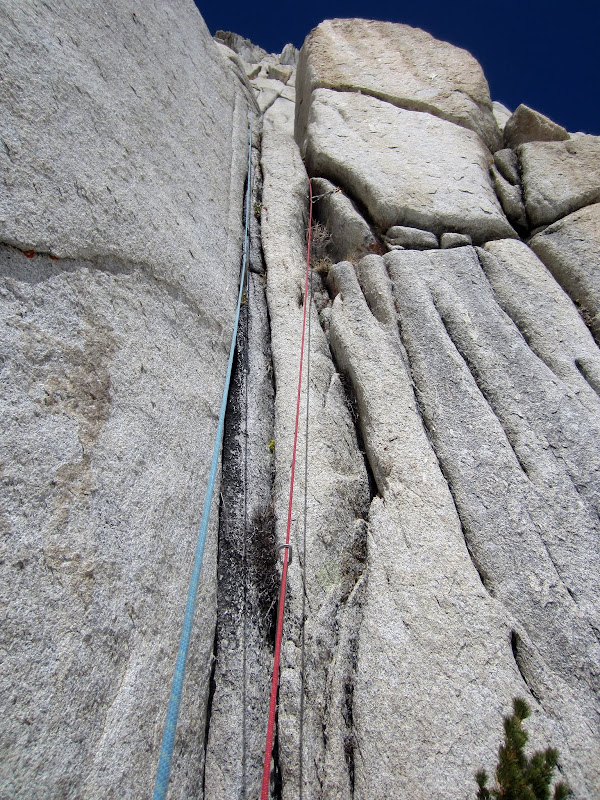
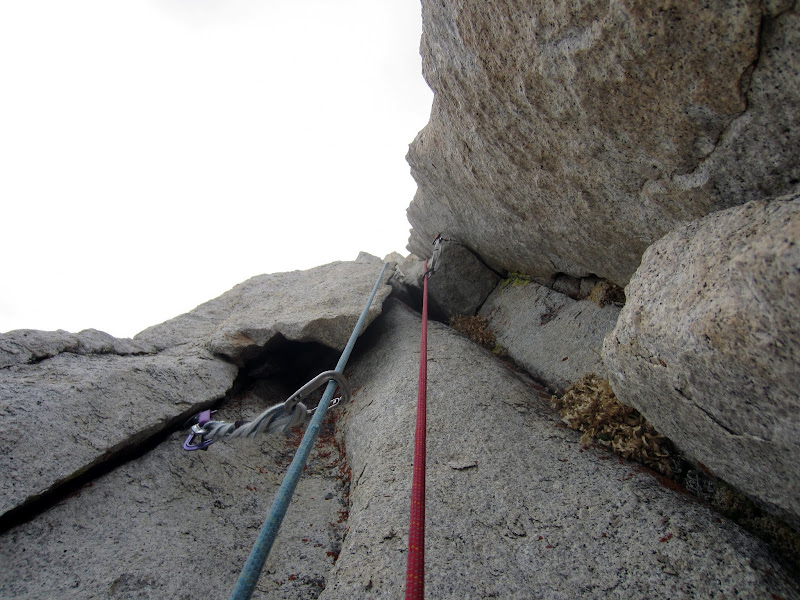
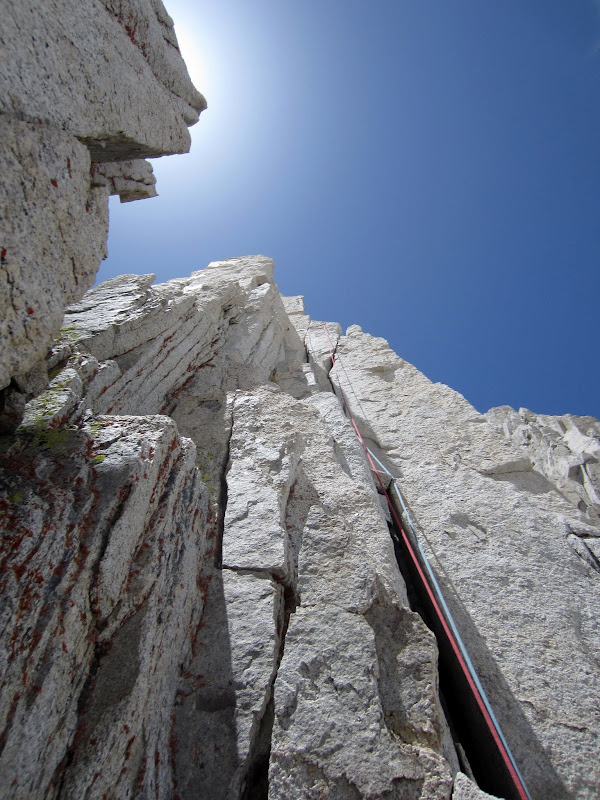
//Headwall above the ledge. You can see the flaring OW/roof split by a crack on the right. That was our reference for hitting the 5.9+ traverse into the next corner system.//
Visit on googleusercontent.com
Nic belaying from ledge below the roof. You can see the pillar around his corner to the right. Really, if you belay here, you should stop before the corner he is in for the drag. I set up a different belay to correct that.

Visit on googleusercontent.com
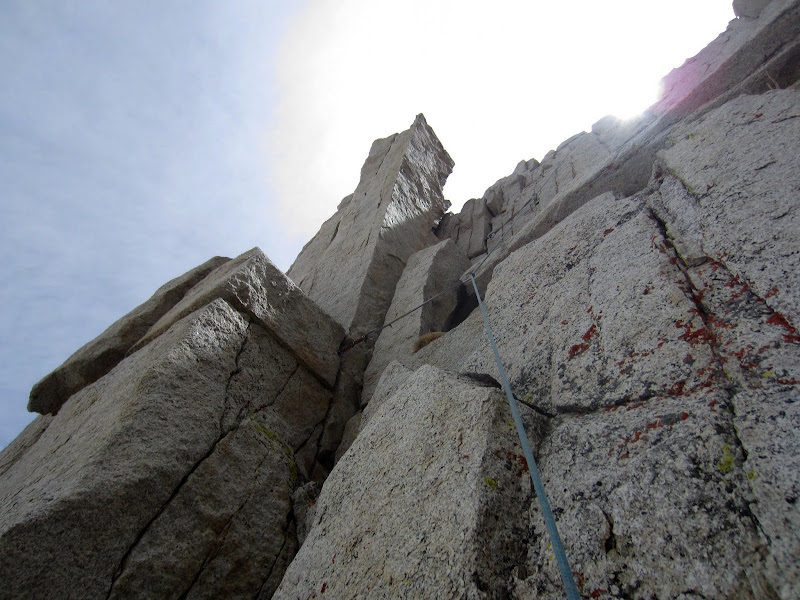
Traversing around the pillar. It sounds like you should climb the pillar, and then do the 5.9+ traverse from there. However, traversing around it might have a technically harder section, but it is cleaner, better protected, and more straight up.
[Click to View Linked Image]
Alternate to the pillar (which Nic zigged back to before zagging back up and right). This left flake is maybe 5.9 to 5.10a, with a thin stepover into the corner. The corner crack has a lot of loose crap (would clean up with more climbing), but it took pro well and was a lot of fun! Crux is the exit, which is a 5.10 flaring finger crack or step around with a mantel finish.

Visit on googleusercontent.com
Nic atop P3. Things were going well, but about to slow down . . .
Visit on googleusercontent.com
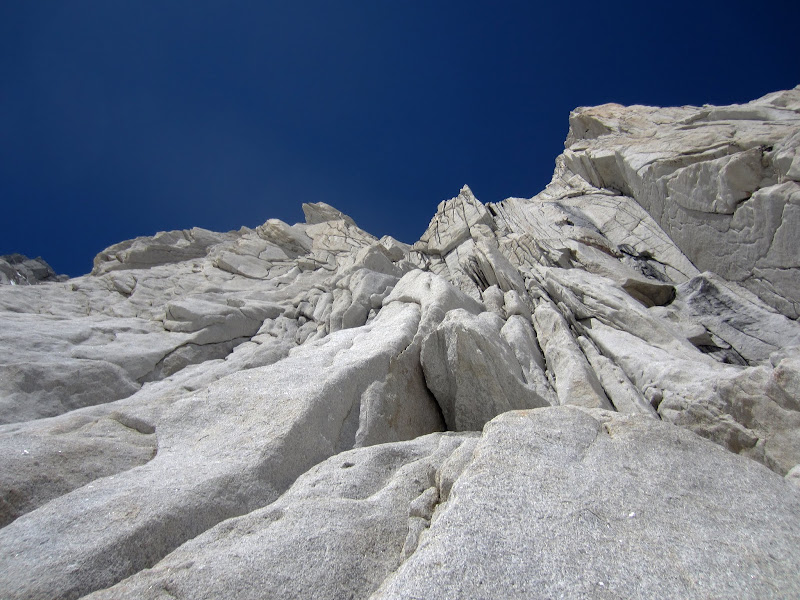
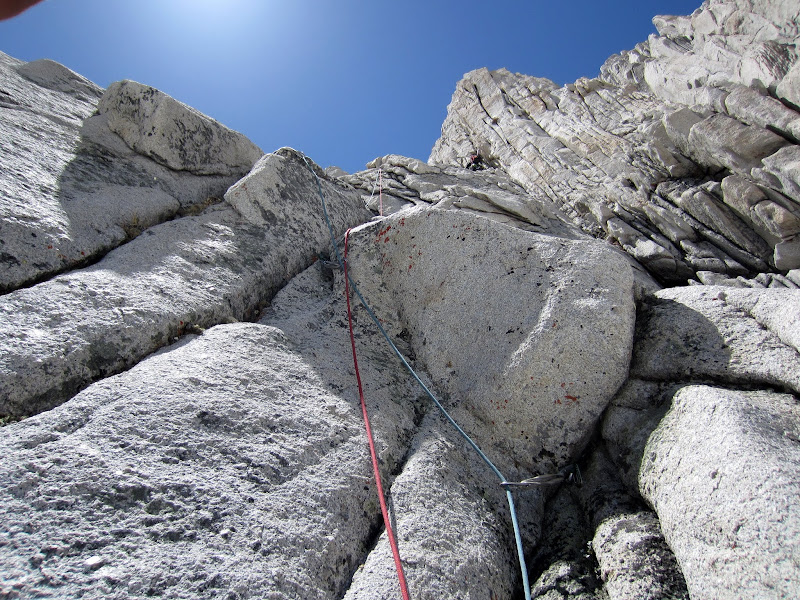
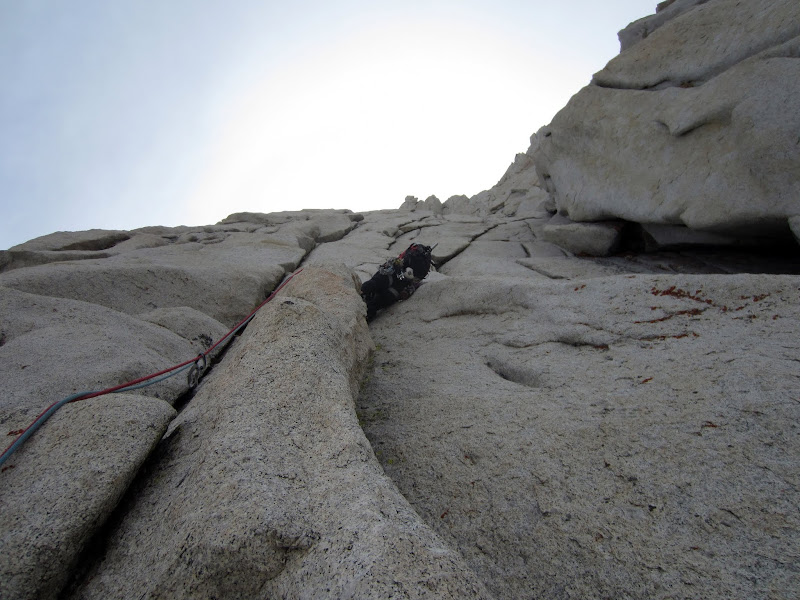
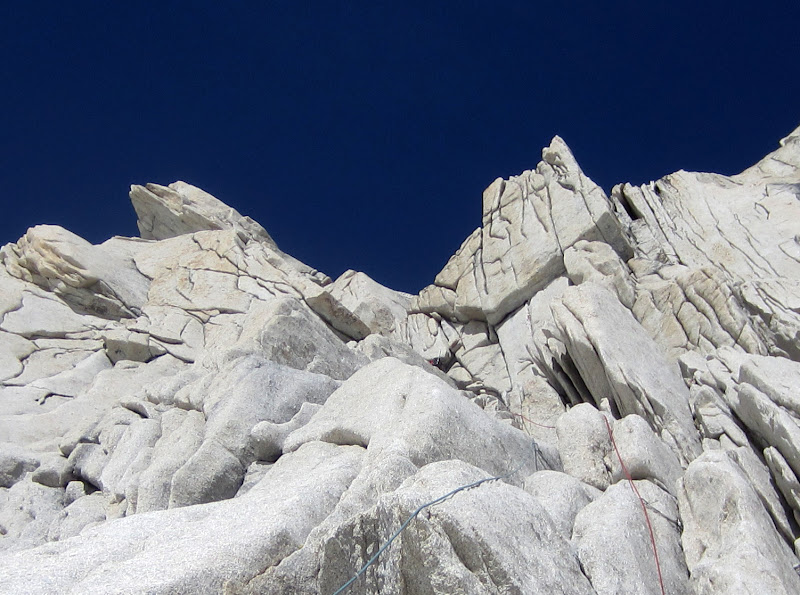
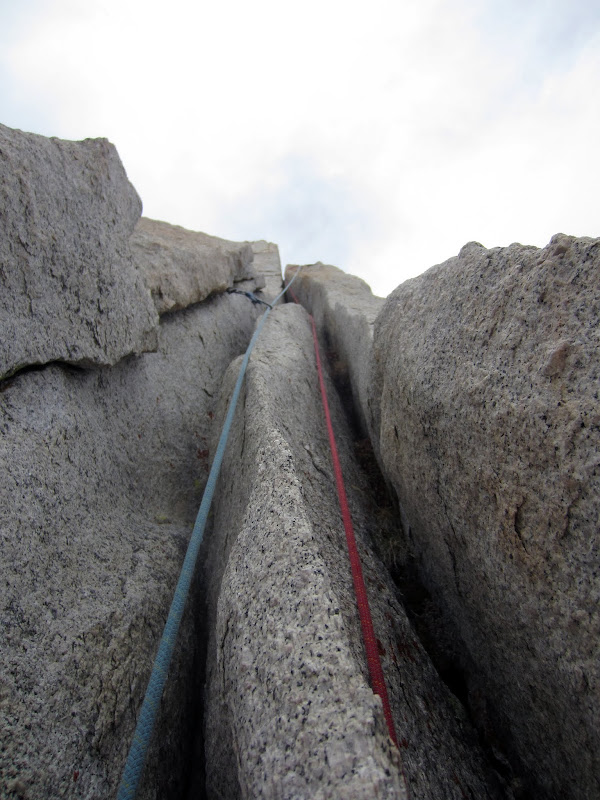
Looking up P4. It is still unclear where to go. Nic started left and stepped right (you could step right to start) to climb the center crack. He reached an impasse higher up, but it might be the way to go and very tough! He tensioned to the right crack (no go) and then to the left crack, which he climbed higher up. The finish is an OW or runout face move, and it is unclear if you can still reach the corner system from the ledge it deposits you on.
Visit on googleusercontent.com
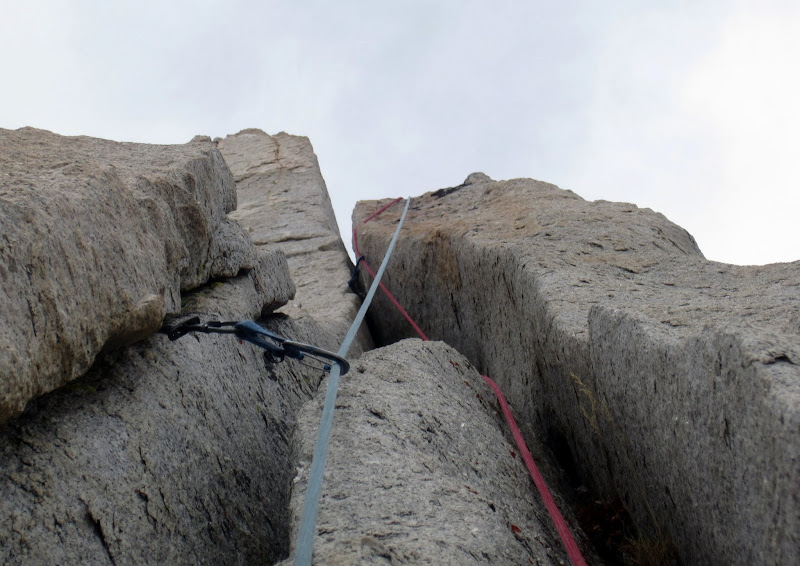
//Looking up P4. It is still unclear where to go. These cracks were rounded and flaring enough that solid jams and pro were tough to come by. Nic is faced with an OW or runout roof/face move to finish, but the ledge above might be off route. Things weren't going well, it was really cold in the shade, and we were only halfway up the wall, behind schedule, and unsure if the route got easier to follow above, so I called it and we bailed.//
[Click to View YouTube Video]
Our second day climbing Ruby Wall led to a second time bailing. After our last, long, steep rappel, the ropes were obviously going to be a lot of effort to pull, so I tried out a lazy way of pulling the ropes while getting back to camp faster. In my defense, my awkward walking in the beginning was because the rope was holding me back so much, even with my entire body weight engaged! (Video by Nic Risser)
Visit on googleusercontent.com
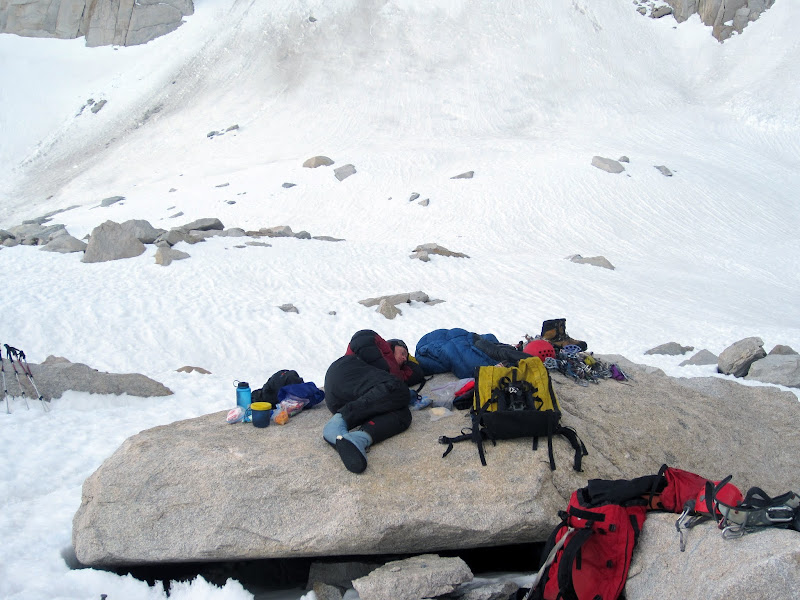
Back at camp. It was so cold in the shade, if only we could be in the sun! Mt Morgan South is behind. (by Nic Risser)
Down early, but it already felt like evening, so we settled down for an earlier night's sleep to catch up on lost sleep and be ready for our last day. Ruby Peak or bust!
Visit on googleusercontent.com
Nap time. (by Nic Risser)
Visit on googleusercontent.com
Nic expressing his feelings to the Center Route. (by Nic Risser)
May 27, 2013
Left East Arete (III-IV, 5.10b, 7P)
[Click to View Linked Image]
The Left East Arete, as we climbed it. Rating is as encountered and differs from Secor.
Our third and final day climbing on Ruby Wall, Nic and I were determined to complete a route! We woke early and were climbing at a good time. As we were familiar with the approach to the East Aretes, we took those pitches, including the theorized better P2 (whichw as better) and then started up the Left East Ridge. It was a great route and it fell together better than routefinding on the prior two days. Unfortunately, as we topped out, an unforecast snow flurry hit us, which made the final traverse to the summit of Ruby Peak slow and difficult. We descended the East Ridge without problems, found a high traverse back to camp, and made it to the car at 1:30 am. Too bad we had lots of bad weather and active animals on the drive home!
Most of what we followed for the Left East Arete came from the route description on the East Arete on SummitPost. I believe those guys were mistaken with their naming, but their information was fairly accurate and very helpful.
Visit on googleusercontent.com
Nic leading P1, at the wide corner crux.
Visit on googleusercontent.com
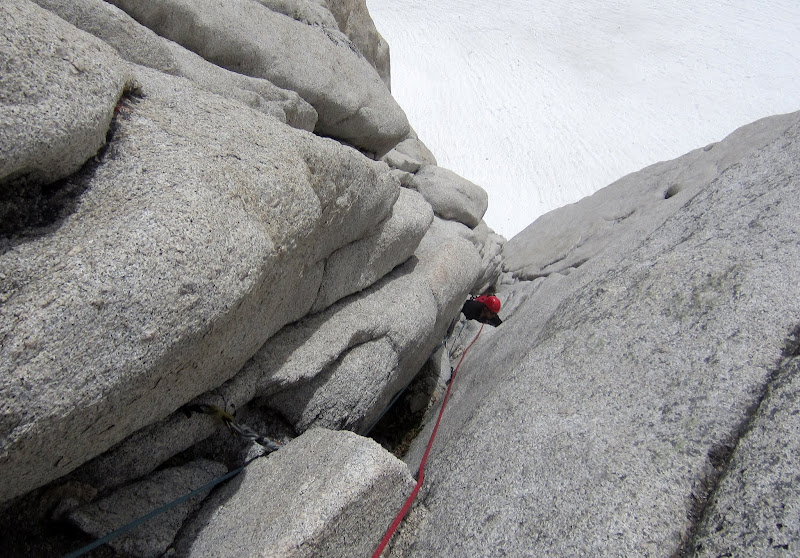
Looking down the P2 chimney. I hand hauled my back up this and then stepped right to continue on easy terrain. The chimney itself has no pro except the entry and exit and a midway point where you could step right (harder). Nic could follow well with his pack by stepping right after cleaning, then stepping left back in to back clean my next piece, before continuing up the right crack system.
Visit on googleusercontent.com
P2 east ending, basically at the belay. You can see the E Arete impasse on the skyline.

Visit on googleusercontent.com
East Arete and the impasse.
Visit on googleusercontent.com
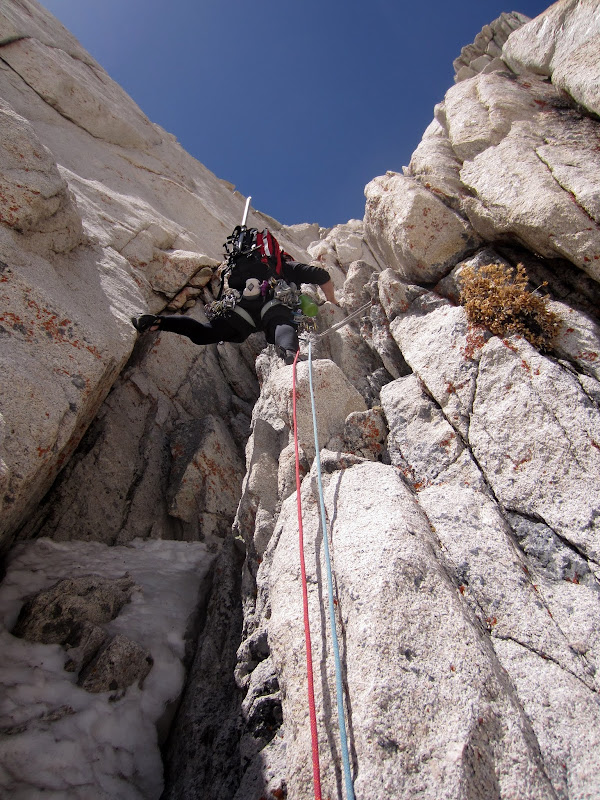
Nic leading the crux P3. Throw that leg in and sit back!
Visit on googleusercontent.com
Nic leading the crux P3, stepping left. This pitch is barely 60m.
After stepping left, Nic stemmed into the wide corner. This wasn't as tough as it looked and took good gear. It had tricky sections, but none were too long or unprotected. A pack added a lot to the difficulty. <span style="line-height:1.25;font-size:10pt"]At the end of P3, Nic pondered the squeeze variation on the right without any pro. A fall would be bad and his pack kept him from being able to wriggle inside, so he investigated a harder but more secure line over to the ledge and up the corner on his left. It ascended a great hand crack in an offset corner, with no feet (felt overhanging, feet had to work with a wide bombay flare with flaking rock).</span>
Visit on googleusercontent.com
Following the crux P3 at the wide section.
Visit on googleusercontent.com
Following the crux P3 flaring wide flakes. Sort of reminded me of Bong's Away, Left.
Visit on googleusercontent.com
Following the crux P3. The corner above was about a 5.10b fist to hand crack. Burly, but well protected and fun!

Visit on googleusercontent.com
Following the crux P3. The corner above was about a 5.10b fist to hand crack. Burly, but well protected and fun!
Visit on googleusercontent.com
Looking over to our day 1 bail. You can barely see our rappel sling.
Visit on googleusercontent.com
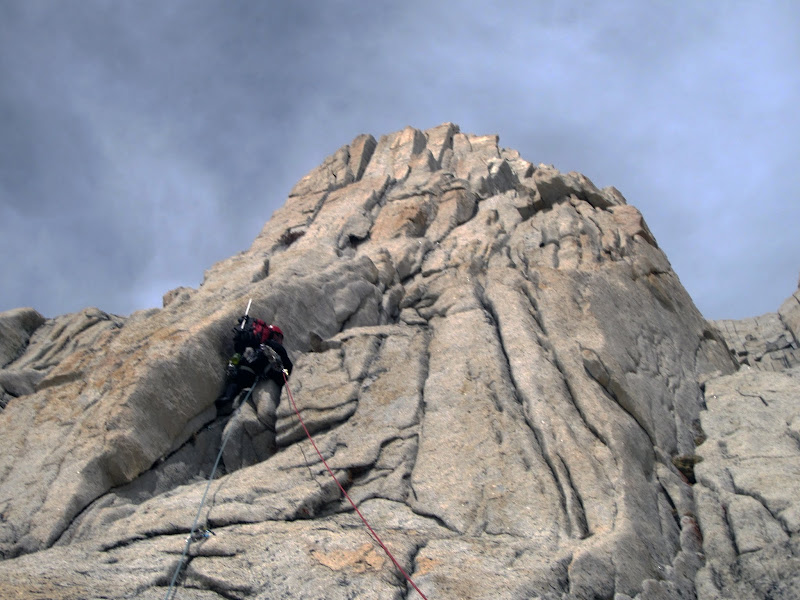
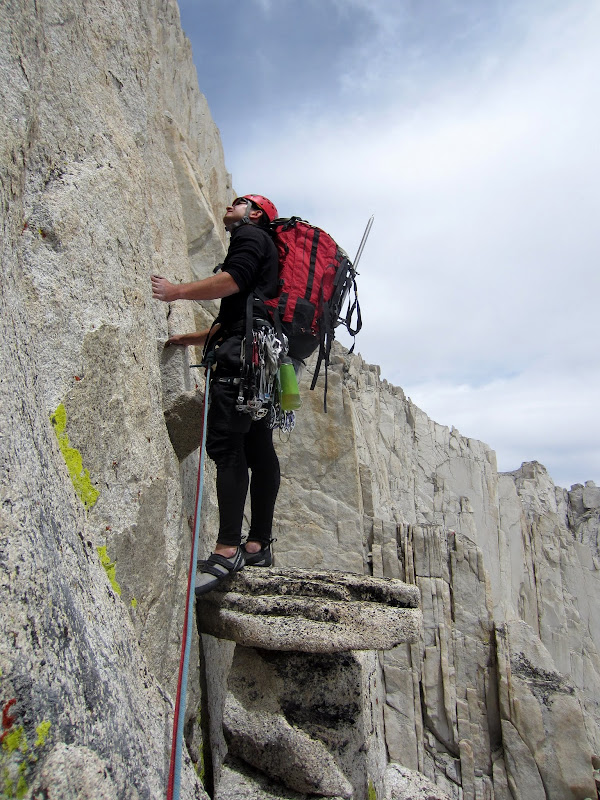
Nic leading P4, atop the pedestal.
Visit on googleusercontent.com
Nic leading P4. This part is steep but very juggy. The levered blocks below are a bit unnerving to climb around.
Visit on googleusercontent.com
Looking down from P4, finally gaining some altitude!
Visit on googleusercontent.com
Following P4. The crack ahead was a very fun 5.7 crack. Clean, steep, and secure.
Visit on googleusercontent.com
Nic belaying atop P4
Visit on googleusercontent.com
Finishing P4 on the jenga pile (by Nic Risser)
Visit on googleusercontent.com
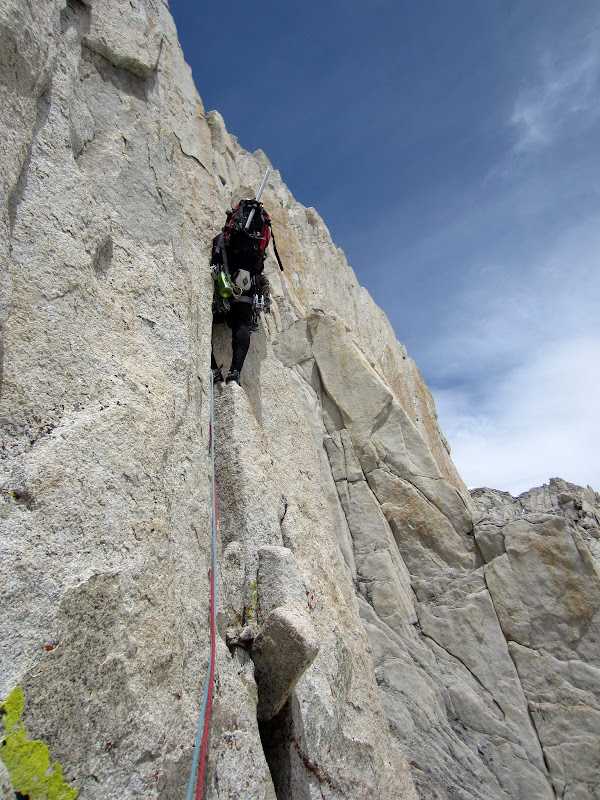
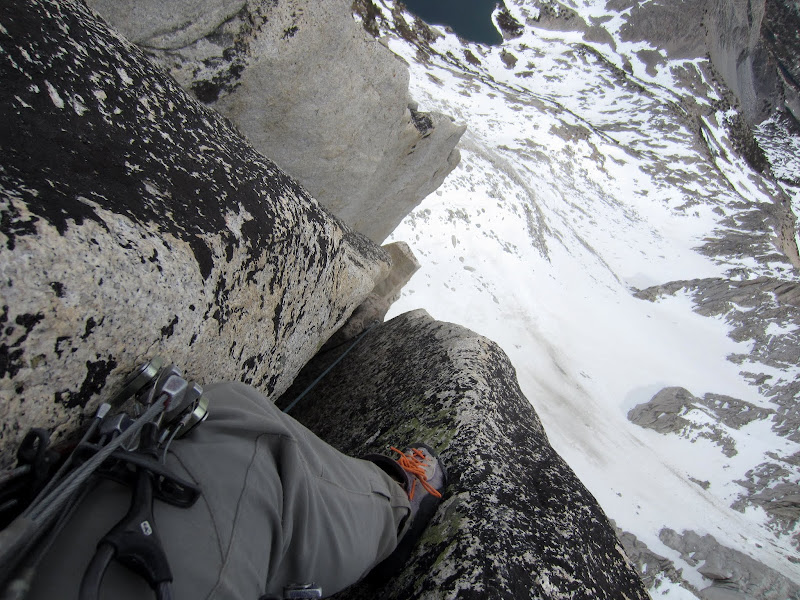
Starting up P5. Major rope drag challenges on this one. Nic climbed between the pillar and then traversed the knife edge ridge crest above.

Visit on googleusercontent.com
P5 knife edge.
Visit on googleusercontent.com
P5 knife edge looking down.
Pitch 6, which I opted to lead, was described as ascending steps and being easy - no rating was given. It was mostly low 5th class and on good rock.

Visit on googleusercontent.com
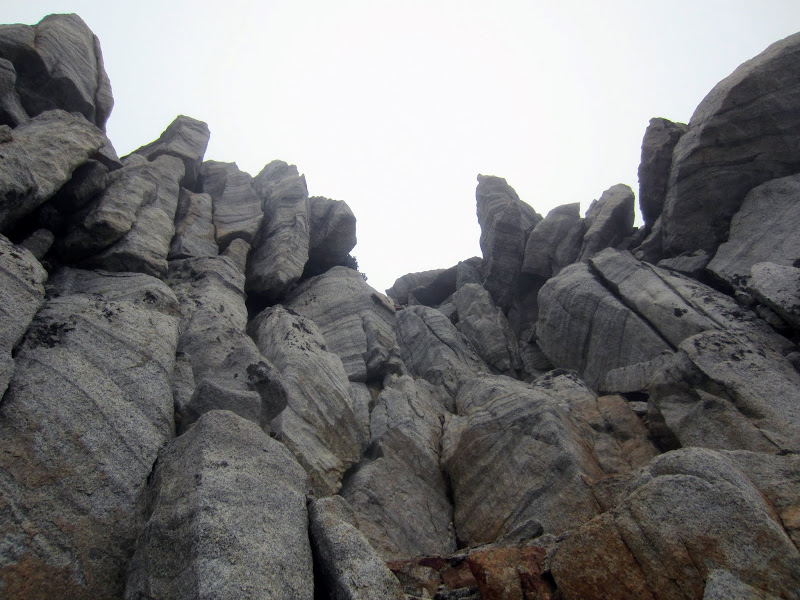
Looking up P6 at some funky wide cracks.
The end of pitch 6 had a surprise though, and I shouted down to Nic "You'll be glad that I led this pitch!". I couldn't find any other alternatives, and pro was obviously no where to be had. Ugh, with my large pack on, I couldn't quite fit all the way into the squeeze, but it looked like it might be secure enough, so up I wormed.
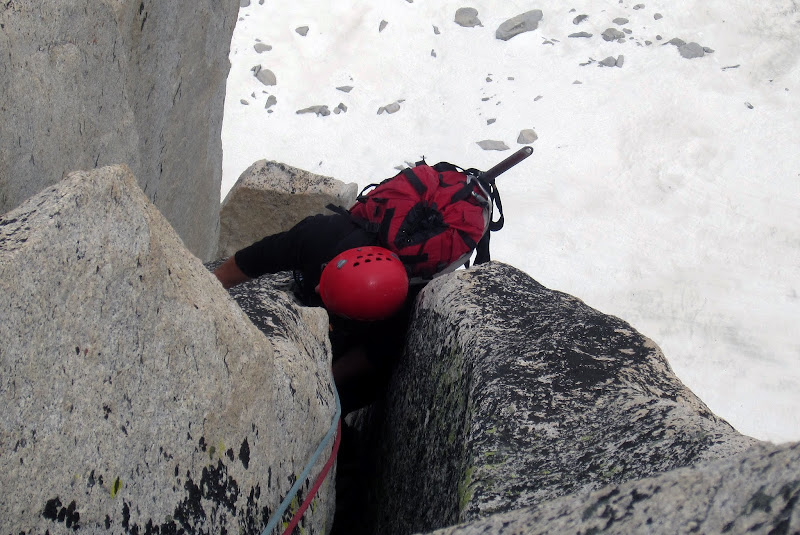
Visit on googleusercontent.com
Looking down the P6 surprise - a 20-30 ft unprotected squeeze chimney! About 5.6-5.7 old school.
However, one of the positive sides of leading awkward pitches is that you get to laugh at your partner as you watch him follow through! Supportively, of course >:-)
Visit on googleusercontent.com
Nic at the P6 squeeze.
The little bit of information we had on this route said P6 and P7 were very easy, and didn't even bother rating them. So I was surprised to find a 30 ft unprotected squeeze chimney at the end of P6! Leading this with a pack was even more awkward, although I was rewarded with a nice belay position from which I could be entertained watching Nic Risser follow through it.
Visit on googleusercontent.com
Interesting layers of color.
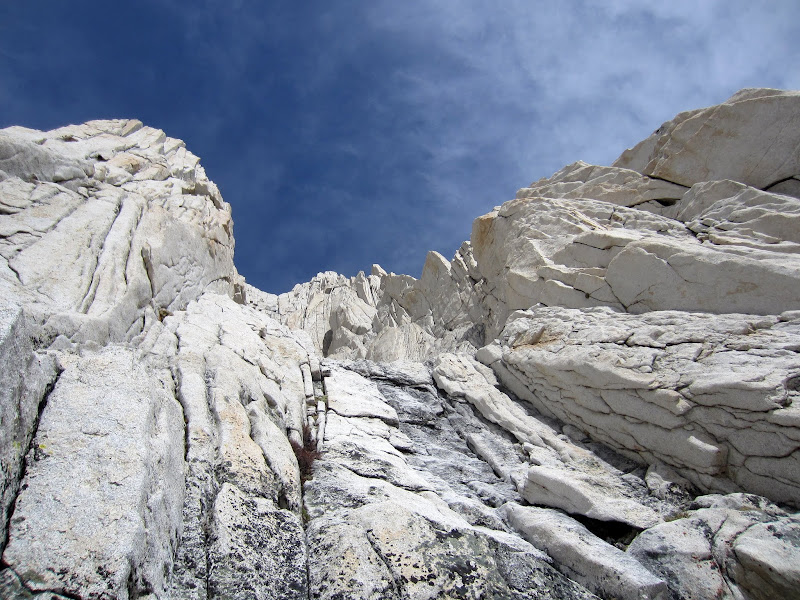
I took off on P7 next, which was very easy. At the headwall, It was tempting to go left as it looked easier, but it also looked pretty loose. I found a nice low 5th class route that zigzagged around to the right for a nicer finish.
Visit on googleusercontent.com
Nic following the better exit on P7, maybe about 5.5.
Visit on googleusercontent.com
The hard way to the summit.

Visit on googleusercontent.com
The easier way to the summit (cl. 4).
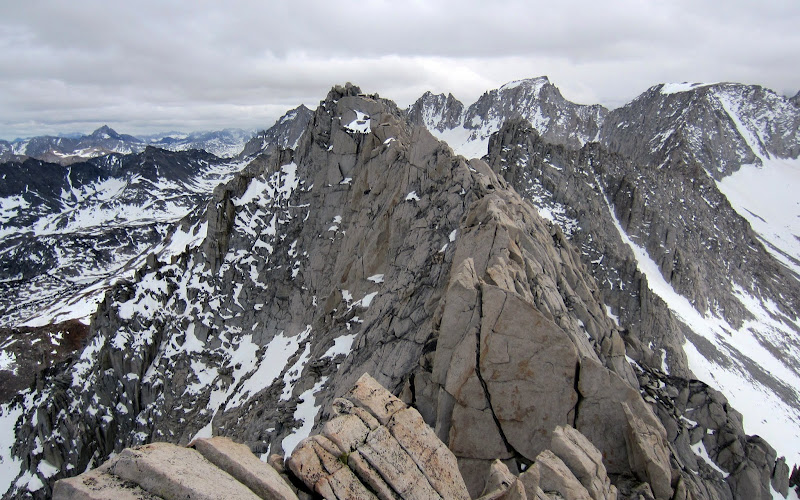
Visit on googleusercontent.com
Traverse to Ruby Pk. It looks like there might still be some tricky climbing left.
At last we had reached the top of a route! Now all we had to do was traverse to Ruby Peak, down the East Ridge, pack camp, hike out, and drive home. However, while Ruby Peak seemed to have finally relented to our efforts, it wasn't done with us just yet . . .
Traverse from Ruby Wall to Ruby Peak - North Ridge (cl. 4-5)
Doh!
Visit on googleusercontent.com
Nic following on the snowy traverse. Downclimbing granite flakes beneath snowflakes. We continued simul-climbing as the wet rock, numbed extremities, and uncertain route made it seem too risky to scramble unroped.
Visit on googleusercontent.com
Looking back into the cloudy, windy climbing. Where to go?

Visit on googleusercontent.com
Foot warmer.
Visit on googleusercontent.com
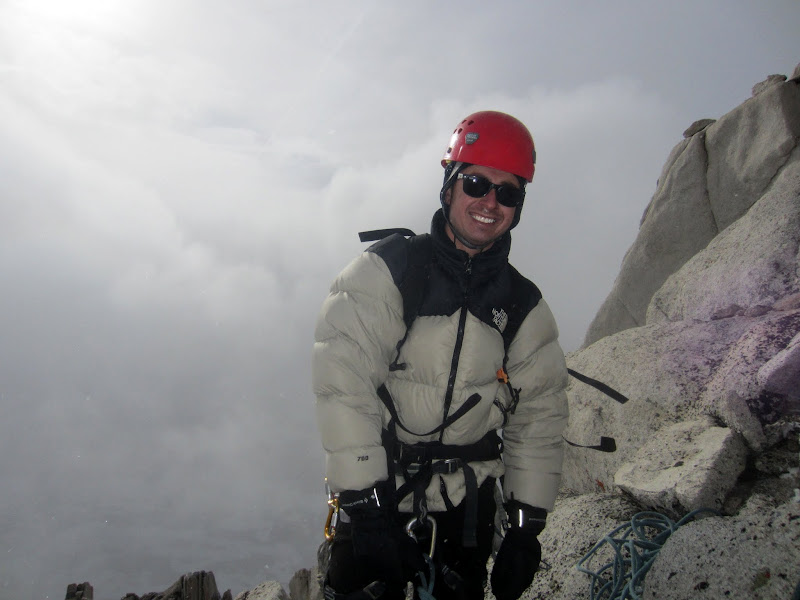
Nic in the eye of the storm. The sudden sunlight and clearing overhead was pretty surreal. Too bad it never cleared up elsewhere! This was short-lived.
Visit on googleusercontent.com
Is that the top? Should we go up?
Visit on googleusercontent.com
Or should we drop down to the ledge with dark rock?
[Click to View YouTube Video]
[Click to View YouTube Video]
A snow storm hit us just as we started to traverse from the end of our route on Ruby Wall over to Ruby Peak, which was part of our descent. Conditions made this section of the ridge much longer and slower than normal! (video by Nic Risser)

Visit on googleusercontent.com
Nic following in the summit passageways. We traversed a ways on the black ledge that was far below, then unroped and scrambled up to what we thought was the summit. Still no dice, but the final few hundred feet took an improbable line through a lot of splits directly along the ridgeline.
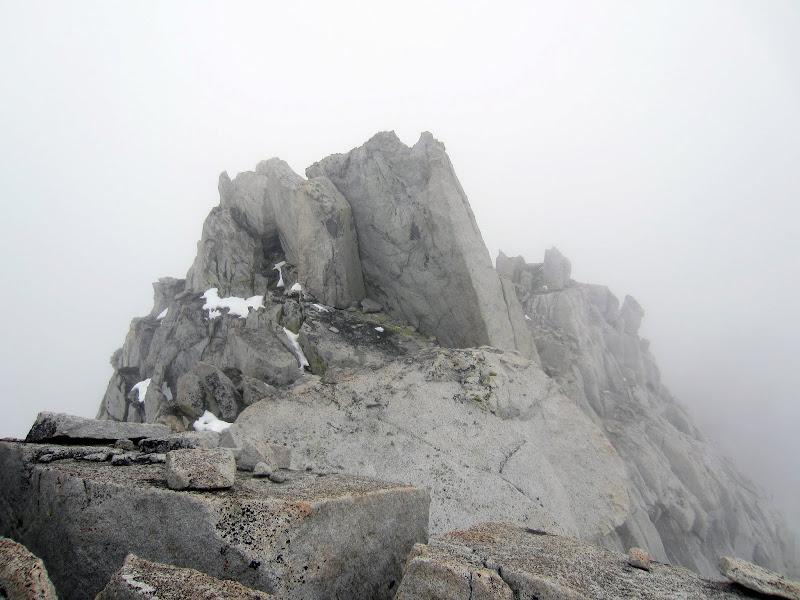
Visit on googleusercontent.com
At last the Ruby Peak summit. We had one more passageway that led inside of this formation before popping out on the East Ridge descent route on the backside.
Visit on googleusercontent.com
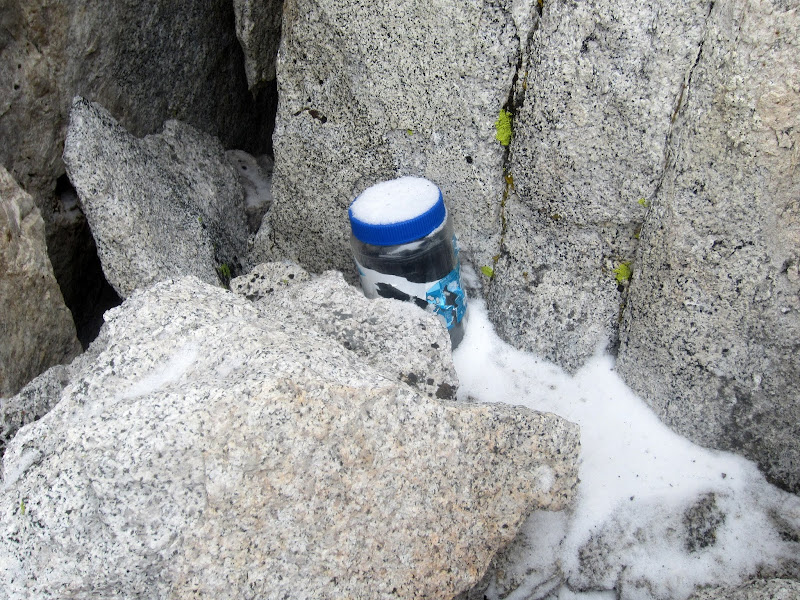
Ruby Peak summit register. This alcove was nicely protected from the wind and snow, so we hung out, ate, drank, and enjoyed the register.
East Ridge Descent (cl. 3, 35 degree snow)
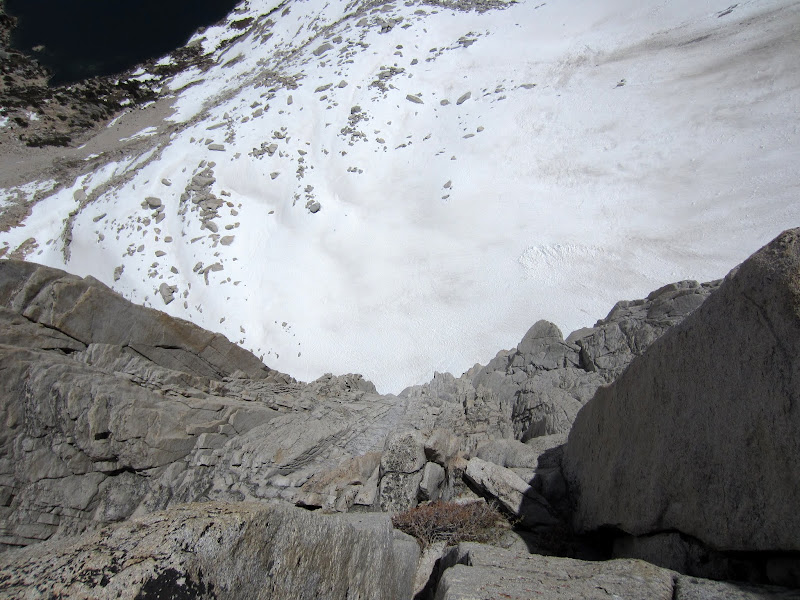
Visit on googleusercontent.com
Downclimbing a cl 3 chute on the East 'Ridge' descent.
Visit on googleusercontent.com
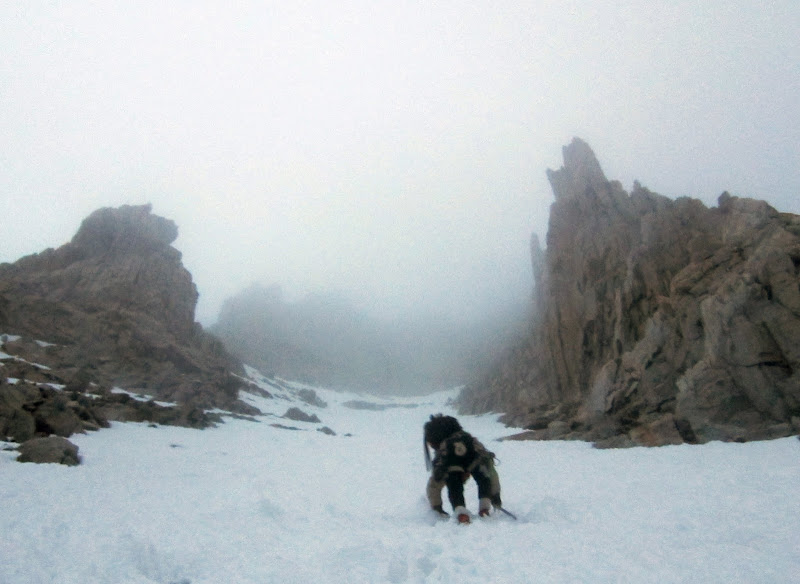
Nic downclimbing the long snow couloir on the East 'Ridge' descent in cloudy weather and fading daylight. The class 3 headwall that we downclimbed is above.
Fortunately, once we reached the snow couloir, it was straightforward downclimbing in the dark, and with some careful navigation, we were able to cut off the East Ridge and contour back to our camp with a minimal loss of elevation that we had to regain (maybe 200-400'). After packing up and heading out in the dark, under the mild snow and rainstorm that had soaked everything that we had left out to dry in the sun, we made the slow slog back to the car, reaching it at about 12:30am. With a drive back to work still in store, and worse driving conditions ahead, it looked like we'd be having another 'epic' breakfast at the Oakdale Denny's!
We might have been beaten down by Ruby Wall, and the rock might not be as nice as it appears from a distance, but both Nic and I are hooked by the potential for exploration, and the mysteries of where the routes actually go! We are already making plans to go back . . .
Recon Photos
Visit on googleusercontent.com
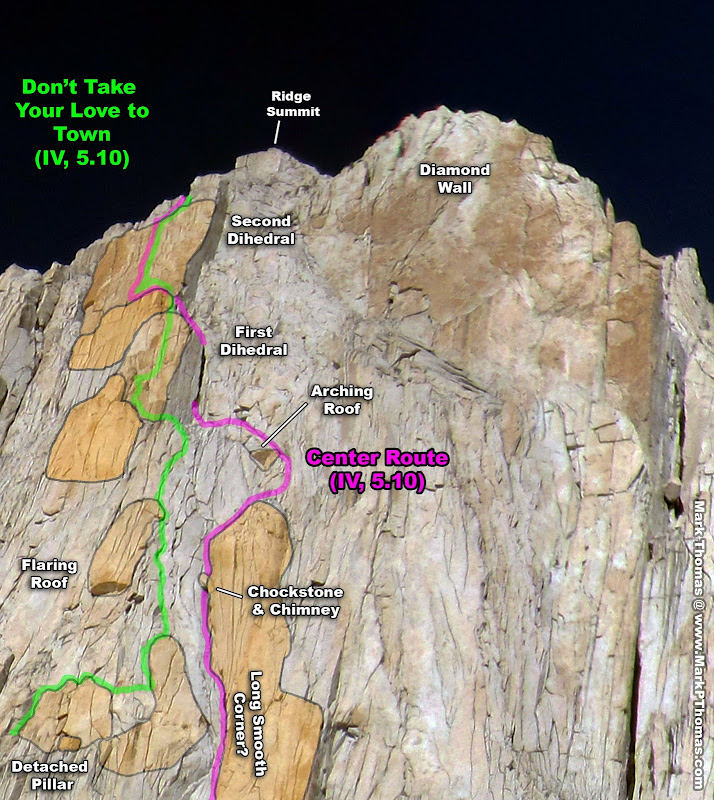
Center Route - High-Res photo composite of pitches 3 and higher. You traverse in at the bottom from the left.
Visit on googleusercontent.com
Center Route - High-Res photo composite of pitches 3 and higher. You traverse in at the bottom from the left. This is my best current deduction of where the routes go.
Visit on googleusercontent.com
Center Route - High-Res photo composite of pitches 3 and higher. You traverse in at the bottom from the left. This is my best current deduction of where the routes go.
Visit on googleusercontent.com
Center Route - High-Res photo composite of pitches 3 and higher. You traverse in at the bottom from the left. This is my best current deduction of where the routes go.
Personal Website
Picasa Album - 2013-05-25 - Ruby Wall - East Arete Attempt w Nic
Picasa Album - 2013-05-26 - Ruby Wall - Center Route Attempt w Nic
Picasa Album - 2013-05-27 - Ruby Wall - Left East Arete w Nic