| Route Name |
Formation |
|
|
Review  |
|
|
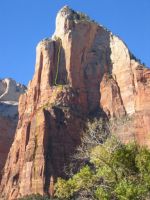
The Organ |
2 |
II 5.9+ |
|
|
|
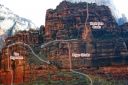
Gatekeeper Wall |
6 |
V 5.10 C2 |
|
|
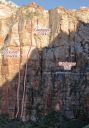
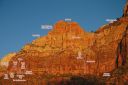
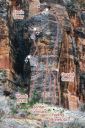
| The Vigil
IV 5.11, The Watchman
Photo:Bryan Bird |
|
The Watchman |
10 |
IV 5.11 |
|
|
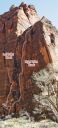
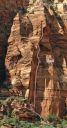
| Smash Mouth
III 5.11+, Sub Peak of Bridge Mountain
Photo:Bryan Bird |
|
Sub Peak of Bridge Mountain |
4 |
III 5.11+ |
|
|
|
Temple of Sinewava |
5 |
III 5.10- |
|
|
|
The Watchman |
8 |
IV 5.10+/11- |
|
|
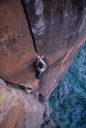
| INI
II 5.10, Cragmont, Tunnel Wall
Photo:Bryan Bird |
|
Cragmont, Tunnel Wall |
5 |
II 5.10 |
|
|
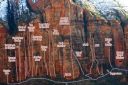
| North Ridge
III/IV 5.10 C1, 10 aid moves, Sub Peak of Bridge Mountain
Photo:Bryan Bird |
|
Sub Peak of Bridge Mountain |
12 |
III/IV 5.10 C1, 10 aid moves |
|
|
|
Headache Area, Tunnel Wall |
1 |
|
|
|
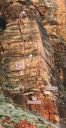
| Boring Crack
I 5.10+, Ataxia Tower, Tunnel Wall
Photo:Bryan Bird |
|
Ataxia Tower, Tunnel Wall |
2 |
I 5.10+ |
|
|
| The Silmaril
IV 5.12 or 5.10 A1, The Watchman
Photo:Bryan Bird |
|
The Watchman |
6 |
IV 5.12 or 5.10 A1 |
|
|
| Plan B
IV 5.12b, Mt. Moroni
Photo:Eric Draper |
|
Mt. Moroni |
9 |
IV 5.12b |
|
|
| Lap Dance
II 5.11-, Cragmont, Tunnel Wall
Photo:Bryan Bird |
|
Cragmont, Tunnel Wall |
3 |
II 5.11- |
|
|
| Blood Sport
II 5.10+, Kung Fu Theatre, Tunnel Wall
Photo:Bryan Bird |
|
Kung Fu Theatre, Tunnel Wall |
3 |
II 5.10+ |
|
|
| The Man Eater
III 5.10+ C1, Ataxia Tower, Tunnel Wall
Photo:Bryan Bird |
|
Ataxia Tower, Tunnel Wall |
6 |
III 5.10+ C1 |
|
|
|

